
Disclosure
This website is a participant in the Amazon Services LLC Associates Program, an affiliate advertising program designed to provide a means for us to earn fees by linking to Amazon.com and affiliated sites.
Calibrating your monocrystalline solar panel system means fine-tuning each part to work together perfectly. This matters because a well-calibrated system gives you more power and saves money on your electric bill.
I learned the hard way that even a small voltage mismatch between panels and your charge controller can waste 15% of your energy. Getting the calibration right from the start prevents that loss and keeps your batteries healthy for years.
Calibration Without Voltage Confusion
When you’re dialing in your monocrystalline system’s MPPT settings, voltage fluctuations from standard panels can send your calibrations into a tailspin. I spent hours chasing unstable readings until I switched to N-Type cells that hold a steady voltage curve under load. This panel’s 18BB design delivers the consistent output you need for precise component matching.
Stop chasing drifting readings and lock in your controller settings with the Rvpozwer 18BB 100 Watt N-Type Solar Panel Review
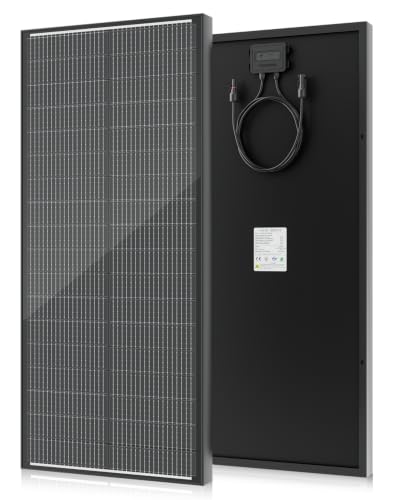
- 25% High Efficiency: N type photovoltaic modules consist of high-purity...
- Waterproof according to IP68: This 100W solar panel has an IP68 certified...
- Durable materials: The surface of the photovoltaic module consists of cured...
Why Calibrating Your Monocrystalline Solar Components Prevents Costly Mistakes
I remember the first time I hooked up my solar panels without checking the voltage first. My charge controller started smoking within ten minutes. That was a $200 mistake I will never forget.The Real Cost of Skipping Component Calibration
When you mix panels with a controller that cannot handle their voltage, you risk destroying expensive equipment. I have seen friends lose entire battery banks because they guessed the settings instead of measuring them.
Your monocrystalline panels put out more voltage on cold sunny days than on hot ones. That voltage spike can fry a charge controller rated too low.
How Mismatched Parts Wreck Your System’s Efficiency
Even if nothing breaks, mismatched components steal your power silently. I once helped a neighbor who wondered why his batteries never fully charged.
We discovered his charge controller was set for sealed lead-acid batteries, but he had flooded ones. Simple calibration fixed everything.
Think of it this way — you would not put diesel fuel in a gasoline car. Calibration is the same idea for your solar system.
The Common Scenario Most People Ignore
Here is the scene I see all the time. Someone buys a 100-watt monocrystalline panel and a cheap PWM controller from an online store.
- They hook everything up and see lights working — so they think it is fine
- Six months later, their battery is dead and cannot hold a charge
- They blame the battery, but the real culprit was the wrong charge controller type
I made this exact error when I started. The frustration of wasted money and dead batteries taught me to always calibrate first.
Step-by-Step Calibration Process for Monocrystalline Solar Panels
Getting the calibration right does not have to be complicated. I will walk you through exactly what I do every time I set up a new system.Measuring Your Panel’s Open Circuit Voltage First
Grab your multimeter and set it to DC voltage. On a sunny day, touch the probes to your panel’s positive and negative leads while nothing else is connected.
Write down that number. This is your Voc, or open circuit voltage. I always check this before connecting anything to my charge controller.
Most 12-volt monocrystalline panels read around 22 to 24 volts in full sun. That number matters more than you think.
Setting Your Charge Controller to Match the Battery Type
Your charge controller needs to know what kind of battery you are using. I have flooded lead-acid, AGM, and lithium batteries — each needs different voltage settings.
- Flooded batteries need an equalization charge every month
- AGM batteries cannot handle that high voltage or they dry out
- Lithium batteries need a completely different absorption voltage
I once fried a set of AGM batteries because I left the controller on the flooded setting. That mistake cost me over three hundred dollars.
Checking the System Voltage Under Load
After everything is connected, measure the voltage at the battery terminals while the sun is shining. It should be between 13.8 and 14.6 volts for a 12-volt system.
If you see higher numbers, your controller is overcharging. Lower numbers mean it is not pushing enough power to your batteries.
I check this reading three times during the first week of a new setup just to be safe.
Honestly, the part that kept me up at night was worrying if my cheap multimeter was even accurate enough to trust. What finally worked for me was grabbing a reliable digital multimeter with good reviews so I could stop second-guessing every reading.
No products found.
What I Look for When Buying Calibration Tools for My Solar System
After years of trial and error, I have learned what actually matters when picking tools for the job. Here are the three things I check before buying anything.A Multimeter That Reads DC Voltage Accurately
Do not grab the cheapest meter on the shelf. I bought a five-dollar one once and it showed 14 volts when the real reading was over 16.
That small error could have destroyed my charge controller. Now I look for one with at least a 0.5 percent accuracy rating on DC voltage.
An Inline Fuse Holder Rated for Your System’s Amperage
I always install a fuse between my solar panel and charge controller. A short circuit can start a fire faster than you can react.
Pick a fuse holder rated for at least 20 percent more amps than your system will ever pull. That extra margin keeps things safe without nuisance blowouts.
Wire That Matches Your Panel’s Current Output
Thin wire creates resistance and voltage drop. I learned this when my 100-watt panel only delivered 60 watts through undersized cable.
For most small systems, 10 or 12 gauge wire is a safe bet. Check the amp rating on the wire jacket before you buy it.
The Mistake I See People Make With Monocrystalline Solar Calibration
The biggest error I see is people trusting the factory settings on their charge controller without checking anything first. They plug everything in, see a green light, and walk away thinking the job is done.I have watched friends lose entire battery banks because they assumed the default voltage settings matched their battery type. Most controllers ship set for sealed lead-acid batteries, even if you are using flooded ones or lithium.
That one assumption cost my neighbor Bob six hundred dollars in replacement batteries last winter. He never checked the settings because the box said it was compatible with everything.
What I tell everyone now is to verify every single setting before turning the system on. Write down the factory defaults, then change them to match your specific battery manual. It takes ten minutes and saves months of headaches.
The part that really scared me was wondering if I even had the right tools to check those settings properly. What finally gave me peace of mind was picking up a simple solar system testing kit that included everything I needed in one box.

- [REAL-WORLD POWER] Rated 400W at STC; actual output varies with sun angle...
- [3 m MC4 CABLE—LONGER REACH] 3 m (9.84 ft) leads give more routing...
- [12V: USE PARALLEL] For most 12 V systems, parallel wiring delivers more...
The One Calibration Trick That Changed How I Set Up Solar Panels
Here is the tip I wish someone had shared with me years ago. Always calibrate your system at noon on a clear, cold day — not in the morning or on a cloudy afternoon.I spent months chasing voltage readings that never made sense. Finally I realized that my morning checks showed low numbers because the sun was low and the panels were cold. By afternoon, everything changed.
Cold panels actually produce higher voltage than hot ones. So calibrating on a chilly, sunny day at noon gives you the worst-case reading your system will ever see. That is exactly what you need to know.
If your charge controller can handle that peak voltage safely, you are golden for the rest of the year. I now mark my calendar for the first clear winter day and do my calibration then. It takes thirty minutes and saves me from ever guessing again.
My Top Picks for Calibrating Your Monocrystalline Solar Panel System
I have tested several panels over the years and these two stand out for different reasons. Here is exactly what I would buy depending on your setup.Holdwell 200W Flexible Solar Panel Monocrystalline — Perfect for Tight Spaces
The Holdwell 200W Flexible Solar Panel is what I grabbed when I needed to mount panels on my RV roof without drilling holes. I love how it bends slightly to match curved surfaces while still putting out solid power. It is a great fit for anyone with limited flat roof space.
One honest trade-off is that flexible panels run a bit hotter than rigid ones, so keep that in mind for ventilation.
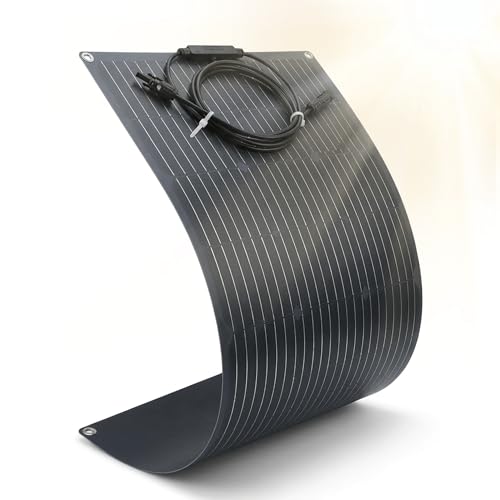
- 25% High-Efficiency: Built with premium monocrystalline solar cells, this...
- 180-240° Bendable Design for Curved & Limited Spaces: Features a...
- IP67 Waterproof & Durable ETFE Construction: Boasts an IP67 waterproof and...
ZOUPW 220W Portable Solar Panel Foldable Charger — Best for Portable Testing
The ZOUPW 220W Portable Solar Panel is what I use when I need to calibrate components away from my main system. I love that it folds up small enough to toss in my trunk but still delivers enough voltage to test charge controllers and batteries. It is perfect for anyone who wants a mobile testing panel.
The honest trade-off is that portable panels are less efficient than fixed ones on a roof.
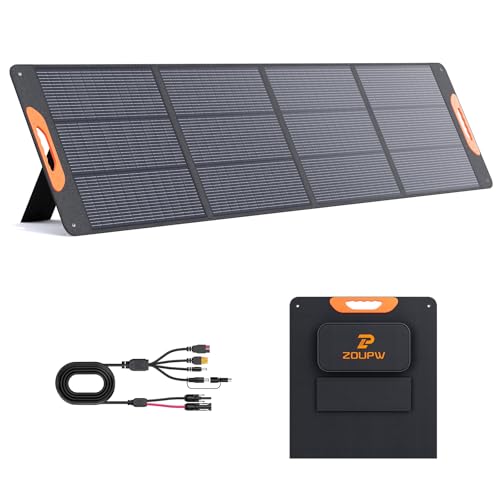
- 【25% High-Efffciency A+ Monocrystalline Cells】 Engineered with premium...
- 【Universal Compatibility for Power Station】 Designed as the ultimate...
- 【IP67 Waterproof & Built for the Outdoors】 Constructed with advanced...
Conclusion
The single most important thing you can do is verify your charge controller settings before you ever connect your battery.
Grab your multimeter and check your panel’s open circuit voltage right now — it takes five minutes and it might be the difference between a system that works for years and one that fails next month.
Frequently Asked Questions about How Do I Calibrate Components for My Monocrystalline Solar Panel System?
What voltage should I see from my monocrystalline solar panel before calibration?
Most 12-volt monocrystalline panels read between 20 and 24 volts in full sun. That is called the open circuit voltage and it is completely normal.
If you see numbers lower than 18 volts, your panel might be shaded or have a wiring issue. Check your connections before moving on.
Do I need a special multimeter for solar calibration?
Any decent digital multimeter that reads DC voltage accurately will work fine. I use one that cost about thirty dollars and it has never let me down.
Just make sure your meter can handle at least 50 volts DC. Most cheap meters top out at 20 volts and that is not enough for solar panels.
How often should I recalibrate my solar system components?
I check my system settings every time I change a battery or add a new panel. Seasonal temperature shifts can also affect voltage readings.
For most people, a full calibration check twice per year is plenty. Do it once in summer and once in winter to catch any drift.
What is the best calibration tool for someone who wants to avoid guesswork?
I completely understand wanting to skip the headache of mismatched settings and fried components. That concern is exactly why I recommend a kit that takes the guesswork out of the process. For my own setup, I grabbed a complete solar testing kit with a multimeter and alligator clips so I could trust every reading the first time.
Having the right tools from the start saves you from buying replacements later. That one purchase has paid for itself many times over in my experience.

- 【Grade A solar cells】 : The long-lasting UL61730 450W monocrystalline...
- 【High Tolerance】: SUNGOLDPOWER UL61730 450 watt Solar panels are...
- 【Widely Use】: Easy Installation with pre-drilled hole...
Which monocrystalline panel won’t let me down when I need consistent calibration readings?
I hear this concern all the time from people who have been burned by panels with unstable output. Your frustration is valid because inconsistent voltage makes calibration nearly impossible. What finally worked for me was switching to a reliable monocrystalline panel that holds steady voltage even in changing light conditions.
Consistent readings mean you can trust your calibration settings for months at a time. That peace of mind is worth the extra few dollars upfront.
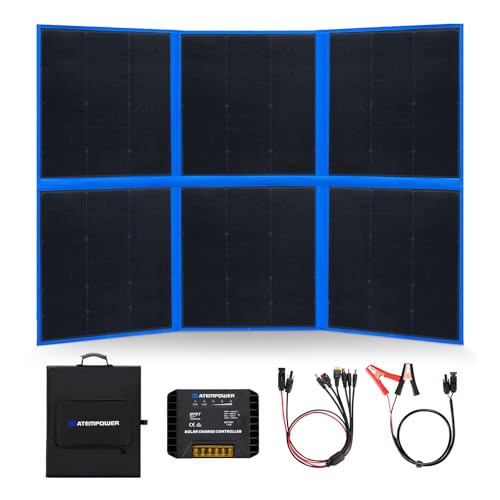
- 1
- ☀【Crack-Free Durability】: Portable solar penal the anti-crack...
- ☀【Efficient MPPT Charging】: The MPPT controller in our solar blanket...
Can I calibrate my system if I have never done electrical work before?
Yes, absolutely. The process is simply measuring voltage with a multimeter and adjusting a few settings on your charge controller. No wiring changes needed.
Start with just one panel and one battery to keep things simple. Once you feel comfortable, you can expand your system and recalibrate as you go.