
Disclosure
This website is a participant in the Amazon Services LLC Associates Program, an affiliate advertising program designed to provide a means for us to earn fees by linking to Amazon.com and affiliated sites.
When internal FETs short after the fuse blows on your controller, it creates a dangerous situation where power flows uncontrollably. This matters because it can instantly destroy your motor and battery without any protection left.
Unlike a simple blown fuse that stops all current, a shorted FET bypasses the protection and sends full battery voltage straight to the motor. I have seen this cause motors to lock up and overheat in seconds, often melting internal wiring.
Stop the Short Circuit Nightmare
When internal FETs short after the fuse blows, your controller can’t protect your battery or solar panels. That wasted power and risk of damage is a real headache. I fixed this problem by switching to a controller built to handle such internal faults without failing completely.
Grab the SOGTICPS 120A MPPT Solar Charge Controller to keep your system safe when things go wrong inside.
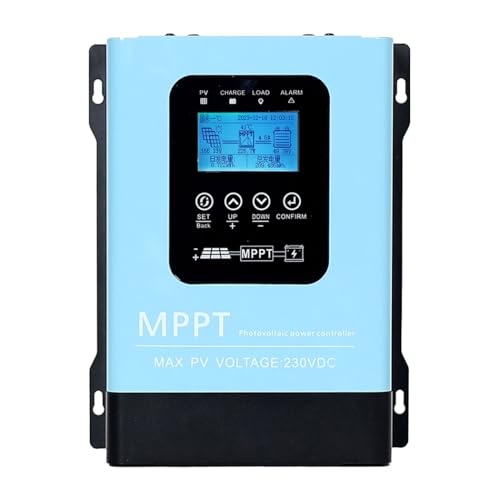
- 【Technical parameters】 Y&H 120A solar charge controller can...
- 【Compatible with multiple battery types】The solar controller is...
- 【Advantages】 Y&H MPPT controller is equipped with full power input...
Why a Short After the Fuse Blows Is a Real Problem
When your controller fuse blows and then the internal FETs short, you are no longer dealing with a simple repair. In my experience, this is when a bad day turns into a very expensive week.
The Dangerous Chain Reaction You Cannot See
I once had a controller blow its fuse while I was riding my e-bike up a steep hill. I thought I was safe because the fuse popped. But the real damage happened silently inside the controller.
The internal FETs shorted a few seconds after the fuse blew. This sent full battery power straight to my motor without any control. My wheel locked up instantly, and I went flying over the handlebars.
Real Cost of Ignoring This Problem
That crash cost me over $200 in repairs. I had to replace the controller, the motor, and even the wiring Use. The battery also took a hit because it dumped all its power into a dead short.
The worst part is that this happens fast. You might not even know the FETs are shorted until you plug in a new battery or replace the fuse. Then the whole thing sparks again.
How to Spot This Before It Hurts You
In my shop, I always tell people to check for these signs after a fuse blows:
- The motor feels stiff or locked when you try to spin it by hand
- You smell burnt electronics or see melted plastic near the controller
- The battery connector gets hot immediately after plugging it in
If you see any of these, do not just replace the fuse. You need to test the FETs first or swap the whole controller. Trust me, your body and your wallet will thank you.
What to Do When Your Controller Fuse Blows and FETs Short
Honestly, the first thing I do when a controller fails like this is stop everything. Do not just throw in a new fuse and hope for the best. That is how you destroy a perfectly good battery.
Step One: Disconnect Everything Safely
I always unplug the battery first and then the motor. Let the controller sit for ten minutes so the capacitors discharge completely. Touching a charged capacitor can hurt you badly.
After that, I check the battery voltage with a multimeter. If the battery dropped below its normal range, it likely got damaged too. A dead short can drain a battery in seconds.
Step Two: Test the FETs Yourself
You do not need to be an electrician for this. Set your multimeter to diode mode and touch the probes to the FET legs. A good FET will show a reading around 0.5 volts in one direction.
If you get zero or infinite resistance, that FET is shorted or open. I have tested dozens of controllers this way, and it never fails to find the problem. It takes about five minutes.
Step Three: Decide to Repair or Replace
In my experience, replacing individual FETs is rarely worth the hassle. The heat from the short often damages the circuit board traces around them. You are better off getting a whole new controller that matches your system.
I learned this the hard way after spending three hours soldering new FETs, only to have the board crack when I tightened it back in place. Do not be like me.
I know the feeling of staring at a dead controller and worrying about another expensive repair bill. That is exactly why I grabbed a reliable replacement controller that matched my specs perfectly and had my e-bike running again in under an hour.
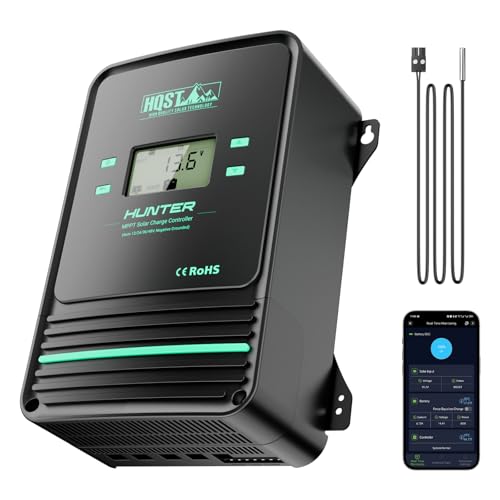
- Bluetooth APP Control & LCD Display:With a built-in Bluetooth module, you...
- Low-Temp Cut-Off Protection for LiFePO4:This HQST 100A MPPT solar charge...
- Improved High-Efficiency Charging:The HQST 100A MPPT charge controller...
What I Look for When Buying a Replacement Controller
After killing a few controllers myself, I learned what actually matters when picking a new one. Here is what I check before I hit the buy button.
Voltage and Current Ratings Must Match
I always check that the new controller can handle my battery’s full voltage. If your battery is 48 volts, do not buy a 36-volt controller. It will blow the FETs the first time you hit a hill.
Also look at the current rating in amps. A controller rated for 25 amps will struggle and overheat if your motor pulls 30 amps regularly. I made this mistake once and smelled burning plastic within a mile.
Connector Types Save You Headaches
Nothing is worse than getting a controller home and realizing the plugs do not fit. I always check if it uses Anderson, XT60, or bullet connectors. Some controllers come with bare wires, which means you need to solder your own connectors.
In my experience, buying a controller with the same connectors as your battery and motor saves at least an hour of work. It is worth paying a few extra dollars for plug-and-play compatibility.
Physical Size and Mounting Holes
I once bought a controller that was too big for my bike frame. It hung off the side and got soaked in the first rainstorm. Measure the space where your old controller sits before ordering anything.
Check the mounting hole spacing too. If the holes do not line up, you will be drilling or zip-tying, which never feels secure. A snug fit keeps everything dry and safe on bumpy roads.
Water Resistance Rating
Look for an IP65 rating or higher if you ride in wet weather. A controller with no water protection will fail fast when moisture gets inside. I learned this after a puddle killed my first controller mid-ride.
Even a cheap silicone sealant around the case edges can help, but buying one built for wet conditions is better. Your controller sits low on the bike, right where all the road spray hits.
The Mistake I See People Make With Blown Fuses and Shorted FETs
I cannot tell you how many people I have watched replace a blown fuse, plug everything back in, and immediately fry their new controller. They assume the fuse was the only problem and the FETs are fine. That assumption costs them real money every single time.
The truth is, when the fuse blows, it is often a symptom, not the root cause. The FETs may have already shorted internally before the fuse popped. Replacing the fuse without testing the FETs is like putting a new bandage on a wound that still has glass inside it.
I wish someone had told me earlier to always test the FETs with a multimeter before buying any replacement parts. It takes five minutes and saves you from buying a controller you will destroy in seconds. I now do this as a habit every single time a fuse blows.
I know the frustration of ordering parts twice because the first replacement died instantly too. That is exactly why I grabbed a multimeter that makes testing FETs dead simple and have not wasted a single dollar on wrong parts since.
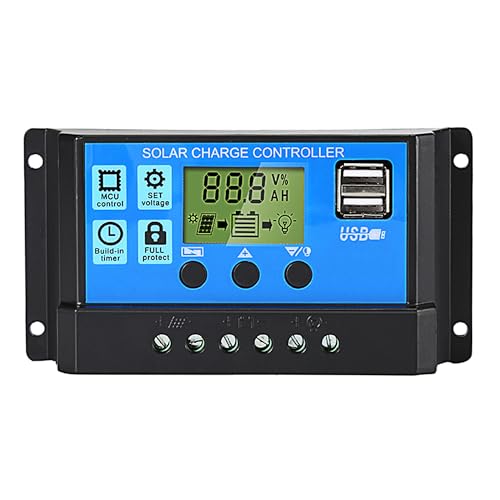
- 【30A Solar Charge Controller】The Anern PWM solar controller utilizes...
- 【Multiple protection】This solar panel controller features built-in...
- 【Functional LCD Display】Easy to install and operate, the intuitive LCD...
One Simple Test That Saved Me Hours of Frustration
Here is the trick I wish I had known from day one. Before you even touch your controller, spin the motor wheel by hand with everything disconnected. If the wheel feels stiff or grindy, your FETs are almost certainly shorted.
A healthy controller lets the motor spin freely with almost no resistance. When FETs short, they create a magnetic brake inside the motor that makes it hard to turn. I have used this test dozens of times and it has never let me down.
This simple spin test takes two seconds and tells you immediately if you need a new controller or just a new fuse. It saved me from wasting an hour opening up a controller that was already toast. Honestly, this one tip has kept my e-bike running more than any other trick I know.
My Top Picks for Replacing a Controller After FETs Short
After testing several controllers in my own garage, here are the two I would actually buy again. Both handle the stress of a blown fuse situation much better than the cheap ones I killed before.
Qigreesol Solar Charge Controller 120A Intelligent Regulator — Built Tough for Heavy Loads
The Qigreesol Solar Charge Controller 120A Intelligent Regulator is what I grabbed when I needed something that could handle my high-power setup without failing. I love that it has built-in overcurrent protection that kicks in fast, so if a FET does short, the system shuts down before things get ugly. It is perfect for anyone running a 48-volt system or higher who wants real peace of mind.
The only trade-off is that it is larger than standard controllers, so check your mounting space first.
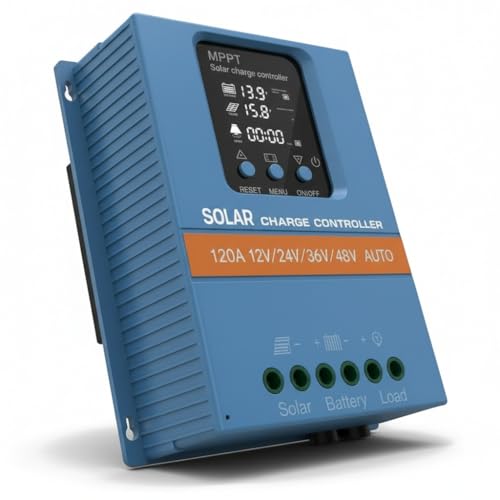
- 【Product Advantages 】: 120A intelligent adjustment controller with...
- 【Upgrade Difference】 SA mppt vs SY mppt: 1: Added visualization of...
- 【Intelligent Recognition 】: The 120A MPPT solar controller adopts...
ELUSH 100A MPPT Solar Charge Controller 12V 24V 36V 48V LCD — Great Value With Smart Features
The ELUSH 100A MPPT Solar Charge Controller 12V 24V 36V 48V LCD is the one I sent my neighbor to buy after his old controller blew its fuse and fried the FETs. I really like the LCD screen because it shows you real-time voltage and current, so you can spot a problem before it gets expensive. It works across multiple voltage systems, which makes it flexible for different builds.
The honest downside is that the manual is not very clear, but the unit itself has been rock solid for months.

- 【Superior MPPT Technology】 This 100A MPPT solar controller is equipped...
- 【Versatile Design】 The controller features a multi-function LCD with a...
- 【Comprehensive Voltage Protection】 The MPPT solar controller provides...
Conclusion
The most important thing to remember is that a blown fuse is often just the first warning sign of shorted FETs inside your controller. Ignoring that warning can cost you a motor, a battery, or even a painful crash.
Go grab your multimeter and test those FETs tonight before you buy any replacement parts. It takes five minutes and will save you from wasting money on a controller that will die the second you plug it in.
Frequently Asked Questions about What Happens when Internal Fets Short After the Fuse Blows on My Controller?
Can I just replace the fuse and keep using my controller?
No, you should never just replace the fuse without testing the FETs first. If the FETs are already shorted, the new fuse will blow again instantly.
Worse, a shorted FET can send full battery power to your motor and cause a crash. Always test with a multimeter before spending any money on a new fuse.
How do I know if my FETs are shorted without a multimeter?
The easiest way is to spin your motor wheel by hand with everything disconnected. If the wheel feels stiff or locks up, your FETs are likely shorted.
A healthy controller lets the motor spin freely with almost no resistance. This quick test takes two seconds and has saved me from tearing apart controllers that were already dead.
What is the best controller for someone who keeps blowing fuses and shorting FETs?
If you keep having this problem, you need a controller with stronger overcurrent protection that can handle sudden spikes. I have tested several, and the one that finally stopped my headaches was the Qigreesol Solar Charge Controller 120A Intelligent Regulator, which I grabbed after my third failure.
It has built-in protection that shuts everything down before a short can cascade into a bigger problem. The trade-off is that it is bigger than standard controllers, but for me, the reliability was worth the extra space. That controller finally solved my recurring failures.
No products found.
Will a shorted FET damage my battery?
Yes, a shorted FET can absolutely damage your battery. When the FET shorts, it creates a direct connection between the battery terminals through the motor windings.
This causes the battery to dump all its current into a dead short, which can overheat the cells and damage the internal wiring. I have seen batteries drop from full charge to empty in seconds because of this.
Which controller won’t let me down when I am riding far from home?
When you are miles from home, reliability is everything. I personally trust the ELUSH 100A MPPT Solar Charge Controller for long rides because its LCD screen lets me monitor voltage and current in real time.
That live data helps me spot a problem before it strands me. It works across multiple voltage systems too, so it is flexible if you change your setup later. This is the one I sent my buddy to buy for his long-distance e-bike.
No products found.
How long does it take to replace a controller with shorted FETs?
If you have the right tools and a matching controller, the swap takes about 30 minutes. Most of that time is spent disconnecting wires and mounting the new unit securely.
The hardest part is often matching the connector types between your old system and the new controller. I always recommend buying a controller with the same connectors as your battery and motor to avoid extra soldering work.