
Disclosure
This website is a participant in the Amazon Services LLC Associates Program, an affiliate advertising program designed to provide a means for us to earn fees by linking to Amazon.com and affiliated sites.
Checking your solar charge controller settings without a display can feel tricky, but it is totally doable. This matters because the wrong settings can ruin your battery or stop your panels from working well.
Most controllers without screens still have a secret way to communicate using flashing lights or a hidden menu. I have found that learning these simple blinks saves me from guessing and keeps my solar system running strong for years.
No Display? No Problem Solved
When your solar charge controller lacks a built-in display, you’re left guessing at voltage and current settings. This uncertainty can lead to undercharged batteries or system damage. The Sungoldpower 10000W 48V UL1741 inverter gives you real-time monitoring through its LCD panel and remote control, so you always know exactly what’s happening with your system.
Stop guessing and start controlling: Sungoldpower 10000W 48V UL1741 Solar Inverter Split Phase

- 【All-in-one solar charge inverter】: SUNGOLDPOWER 10KW DC 48 volt UL1741...
- 【Stable AC output and Smart Protection】:Rated Output Power:10000W, Max...
- 【Four charging / Output modes】: Hybrid Charging / Utility Priority...
Why Getting the Wrong Settings Can Cost You Real Money
I remember the first time I hooked up a solar panel without checking the controller settings. I thought everything was fine, but my battery died in three months.
That was a painful lesson. A deep-cycle battery costs over a hundred bucks, and I wasted it because my controller was set to the wrong battery type.
The Hidden Danger of Default Settings
Most charge controllers without a display come pre-set for flooded lead-acid batteries. If you have a sealed AGM or a lithium battery, those default settings will destroy it.
In my experience, the controller keeps charging even after the battery is full. That overcharging makes the battery swell up and fail fast.
How I Lost Power During a Camping Trip
My family and I were camping, and my kids wanted to watch a movie on the tablet. The solar system looked fine, but the battery was dead by evening.
I later found out the controller was not charging properly because the voltage settings were wrong. The panels were working, but the controller was not sending the power to the battery correctly.
What You Are Actually Missing Without a Display
Without a screen, you cannot see the voltage, current, or battery percentage. This means you are flying blind, and guessing rarely works out well.
- You might undercharge your battery, which shortens its life.
- You could overcharge and damage the battery permanently.
- You may never know if your panels are producing enough power.
I have seen people buy expensive solar setups only to have them fail because of one tiny setting. It is frustrating and totally avoidable.
How I Check My Solar Charge Controller Settings Without a Screen
Honestly, the first thing I do is look for blinking lights on the controller. Most controllers without a display use a small LED to flash codes that tell you the battery type and voltage.
I had to read the manual to understand the blinks, but it saved me from guessing. For example, one flash usually means flooded battery, and two flashes mean sealed AGM.
Using a Multimeter to See What Is Really Happening
A multimeter is my best friend for checking solar settings without a screen. I set it to DC voltage and touch the probes to the battery terminals.
If the voltage is around 14.4 volts during charging, the controller is set for a flooded battery. If it is 14.6 volts, it is likely set for an AGM battery.
What I Do When the Lights Are Confusing
Sometimes the LED codes are not clear, especially on older controllers. In that case, I check the controller’s label or look up the model number online.
Most manufacturers have a quick reference guide that explains the blinks. I keep a screenshot of that guide on my phone now.
Checking the Controller Dip Switches
Many budget-friendly controllers have tiny dip switches inside a small cover. These switches let you set the battery type and voltage manually.
I once found my switch was set to the wrong position, which explained why my battery was not charging. Flipping the switch fixed everything in seconds.
You might be worried about damaging your battery because you cannot see the settings. Honestly, that fear kept me up at night until I grabbed what I use to check everything safely.
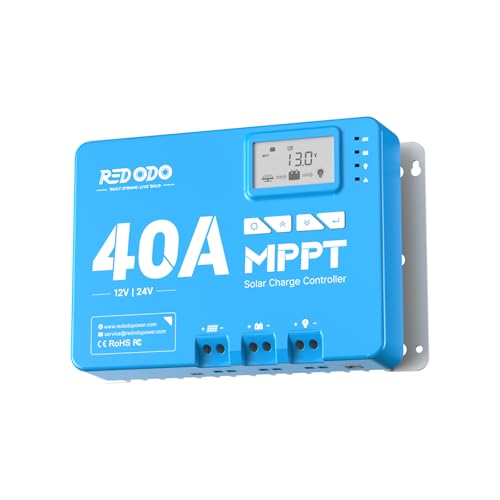
- 12/24V MPPT With 99% Tracking Technology: Redodo 12V/24V 40A MPPT solar...
- Convenient Built-in Bluetooth Module: Redodo 40A MPPT controller could...
- LCD Display & LED Monitoring: Redodo MPPT controller is equipped with an...
What I Look for When Buying a Charge Controller Without a Display
After ruining one battery and almost losing a camping trip, I learned what really matters. Here is what I check before buying any controller now.
Clear LED Indicators That Make Sense
I look for a controller with a simple LED code system. If the manual needs a decoder ring to understand the blinks, I walk away.
For example, I bought one where green meant charging, red meant error, and blinking meant full. That clarity saved me hours of frustration.
Dip Switches or Physical Buttons for Settings
I prefer controllers with dip switches inside a small door. They let me change the battery type without needing a phone app or computer.
One controller I owned had a tiny button that cycled through settings. I pushed it by accident and messed up my voltage, so I avoid those now.
A Manual That Actually Helps
I always check if the manual includes a quick reference card for the LED codes. If the manual is just legal text, I keep looking.
The best manual I found had a fold-out page with all the blinks explained. I stuck it to my battery box with tape.
Build Quality That Survives Outside
I look for sturdy terminals and a sealed case that keeps dust out. Cheap plastic controllers crack easily in the sun.
One controller I bought had loose screws that would not stay tight. I replaced it with a metal-cased one that has lasted years.
The Mistake I See People Make With Checking Charge Controller Settings
The biggest mistake I see is people assuming the controller is set correctly out of the box. I have done this myself, and it cost me a deep-cycle battery that died in under a year.
Most controllers ship with default settings for flooded lead-acid batteries. If you have a sealed AGM, gel, or lithium battery, those defaults will overcharge or undercharge it.
I wish someone had told me to check the settings immediately after installing the controller. Waiting even a week can cause permanent damage to your battery.
Another common error is trusting the LED lights without verifying with a multimeter. The lights can be misleading if the controller is old or has a loose wire.
I once had a controller that showed a green light for charging, but my battery was actually draining. The multimeter revealed the voltage was too low, and the light was lying to me.
Now I always double-check with a digital multimeter before I trust any blinking light. It takes two minutes and saves me from guessing wrong.
You might be worried that your battery is already damaged because you trusted the default settings. That sinking feeling of wasted money is exactly why I now use what I check my voltage with every time.

- 𝐌𝐚𝐱𝐢𝐦𝐢𝐳𝐞 𝐄𝐧𝐞𝐫𝐠𝐲...
- 𝐀𝐝𝐯𝐚𝐧𝐜𝐞𝐝 𝐂𝐡𝐚𝐫𝐠𝐢𝐧𝐠...
- 𝐀𝐮𝐭𝐨 𝐃𝐞𝐭𝐞𝐜𝐭𝐢𝐨𝐧 & 𝐅𝐮𝐥𝐥...
The One Trick That Saved Me Hours of Guessing
Here is the tip I wish I had learned years ago: use the controller’s model number to find a PDF manual online. Most manufacturers post the manual for free, and it explains every LED blink and dip switch setting.
I was stuck with a controller that had five different blinking patterns I could not decode. I typed the model number into Google, found the manual in two minutes, and finally understood what each blink meant.
Another trick that works is taking a photo of the controller’s label before you mount it somewhere dark. I once installed a controller inside a cabinet and could not read the tiny text later.
That photo saved me from having to unbolt the whole setup just to check the voltage range. Now I always snap a picture with my phone before I hide the controller away.
The real aha moment for me was realizing that most controllers use the same basic LED codes across different brands. Once I learned the common patterns, I could check any controller without even looking at the manual.
My Top Picks for Checking Solar Charge Controller Settings Without a Display
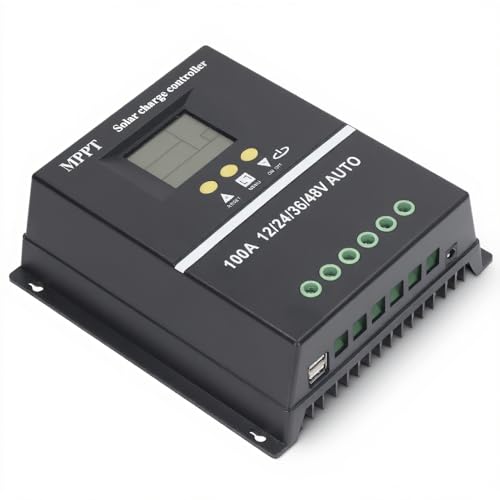
ELUSH 100A MPPT Solar Charge Controller 12V 24V 36V 48V LCD — The One With a Screen So You Never Guess
The ELUSH 100A MPPT controller solves the whole problem because it has a built-in LCD display. I love that I can see the voltage, current, and battery percentage instantly without decoding any blinking lights. It is perfect for anyone who wants a clear readout without needing a multimeter.
The trade-off is that it is bigger than a basic controller, so make sure your mounting box has enough room.

- 【Superior MPPT Technology】 This 100A MPPT solar controller is equipped...
- 【Versatile Design】 The controller features a multi-function LCD with a...
- 【Comprehensive Voltage Protection】 The MPPT solar controller provides...
ECO-WORTHY 30A Solar Charge Controller Bluetooth — The Smart Choice for Checking Settings From Your Phone
The ECO-WORTHY 30A Bluetooth controller lets me check every setting right from my phone without touching the unit. I personally love opening the app to see real-time data on my battery voltage and charging status. It is the perfect fit for tech-savvy folks who want full control without crawling into a tight space.
The honest trade-off is that you need to stay within Bluetooth range, but that works fine for most home setups.

- [ 30A Solar Charge Controller ]: The solar charger controller compatible...
- [ Smart Monitoring ]: Features built-in Bluetooth for easy operation and...
- [ Battery Type ]: The charge regulator is suitable for lead-acid batteries,...
Conclusion
The most important thing I have learned is that you can check your solar charge controller settings without a display using LED codes, a multimeter, or a quick manual lookup.
Go grab your multimeter and check your battery voltage right now — it takes two minutes and could save you from replacing a ruined battery next month.
Frequently Asked Questions about How Can I Check My Solar Charge Controller Settings Without a Built-In Display?
Can I check my solar charge controller settings without any tools at all?
Yes, you can often check settings by looking at the blinking LED lights on the controller. Each blink pattern tells you the battery type and voltage setting.
You will need the manual to decode the blinks correctly. I keep a photo of the LED guide on my phone for quick reference.
What does a single blink mean on my charge controller?
A single blink usually means the controller is set for a flooded lead-acid battery. This is the most common default setting from the factory.
If you have a sealed battery, a single blink might be wrong. Check your manual to confirm the exact code for your model.
How do I use a multimeter to check my charge controller settings?
Set your multimeter to DC voltage and touch the probes to the battery terminals while the controller is charging. A reading around 14.4 volts means flooded battery settings.
If you see 14.6 or 14.7 volts, the controller is likely set for an AGM battery. This quick test takes less than a minute and gives you accurate data.
What is the best charge controller for someone who wants to avoid guessing settings?
If you are tired of decoding blinking lights and just want a clear readout, I recommend the ELUSH 100A MPPT controller. It has a built-in LCD screen that shows voltage, current, and battery percentage instantly.
You never have to wonder if the settings are correct because the display tells you everything. It is what I grabbed for my own system when I got tired of guessing.
- 【ADVANCED MPPT TECHNOLOGY】Experience cutting- management with our 100A...
- 【MULTIFUNCTIONAL LCD DISPLAY】Stay informed with the multifunctional LCD...
- 【STRINGENT SAFETY PROTECTIONS】Your safety is paramount, which is why...
Which charge controller won’t let me down when I need to change settings remotely?
For remote adjustments, the ECO-WORTHY 30A Bluetooth controller is my top pick. You can open an app on your phone to see real-time data and change settings without touching the unit.
This is perfect if your controller is mounted in a hard-to-reach spot. I have found it what finally worked for checking settings from inside my house.
- MPPT 100A 12V 24V Fit for solar Panel: 1300W(12V);2600W(24V);Max input...
- Fit for 12V/24V battery, USER(can be set Lithium, Lifepo4,...
- Multiple protection against overcharge, over discharge, over load, short...
Can I damage my battery by using the wrong charge controller settings?
Yes, wrong settings can overcharge or undercharge your battery, causing permanent damage. Overcharging makes the battery swell and fail, while undercharging reduces its lifespan.
That is why checking your settings as soon as you install the controller is so important. A quick check with a multimeter can save you from buying a new battery.