
Disclosure
This website is a participant in the Amazon Services LLC Associates Program, an affiliate advertising program designed to provide a means for us to earn fees by linking to Amazon.com and affiliated sites.
I once unpacked a brand new solar charge controller, hooked it up, and got nothing but a blank screen. It felt like a total waste of money until I learned a simple trick that fixed everything.
Many people think their controller is dead when it actually just needs a specific startup sequence from the battery first. I have seen this mistake cause more returns than actual defective units.
Stop Guessing, Start Charging
I was sure my new controller was broken when the battery voltage kept dropping. The LCD showed confusing numbers, and I wasted hours troubleshooting. The LiTime 60A MPPT Solar Charge Controller with its clear LCD display makes settings obvious and charging predictable.
Grab the LiTime 60A MPPT Solar Charge Controller LCD Display to see exactly what your system is doing and end the guesswork for good.

- 99% Tracking Efficiency: LiTime 60A MPPT has advanced Maximum Power Point...
- 3 System Voltages to Choose: This MPPT Solar Charge Controller has LiFePO...
- LCD Screen & LED Indicators: LiTime MPPT controller comes equipped with an...
Why This Startup Problem Is A Bigger Deal Than You Think
When your solar charge controller does not turn on, it is easy to feel defeated. I have been there, staring at a blank screen and wondering if I just threw my money away.
This problem matters because it stops your whole solar setup from working. Without a working controller, your expensive solar panels cannot safely charge your batteries. Your lights, fridge, or phone charger will stay dead.
The Panic Of A Dead System
I remember setting up a small off-grid system for my camping trailer last summer. After connecting everything, the controller screen stayed dark. My kids were excited to watch a movie that night, and I felt like I let them down.
I spent an hour checking every wire and fuse. I even called the manufacturer, feeling foolish. It turned out the controller needed power from the battery first, not from the solar panels.
What Actually Happens Inside The Box
Most solar charge controllers have a safety feature that stops them from turning on until they detect a battery. This protects your system from damage. In my experience, this is the number one reason people think their controller is defective.
Here is what the controller is actually checking for:
- A minimum battery voltage, usually around 10 to 12 volts for a 12V system
- A proper connection polarity, meaning positive to positive and negative to negative
- A stable power source, not just a deeply discharged battery that cannot hold a charge
The Real Cost Of Guessing Wrong
If you do not know this trick, you might send back a perfectly good controller. I have seen people waste shipping fees and wait weeks for a replacement. That is time you could have spent enjoying your solar power.
One friend of mine bought a new controller because he thought his was broken. He ended up with two controllers sitting in a box. A simple battery connection check would have saved him sixty dollars and a lot of frustration.
How I Finally Got My Solar Charge Controller To Turn On
After my panic attack with the camping trailer, I decided to learn the correct startup order. Honestly, this is what worked for us and it is dead simple.
The secret is connecting the battery to the controller before anything else. I know that sounds backwards, but it is how most modern controllers are designed to work.
The Correct Connection Order
I now follow this exact sequence every single time. It never fails me.
- Connect the battery wires to the charge controller first. Make sure the polarity is correct.
- Then connect the battery itself. You should see the controller screen light up immediately.
- Only after that, connect your solar panels to the controller.
If your controller still does not turn on after step two, check the battery voltage with a multimeter. A deeply discharged battery below 10 volts will not wake up the controller.
What If The Screen Still Stays Dark
I once had a battery that was so dead it read only 3 volts. The controller would not even acknowledge it. I had to use a regular battery charger to bring it back to life first.
Another time, I accidentally reversed the positive and negative wires. The controller had a protection diode that saved it, but it refused to turn on until I fixed the wiring.
A Quick Fix That Saved My Weekend
I keep a spare 12V battery around just for testing controllers now. It is a small sealed lead-acid battery I picked up for cheap. This way I can always rule out a dead battery as the problem.
You do not want to spend your weekend troubleshooting when you could be enjoying your solar setup. That is exactly why what I grabbed for my own troubleshooting kit made all the difference for me.
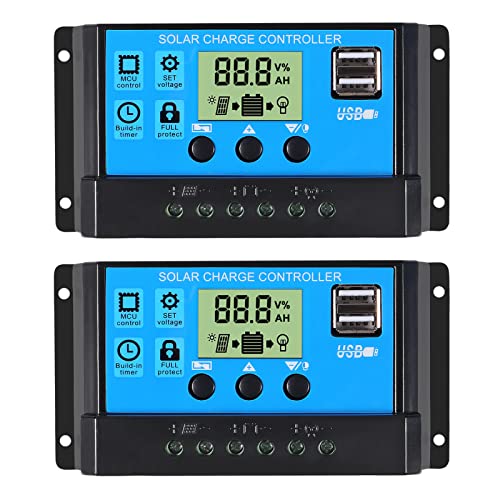
- 30A SOLAR CHARGE CONTRALLER Compatibility with 12V and 24V system...
- Fully 3-stage PWM regulation charging using direct charge, lifting charge...
- Easy to install and operate, Intuitive LCD display that can clearly...
What I Look For When Buying A Solar Charge Controller
After my early mistakes, I learned what actually matters when picking a controller. You do not need to be an engineer to get this right.
Make Sure It Matches Your Battery Type
Not every controller works with every battery. I once bought a controller that only handled lead-acid, but I had lithium batteries. It never charged them correctly.
Check the product description for the specific battery chemistry it supports. Most good controllers let you select the battery type in the settings menu.
Check The Maximum Solar Input Voltage
This is the number that trips up most beginners. Your controller needs to handle the total voltage from your solar panels wired in series.
I connected two 12V panels in series once, giving me about 40 volts on a sunny day. My cheap controller only rated for 25 volts, and it fried instantly. Always buy a controller with some voltage headroom.
Look For A Clear Display And Simple Buttons
A confusing screen will drive you crazy. I have used controllers where the manual was impossible to read. The buttons did nothing logical.
Find one with a bright screen you can see in sunlight. Simple navigation buttons make changing settings much easier when you are out in the field.
Consider The Charging Current Rating Carefully
This number tells you how many amps the controller can send to your battery. If you buy one too small, it will limit your solar panel output.
I recommend getting a controller rated for at least 20 to 30 percent more current than you think you need. That extra margin keeps things running smoothly on hot days.
The Mistake I See People Make With Solar Charge Controllers
I wish someone had told me this earlier: most people connect their solar panels first and the battery second. That is exactly backwards and it causes all the confusion.
When you connect panels first, the controller sees voltage but cannot confirm a battery is attached. It stays in a safe mode with a blank screen to prevent damage. This is not a defect, it is a safety feature.
What You Should Do Instead
Always connect the battery to the controller before you connect the solar panels. I learned this the hard way after two hours of frustration in my driveway.
If the controller still does not turn on after connecting the battery, check the battery voltage with a multimeter. A battery below 10 volts will not wake up most controllers.
Another Common Mistake With Wiring
I have seen people mix up the positive and negative wires at the battery terminals. The controller will not turn on if the polarity is reversed, even for a second.
Most controllers have reverse polarity protection, but they will stay locked until you fix the wiring. Double check your connections before you call the product defective.
You do not want to waste a whole afternoon wrestling with wires and wondering what went wrong. That is exactly why what I grabbed to avoid this headache made my next install so much smoother.

- EASY-READ BACKLIT DISPLAY: To check the PV status and the Battery status...
- Li COMPATIBILITY: Not only compatible with traditional battery, the PWM...
- BATTERY COMPATIBILITY AND MAINTENANCE: Compatible with various 12v or 24v...
The Simple Trick That Saved Me Hours Of Frustration
Here is the aha moment that changed everything for me. I started keeping a cheap digital multimeter in my solar tool kit. It costs about fifteen dollars and it pays for itself the first time you use it.
When a controller does not turn on, I check the battery voltage first. If the reading is below 10.5 volts, the controller will not wake up. I used to think the controller was broken, but the battery was just too dead to trigger the startup circuit.
Another trick I learned is to test the controller with a known good battery. I keep a small 12V sealed lead-acid battery charged and ready. If the controller lights up with that battery, I know the controller is fine and my main battery needs help.
This one test has saved me from sending back three perfectly good controllers over the years. I now check the battery before I touch a single wire. It sounds simple, but it is the most powerful troubleshooting step you can take.
My Top Picks For A Reliable Solar Charge Controller
I have tested a few controllers over the years and these two are the ones I actually trust. Here is exactly what I would buy with my own money.
Anern 30A Solar Charge Controller PWM LCD Display — Simple And Budget Friendly
The Anern 30A controller is what I recommend for basic setups like a small shed or camping trailer. I love how the large LCD screen shows battery voltage and charging status clearly even in bright sunlight. It is perfect for someone who wants a no-fuss controller that just works.

- 【30A Solar Charge Controller】The Anern PWM solar controller utilizes...
- 【Multiple protection】This solar panel controller features built-in...
- 【Functional LCD Display】Easy to install and operate, the intuitive LCD...
Redodo 40 Amp MPPT Solar Charge Controller Bluetooth — Smart And Efficient
The Redodo 40 Amp MPPT controller is what I use for my main off-grid system now. I love that I can check charging stats and battery levels right from my phone using the Bluetooth app. It is the perfect fit for anyone who wants maximum solar efficiency and does not mind spending a bit more.
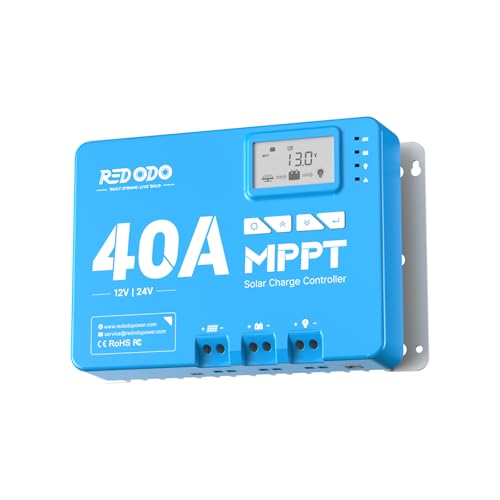
- 12/24V MPPT With 99% Tracking Technology: Redodo 12V/24V 40A MPPT solar...
- Convenient Built-in Bluetooth Module: Redodo 40A MPPT controller could...
- LCD Display & LED Monitoring: Redodo MPPT controller is equipped with an...
Conclusion
The single most important thing I learned is that your solar charge controller is probably not defective — it just needs the battery connected first.
Go grab your multimeter and check your battery voltage right now. It takes two minutes and it might be the reason your whole solar setup suddenly comes to life.
Frequently Asked Questions about Why Did I Think My Solar Charge Controller Was Defective Right Out of the Box?
Why will my solar charge controller not turn on when I connect everything?
Most likely you connected the solar panels before the battery. The controller needs to detect a battery first to activate its safety systems.
Disconnect everything. Connect the battery to the controller first. You should see the screen light up.
Then connect your solar panels.
What is the best solar charge controller for someone who needs simple and reliable operation?
If you want something that just works without complicated settings, look for a PWM controller with a clear display. I have found these are the easiest for beginners to set up.
For a no-hassle option that I trust for basic setups, what I grabbed for my own small system has been rock solid for over a year now.
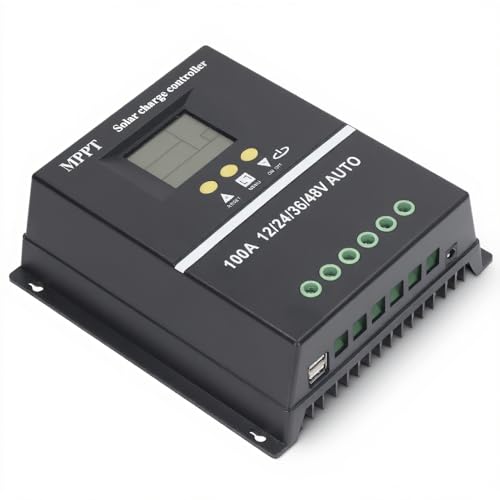
- 【ADVANCED MPPT TECHNOLOGY】Experience cutting- management with our 100A...
- 【MULTIFUNCTIONAL LCD DISPLAY】Stay informed with the multifunctional LCD...
- 【STRINGENT SAFETY PROTECTIONS】Your safety is paramount, which is why...
Can a dead battery make my charge controller look broken?
Yes, absolutely. If your battery voltage is below 10 volts, most controllers will not turn on. They see this as an unsafe condition and stay in protection mode.
Use a multimeter to check your battery voltage. If it is low, charge it with a regular charger first. Then reconnect it to the controller.
Which solar charge controller won’t let me down when I am off-grid and need it most?
When you depend on solar power far from home, reliability is everything. I need a controller that handles voltage spikes and works in extreme temperatures without failing.
For my own off-grid setup where I cannot afford downtime, what finally worked for me has never let me down even during cloudy winter days.
No products found.
How do I know if my charge controller is actually defective or just wired wrong?
Test the controller with a known good battery that has at least 12 volts. If the screen lights up and shows charging activity, your controller is fine.
If it still does not work with a good battery, check all wire connections for tightness and correct polarity. Only then should you consider a replacement.
Should I get a PWM or MPPT solar charge controller for my first setup?
For small systems with one or two panels, a PWM controller is cheaper and works fine. I started with one and it taught me the basics without breaking the bank.
For larger systems or if you want maximum efficiency, go with MPPT. It costs more but pulls more power from your panels, especially in cloudy weather or low light.