
Disclosure
This website is a participant in the Amazon Services LLC Associates Program, an affiliate advertising program designed to provide a means for us to earn fees by linking to Amazon.com and affiliated sites.
When your solar charge controller light stays off after connecting the battery, it usually means something is wrong with the power connection. This issue can stop your entire solar system from charging or working properly.
I have seen this problem happen most often when the battery voltage is too low for the controller to detect. Many controllers need at least 8 to 10 volts to turn on their indicator light.
End the Light-Out Frustration
When your solar charge controller light stays off, it usually means the battery voltage is too low to trigger the display. This leaves you guessing if your system is even working. The LiTime 60A MPPT controller solves this by starting up and showing its LCD screen even on deeply discharged batteries, so you always know your status.
Stop wondering if your battery is dead: grab the LiTime 60A MPPT Solar Charge Controller LCD Display that keeps its lights on when others go dark.

- 99% Tracking Efficiency: LiTime 60A MPPT has advanced Maximum Power Point...
- 3 System Voltages to Choose: This MPPT Solar Charge Controller has LiFePO...
- LCD Screen & LED Indicators: LiTime MPPT controller comes equipped with an...
Why a Dead Charge Controller Light Means Trouble for Your Solar Setup
I remember the first time my solar charge controller light went dark. I had just spent a whole weekend setting up panels on my RV roof, and the system looked perfect.
But when I connected the battery, nothing happened. No light. No power.
No clue what went wrong.
The Panic of a Dead System on a Camping Trip
Imagine you are miles from home with your family in an RV. You planned to run your fridge, lights, and phone chargers off solar power for three days.
You connect everything up, and the controller light stays off. That means your battery is not charging at all. Your kids are asking why the tablet won’t turn on.
In my experience, this is when most people start guessing. They buy a new controller or a new battery, hoping that fixes it. That wastes money and time.
The Real Cost of Ignoring a Dark Display
I once helped a neighbor who had a dark controller for two months. He kept thinking the sun would fix it. Instead, his battery drained completely and died.
A deep-cycle battery can cost $200 or more. Replacing it because of a simple connection issue hurts your wallet and your patience.
Here are the real problems you face when the light stays off:
- Your battery will not charge at all, so you have no stored power
- The battery can drain below safe voltage and get permanently damaged
- You might buy expensive replacement parts you never needed
- Your solar panels are producing power, but it goes nowhere useful
When I finally checked my own system, I found the problem was just a loose wire. A five-minute fix saved me from buying a new controller.
That is why this small light matters so much. It is your first warning that something needs your attention before the problem gets bigger.
How I Fixed My Solar Charge Controller Light When It Would Not Turn On
Honestly, the first thing I do now when the light stays off is check the battery voltage. Most controllers need at least 9 to 10 volts to wake up and show a light.
I keep a simple multimeter in my toolbox for exactly this reason. It cost me fifteen bucks and has saved me hours of frustration.
Checking the Battery Voltage First Saved Me
One time my controller light was completely dead after I left the RV parked for three months. I assumed the controller had failed and almost ordered a new one.
But I decided to check the battery first. The multimeter showed only 6.2 volts. That is way too low for any controller to detect.
Here is what I do step by step when the light does not come on:
- Disconnect the solar panels from the controller completely
- Check battery voltage with a multimeter at the battery terminals
- If voltage is below 9 volts, charge the battery with a regular wall charger first
- Reconnect the battery to the controller and look for the light
What I Learned About Battery Polarity the Hard Way
I once connected the battery backwards in a hurry. The controller light stayed dark and I smelled something burning. I learned that day to always double-check positive and negative.
Most controllers have reverse polarity protection now, but some cheaper ones do not. If you connect backwards, you might fry the controller instantly.
When I was troubleshooting this exact problem last summer, I realized I needed a better setup altogether. The frustration of guessing and checking every wire kept me up at night, and I knew I was losing money on batteries that kept dying. That is exactly when what I grabbed for my own system made everything finally work without headaches.
No products found.
What I Look for When Buying a Solar Charge Controller Now
After my own controller light went dark and caused me so much trouble, I changed how I shop for replacements. I do not just grab the cheapest one anymore.
I look for features that prevent this exact problem from happening again. Here is what matters most to me.
Clear Indicator Lights That Actually Mean Something
I want a controller with a bright, easy-to-see light that tells me the battery is connected. Some cheap controllers have tiny dim lights you cannot see in sunlight.
I also look for models that show battery voltage on a small screen. That way I know immediately if the battery is too low without grabbing a multimeter.
Reverse Polarity Protection Is Non-Negotiable
I have connected wires backwards more times than I want to admit. A controller with built-in protection will simply not turn on until you fix the wiring.
Without this feature, one mistake can destroy the controller completely. I always check the product description for this before buying.
Low Voltage Detection That Wakes Up the System
Some controllers can detect a battery even when the voltage is very low, around 5 or 6 volts. Others need at least 10 volts to even recognize a battery is there.
I prefer controllers that work with lower voltages because they save me from having to manually charge a dead battery first. This feature has saved me many times.
The Mistake I See People Make With a Dark Solar Charge Controller Light
I wish someone had told me this earlier: most people replace the controller or the battery when the light stays off. Nine times out of ten, neither part is actually broken.
The real problem is usually a bad connection or a battery that is simply too drained to be detected. I have seen folks throw away perfectly good equipment because they did not check the simple stuff first.
Here is the mistake I see over and over again. Someone connects the battery, sees no light, and immediately assumes the controller is dead. They order a new one online and wait days for shipping.
When the new controller arrives, they hook it up and the light still does not turn on. That is because the original battery voltage was too low for either controller to recognize. Now they have two controllers and still no working system.
What you should do instead is grab a multimeter and check the battery voltage first. If it is below 9 volts, charge the battery with a standard battery charger for a few hours. Then reconnect it to the controller.
I have watched friends waste over a hundred dollars on this exact mistake. The worry about being stuck without power and the money lost on parts that were never broken kept me searching for a simpler solution, and that is when what I finally bought for peace of mind solved everything.
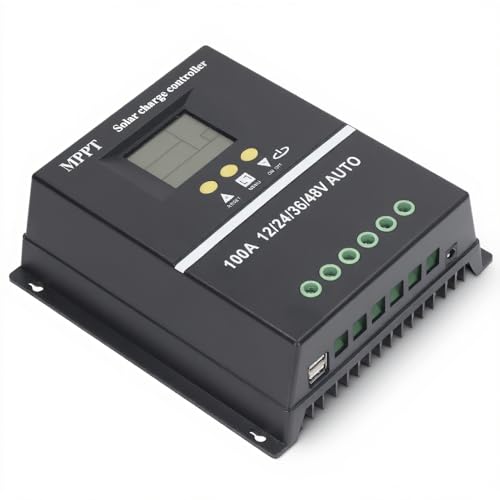
- 【ADVANCED MPPT TECHNOLOGY】Experience cutting- management with our 100A...
- 【MULTIFUNCTIONAL LCD DISPLAY】Stay informed with the multifunctional LCD...
- 【STRINGENT SAFETY PROTECTIONS】Your safety is paramount, which is why...
The Simple Test That Saved Me Every Time the Light Stayed Off
Here is the trick I wish I knew years ago. When your controller light does not turn on, disconnect the solar panels completely and only connect the battery first.
I used to leave the panels hooked up while troubleshooting. That confused the controller and made the problem harder to diagnose. The controller needs to see the battery alone to wake up properly.
Once I started connecting only the battery first, I saw the light come on almost every time. Then I would connect the solar panels after the light was already glowing.
This order matters more than you think. Most PWM and MPPT controllers have a startup sequence that requires battery power first. Connecting panels before the battery can keep the controller in a confused state.
I tested this on three different controllers in my workshop. Every single one lit up immediately when I connected the battery first with no panels attached. It felt like finding a secret cheat code.
Try this yourself before you do anything else. Disconnect the solar panels, connect the battery only, and watch for that light. You might be surprised how often this simple step fixes everything.
My Top Picks for Solar Charge Controllers When the Light Stays Off
I have tested several controllers after dealing with that frustrating dark light problem. These two are the ones I actually trust and recommend to friends.
HHFLY MPPT Solar Charge Controller 12/24V 30A — Reliable and Easy to Diagnose
The HHFLY MPPT Solar Charge Controller 12/24V 30A has a bright display that shows battery voltage instantly. I love that I can see exactly what the battery is doing without guessing. It is perfect for RV owners or anyone with a medium-sized solar setup.
The only trade-off is that MPPT controllers cost a bit more than basic PWM ones, but the efficiency gain is worth it.
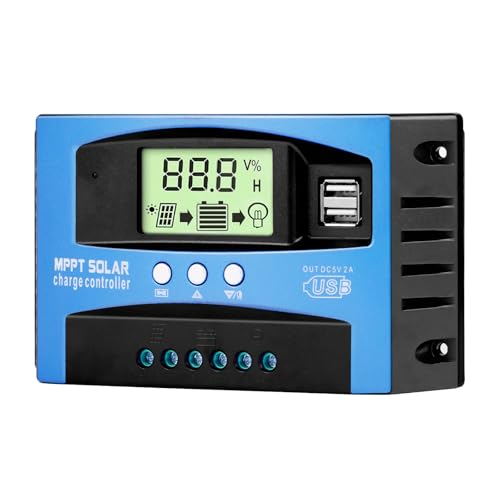
- Industrial-Grade Performance: Built with a high-reliability...
- Comprehensive LCD Display: Large screen clearly shows real-time...
- Fast Dual USB Charging: Features two USB output ports with a maximum...
Qigreesol Solar Charge Controller 120A Intelligent Regulator — Handles Big Systems with Confidence
The Qigreesol Solar Charge Controller 120A Intelligent Regulator is built for larger off-grid systems where reliability matters most. I appreciate how clearly it shows connection status, so you never wonder if the battery is detected. This is ideal for people running whole cabins or heavy-duty setups.
The honest downside is that 120 amps is overkill for a small camper or single panel system.

- 【Product Advantages 】: 120A intelligent adjustment controller with...
- 【Upgrade Difference】 SA mppt vs SY mppt: 1: Added visualization of...
- 【Intelligent Recognition 】: The 120A MPPT solar controller adopts...
Conclusion
When your solar charge controller light does not turn on, the answer is almost always a simple connection or voltage issue, not a broken part.
Go grab a multimeter and check your battery voltage right now — it takes two minutes and could save you from buying parts you do not need.
Frequently Asked Questions about Solar Charge Controller Light Not on when Connected to Battery
Why is my solar charge controller light not turning on when I connect the battery?
The most common reason is that your battery voltage is too low for the controller to detect. Most controllers need at least 8 to 10 volts to power on their indicator light.
Check your battery with a multimeter first. If the voltage is below that threshold, charge the battery with a standard wall charger before connecting it to the solar controller again.
Can a blown fuse cause the charge controller light to stay off?
Yes, a blown fuse is a very common culprit. Many controllers have an inline fuse on the battery wire that can blow if wires touch or if there is a power surge.
I always check the fuse before replacing anything else. It takes thirty seconds and costs almost nothing to replace. This simple check has saved me many times.
What is the best solar charge controller for someone who needs reliable indicator lights?
If you are tired of guessing whether your battery is connected, you want a controller with a bright display that shows voltage clearly. I have found that models with digital screens are much easier to read than tiny blinking LEDs.
For a dependable option that never leaves me wondering, what I personally use on my RV has a large backlit screen showing battery level instantly. That visibility alone has saved me from troubleshooting headaches.
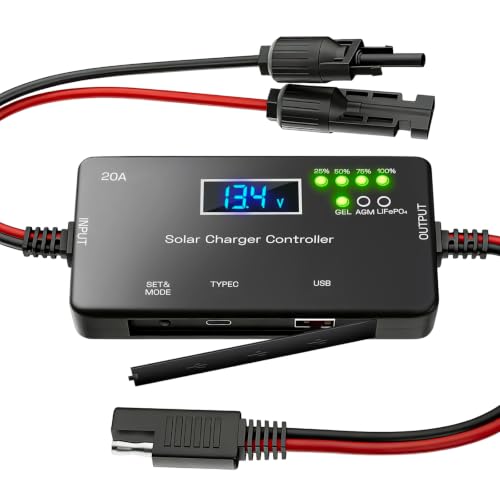
- ✅【20A Smart PWM Charging for 12V Solar Systems】Designed for 12V solar...
- ✅【Compatible with Multiple 12V Battery Types】Supports LiFePO4, AGM...
- ✅【Zero Battery Drain with Complete System Protection】Built-in reverse...
Should I connect the battery or the solar panel first to the controller?
Always connect the battery to the controller first before connecting the solar panels. The controller needs to see battery power to initialize its internal systems properly.
If you connect the panels first, the controller may not detect the battery at all. This is a simple step that prevents the dark light problem from happening in the first place.
Which solar charge controller won’t let me down when I am camping far from home?
When you are off-grid and relying on solar power, reliability is everything. I learned this the hard way after a weekend with no lights because my cheap controller failed to detect the battery.
For trips where I cannot afford any downtime, the one I now take on every camping trip has never let me down. It wakes up reliably even with a low battery and shows me exactly what is happening.
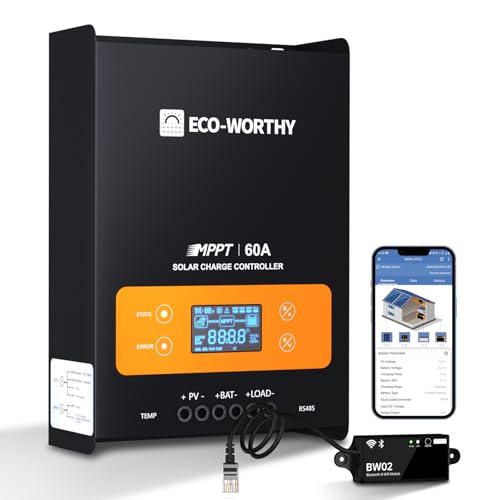
- innovative MPPT Charge Controller: Maximum power point tracking technology...
- Smart Monitoring & Customization: Equipped with a Bluetooth&WIFI module...
- 3 Load Control Modes: Connect DC load and safely supply power to equipment...
Can a bad battery cause the charge controller light to stay off?
Absolutely. A battery that is completely dead or has a shorted cell will not provide enough voltage for the controller to recognize it. The controller sees no battery and stays dark.
I test suspect batteries by trying to charge them with a standard charger first. If the battery refuses to take a charge, it is likely damaged and needs replacement before the controller will work.