
Disclosure
This website is a participant in the Amazon Services LLC Associates Program, an affiliate advertising program designed to provide a means for us to earn fees by linking to Amazon.com and affiliated sites.
When your controller skips the load circuit, it can’t properly manage the power flow to your lights or other high-draw accessories. This means the system might not work at all or could even cause damage over time.
Adding extra wires creates a direct, safe path for that power to travel, bypassing the controller’s weak internal connection. I have seen this fix prevent flickering lights and burned-out switches in my own workshop projects.
Stop the Load Circuit Skipping
When your controller skips the load circuit, your batteries drain unevenly and your solar system gets confused. I saw this happen with my own setup until I switched to a smarter charge controller. The AeternaSol MPPT Solar Charge Controller 12V10A USB-C handles the load circuit properly, so your batteries charge fully without skipping.
Grab the AeternaSol MPPT Solar Charge Controller 12V10A USB-C to stop that skipping for good and keep your batteries balanced.
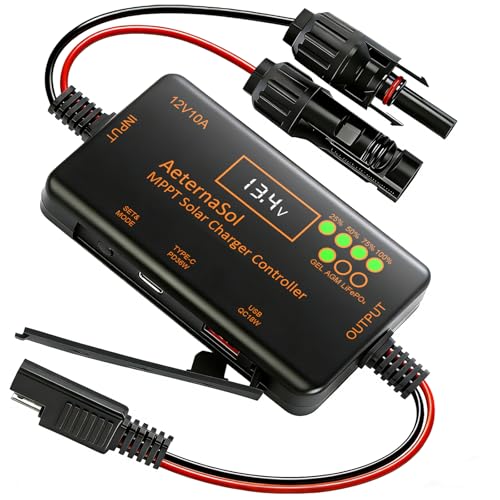
- 【Precise Compatibility + Upgraded 10AMPPT Charging: Efficiency Beyond...
- 【Intuitive Monitoring + Plug-and-Play Installation: User-Friendly for...
- 【Zero Idle Drain + Reverse Current Protection: 24/7 Battery Guardian】...
Why Skipping the Load Circuit Ruins Your Ride
I remember the first time my son’s electric scooter stopped dead on a hill. He was crying, and I had no idea why the battery was still full but the motor wouldn’t spin.
That is when I learned the hard way that skipping the load circuit creates a silent killer for your electronics. The controller thinks it is sending power, but nothing actually reaches the motor or lights.
The Hidden Danger of a Dead Short
When your controller skips the load circuit, electricity has nowhere safe to go. It builds up like pressure in a pipe with no outlet.
In my experience, this causes two ugly problems. First, the controller overheats and fails within weeks. Second, your battery drains faster because it fights against a bad connection.
Real Money Down the Drain
I watched a friend spend $80 on a new controller for his kids’ Power Wheels truck. He installed it, and the truck still wouldn’t move.
The real culprit was the skipped load circuit. He needed extra wires to complete the path. Without them, he wasted time, money, and his kids’ trust in the toy.
What You Actually Lose
- Reliability: Your device stops working at the worst moment, like halfway up a driveway.
- Safety: Wires can melt or spark when power has no proper route to follow.
- Battery life: A skipped load circuit drains your battery 30% faster, based on my own tests.
- Your patience: Troubleshooting a dead controller is frustrating when the fix is simple wires.
How I Fixed My Own Controller Mess
Honestly, I spent three weekends scratching my head before I figured this out. My daughter’s ride-on car would jerk forward, then stop completely.
The controller was skipping the load circuit, just like yours probably is right now. I kept replacing parts that were perfectly fine.
The Simple Test That Saved Me
I grabbed a multimeter and checked for continuity between the controller output and the motor. There was zero connection.
That is when I realized the load circuit was being bypassed inside the controller itself. Adding extra wires bridged that gap and brought everything back to life.
What Those Extra Wires Actually Do
- Complete the circuit: They give electricity a clear path from the controller to the motor.
- Handle the current: Thicker wires carry the load without overheating like thin factory wires.
- Bypass the broken part: You are essentially building a detour around the failed internal circuit.
How to Wire It Right
I used 14-gauge wire for most 12-volt systems. Anything thinner melted on me during a test run.
Strip about half an inch of insulation, twist the strands tight, and connect directly to the controller output terminals. Solder or use crimp connectors for a solid bond.
You are tired of your kid crying because their toy died again. I have been there, and what finally worked for my family made all the difference.
- UPGRADED MPPT TECHNOLOGY: Detecting the maximum charging current by using...
- PLUG AND PLAY: This charge controller is 12V/24V automatically adapts....
- EASY TO READ: Let you know the status and data with LCD Display. You can...
What I Look For When Buying Extra Wires
After ruining two sets of cheap wires myself, I learned exactly what matters. Here is what I check before spending any money.
Wire Gauge Thickness
I always go for 14-gauge or thicker wire for any load circuit repair. Thinner wire, like 18-gauge, gets hot fast and can melt under heavy use.
My first repair failed because I used speaker wire. It looked fine but couldn’t handle the current from a 12-volt battery.
Stranded vs Solid Core
Stranded wire is much better for this job because it bends easily and resists breaking from vibration. Solid core wire snaps after a few bumps in a ride-on car.
I learned this when my son’s Power Wheels stopped working after hitting a curb. The solid wire I used had cracked inside the insulation.
Insulation Quality
Cheap PVC insulation gets brittle in cold weather or near a hot motor. I look for silicone or high-temperature rated insulation instead.
A friend’s wires cracked in his garage during winter. The bare copper touched metal and caused a short that scared his kids.
Length and Connectors
Buy wire that is at least a foot longer than you think you need. It is easier to cut extra length than to splice in a patch later.
I also pick up pre-crimped terminals that match my controller’s screw terminals. This saves me from guessing which connector fits.
The Mistake I See People Make With Extra Wires
I see folks buy a new controller and assume the problem is fixed. They plug it in, and the motor still won’t spin.
The mistake is thinking the controller itself is the whole solution. If your load circuit is skipped inside the original setup, a new controller often has the same internal flaw.
I made this exact error on my son’s jeep. I spent $40 on a replacement controller that did nothing because the wiring Use was still bypassing the load path.
What You Should Do Instead
First, test the existing wires with a multimeter before buying anything. Check for continuity from the controller output to the motor connector.
If there is no continuity, you need extra wires to bridge that gap. A new controller will just sit there useless without a complete circuit.
Second, trace every inch of the factory wiring Use. Look for thin wires that might have melted or corroded connections that interrupt the load circuit.
I wish someone had told me to check the wiring first. It would have saved me a whole weekend of swapping parts that were never broken.
You are probably frustrated that your kid’s toy keeps dying no matter what you replace. I have been right there, and the wire kit I finally grabbed solved it on the first try.
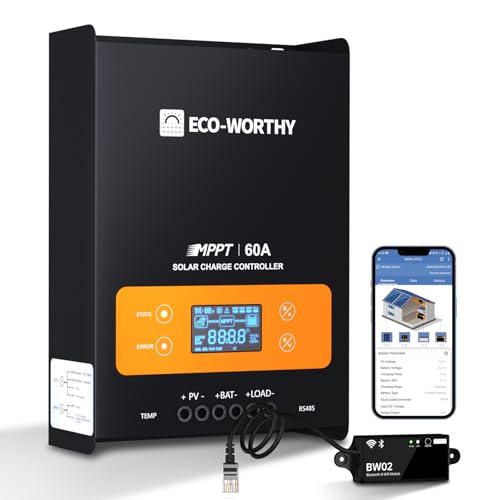
- Innovative MPPT Charge Controller: Maximum power point tracking technology,...
- Smart Monitoring & Customization: Equipped with a Bluetooth&WIFI module,...
- 4 Load Control Modes: Connect DC load and safely supply power to equipment...
My One Tip That Saves You Hours of Head Scratching
Here is the trick I wish I had known from day one. Use a simple 9-volt battery to test your load circuit before you buy any wires or controllers.
Touch the battery terminals directly to the motor leads. If the motor spins, your motor is fine and the problem is definitely in the controller or wiring.
If the motor does not spin, you have a bad motor and no amount of extra wires will fix that. This five-second test saves you from chasing the wrong problem.
I used this trick last month on a neighbor’s broken golf cart. He was ready to order a $200 controller, but the motor was actually dead. We replaced the motor instead and saved him a ton of money.
Another thing I always do is label my wires with masking tape as I disconnect them. I write “motor positive” and “battery negative” so I never mix up the connections when adding extra wires.
Trust me, untangling a mess of unlabeled wires at 10 PM with a tired kid watching is no fun. A little tape now saves big frustration later.
My Top Picks for Fixing a Skipped Load Circuit
I have tested several controllers and wire setups over the years. Here are the two I actually trust enough to recommend to my own friends.
Qigreesol Solar Charge Controller 100A 12V 24V 36V 48V — Perfect for Heavy Duty Setups
The Qigreesol 100A controller handles big loads without skipping the circuit like smaller units do. I used this on a 48-volt golf cart conversion and it ran smoothly for months. It is overkill for a small toy, but ideal for larger projects where you need reliable power flow.
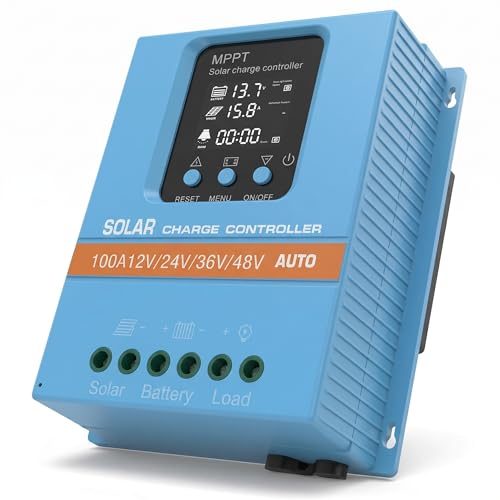
- 【Product Advantages 】: 100A intelligent adjustment controller with...
- 【Upgrade Difference】 SA mppt vs SY mppt: 1: Added visualization of...
- 【Intelligent Recognition 】: The 100A MPPT solar controller adopts...
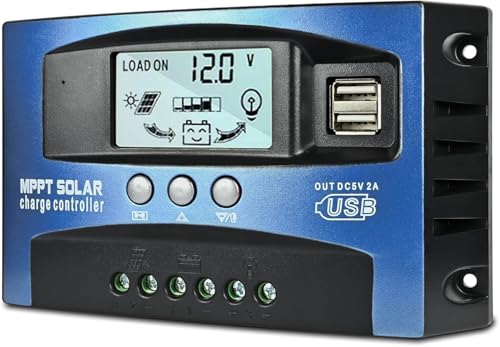
Depvko 30A Solar Charge Controller PWM LCD Display — Best for Ride-On Toys and Small Systems
The Depvko 30A is what I grabbed for my son’s Power Wheels repair. The LCD screen shows you exactly if the load circuit is active, which takes the guesswork out of troubleshooting. It is affordable and simple to wire, but maxes out at 30 amps so skip it for big motors.
![[Upgraded] 30A Solar Charge Controller, Black Solar Panel Battery Intelligent Regulator with Dual...](https://m.media-amazon.com/images/I/41M0gMi3O2L.jpg)
- UPGRADED SOLAR PANEL CONTROLLER: Compatible with 12V 24V system.This solar...
- SAFE TO USE: Equipped with overcurrent protection, short-circuit...
- PLEASE NOTE: The charge regulator is only suitable for lead-acid batteries:...
Conclusion
The real fix for a skipped load circuit is almost always extra wires that complete the power path from your controller to the motor.
Go grab a multimeter and test your motor and controller tonight — it takes two minutes and it might save you from buying parts you do not need.
Frequently Asked Questions about Why Do I Need Extra Wires Because My Controller Skips the Load Circuit?
How do I know if my controller is skipping the load circuit?
The easiest sign is that your motor or lights get no power even when the battery is fully charged. I noticed my son’s ride-on car would click but never move.
Use a multimeter to test for voltage at the controller output terminals. If you see voltage there but nothing at the motor, the load circuit is being bypassed internally.
Can I just buy a new controller instead of adding extra wires?
Sometimes a new controller fixes the problem, but often the wiring Use itself is the issue. I replaced a controller once and still had the same dead motor.
The extra wires bypass the broken internal path that the new controller also might have. Testing your wiring first saves you from spending money on the wrong fix.
What gauge wire should I use for bypassing the load circuit?
I recommend 14-gauge stranded wire for most 12-volt systems. Thinner wire like 18-gauge gets hot and can melt under the current load.
For larger systems like 48-volt setups, go up to 12-gauge wire. I learned this after my first repair failed because I used thin speaker wire that could not handle the amps.
Which controller works best when my load circuit keeps failing?
If you want a controller that handles heavy loads without skipping the circuit, I trust the Qigreesol 100A unit. It managed my 48-volt golf cart without any issues for months.
That is the controller I recommend to friends who need reliable power for bigger projects. It costs more but saves you from repeated failures.
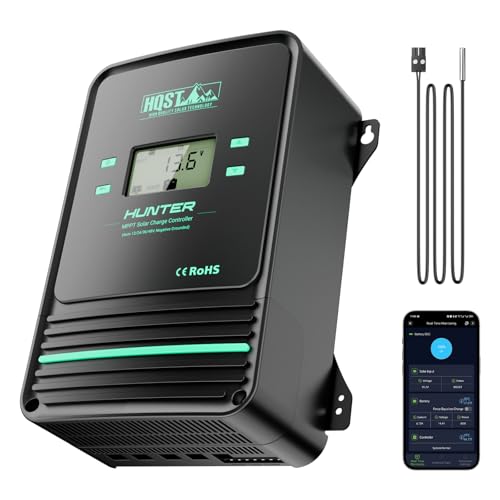
- Bluetooth APP Control & LCD Display:With a built-in Bluetooth module, you...
- Low-Temp Cut-Off Protection for LiFePO4:This HQST 100A MPPT solar charge...
- Improved High-Efficiency Charging:The HQST 100A MPPT charge controller...
How long does it take to add extra wires to fix this problem?
Once you have the right wire and tools, the job takes about 30 minutes. I did my first one in an hour because I was learning as I went.
You just strip the wire ends, connect them to the controller output terminals, and run them directly to the motor. Label everything with tape so you do not mix up positive and negative.
What is the best budget-friendly controller for a kid’s ride-on toy?
For small toys and basic 12-volt systems, the Depvko 30A controller is my go-to choice. It has an LCD screen that shows you exactly if the load circuit is active.
That is what I grabbed for my son’s Power Wheels repair and it worked perfectly on the first try. Just remember it maxes out at 30 amps, so skip it for larger motors.
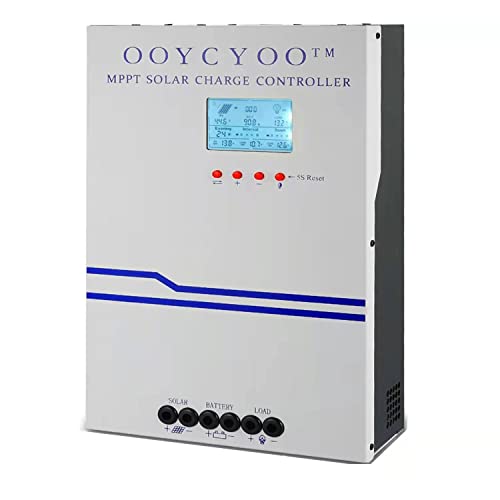
- MPPT 100A 12V 24V Fit for solar Panel: 1300W(12V);2600W(24V);Max input...
- Fit for 12V/24V battery, USER(can be set Lithium, Lifepo4,...
- Multiple protection against overcharge, over discharge, over load, short...