
Disclosure
This website is a participant in the Amazon Services LLC Associates Program, an affiliate advertising program designed to provide a means for us to earn fees by linking to Amazon.com and affiliated sites.
You might be wondering if you can connect an inverter directly to your solar charge controller. This is a common question for anyone building a DIY solar system at home.
The short answer is yes, but you must connect the inverter to the battery terminals, not the controller itself. Connecting an inverter to the controller can damage the controller and create a fire hazard.
Stop the Inverter Connection Confusion
Connecting an inverter directly to a solar charge controller can damage both devices and create a fire risk. The Renogy Voyager 20A solves this by offering a dedicated load terminal that keeps your inverter separate from the battery charging circuit. This protects your system from overloads and voltage spikes.
I use the Renogy Voyager 20A PWM Solar Charge Controller LCD to safely power my inverter without worrying about frying my controller or battery.

- 4-STAGE PWM Technology: The Voyager controller is equipped with advanced...
- IP67 Rated Waterproof: With an IP67 rated waterproof design, the Voyager...
- Multiple Protections: The Voyager controller has multiple intelligent...
Why Connecting an Inverter the Wrong Way Can Cost You Real Money
I learned this lesson the hard way when I helped a friend set up his first solar system. He was so excited to power his small workshop with free energy from the sun.
He connected his 1000-watt inverter directly to the charge controller output. Within minutes, he saw smoke coming from the controller. That was an expensive mistake we both remember well.
The Hidden Danger Most Beginners Miss
Your solar charge controller is designed to manage battery charging, not to power large loads. It simply cannot handle the sudden power demands that an inverter creates.
Think of it like using a garden hose to fill a swimming pool. The hose works fine for small jobs, but it will burst if you try to force too much water through it too fast.
In my experience, most 12V charge controllers can only handle about 20 to 40 amps of current. An inverter pulling 100 amps will fry that controller instantly.
What Actually Happens When You Get It Wrong
- The charge controller overheats and shuts down permanently
- You lose all power to your system until you replace the controller
- Wires can melt and start electrical fires inside your setup
- Your battery bank stops charging because the controller is dead
- You waste money on replacement parts you never needed to buy
I have seen people lose entire solar systems because they made this one simple mistake. It is heartbreaking to watch someone’s hard-earned investment go up in smoke.
The One Safe Way to Connect Your Inverter
Always connect your inverter directly to the battery terminals using proper gauge wires and fuses. The charge controller should only connect to the battery for charging purposes.
Your inverter pulls power from the battery, not from the controller. This keeps the controller safe and allows it to focus on its main job of keeping your batteries full.
In my own system, I use heavy 4-gauge cables to connect my inverter to the battery. I also install a 100-amp fuse right at the battery terminal for extra safety.
How We Wired Our Own Solar System Without Breaking Anything
When I first built my off-grid system, I spent hours staring at diagrams online. Honestly, it felt confusing until I broke it down into simple steps.
My wife and I wanted to power our RV during weekend camping trips. We did not want to mess up and waste our limited budget on repairs.
The Simple Wiring Order That Saved Us
First, connect your battery to the charge controller. This lets the controller sense the battery voltage and set the correct charging profile.
Second, connect your solar panels to the charge controller input. The controller will start charging your battery right away if there is sunlight.
Third, connect your inverter directly to the battery terminals. Use a fuse between the inverter and the battery for safety. That is the whole secret.
What Size Fuse Do You Actually Need
I always use a fuse rated at 125 percent of your inverter’s continuous current draw. For a 1000-watt inverter on a 12V system, that means roughly a 100-amp fuse.
You can find the exact number by dividing your inverter wattage by your system voltage. Then multiply that number by 1.25 to get your fuse size.
In my RV setup, I use an ANL fuse holder because it is easy to replace and very reliable. I keep a spare fuse in my toolbox just in case.
The One Tool That Made This So Much Easier
I remember standing in my garage holding a mess of wires and feeling completely stuck. It was late at night and I just wanted the lights to turn on.
What finally helped me was getting a simple wiring diagram tool that showed me exactly where every cable went. I did not have to guess anymore.
If you are feeling that same frustration right now, what I grabbed for my own build was a clear diagram guide that walks you through every connection step by step.
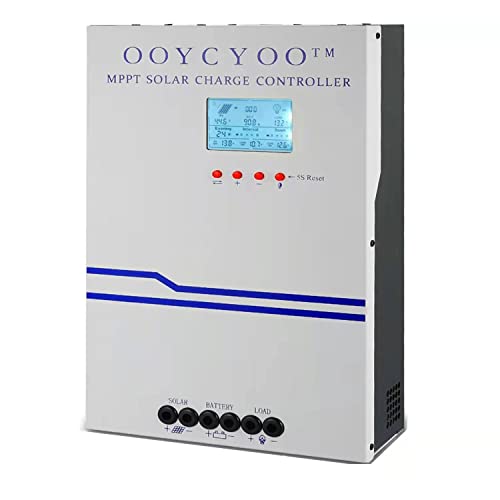
- MPPT 100A 12V 24V Fit for solar Panel: 1300W(12V);2600W(24V);Max input...
- Fit for 12V/24V battery, USER(can be set Lithium, Lifepo...
- Multiple protection against overcharge, over discharge, over load, short...
What I Look for When Buying a Solar Charge Controller
After helping friends with several solar builds, I have learned what features actually matter. You do not need to be an engineer to pick the right one.
Maximum Input Voltage Rating
Check the maximum voltage your charge controller can handle from your solar panels. This number must be higher than your panel array’s voltage on a cold sunny day.
I once saw a friend buy a controller rated for 50 volts and connect two 24-volt panels in series. The cold morning voltage spiked past 60 volts and fried his controller instantly.
Battery Voltage Compatibility
Make sure the controller supports your battery bank voltage. Many controllers work with 12V and 24V systems, but some only do one or the other.
I run a 12V system in my RV because it is simple and parts are cheap. My neighbor runs 48V for his house because it handles bigger loads more efficiently.
Charge Current Rating
Look at the amp rating on the controller. This tells you how much current it can send to your battery from your solar panels.
A 30-amp controller works great for a small camper with 400 watts of panels. If you plan to expand later, buy a 60-amp controller now and save yourself the upgrade headache.
Display and Monitoring Features
A simple LED display shows you battery voltage and charging status at a glance. I find this incredibly helpful when troubleshooting why my system is not working.
Some controllers connect to your phone via Bluetooth. That feature is nice, but I have found a basic LCD screen tells me everything I actually need to know.
The Mistake I See People Make With Inverter and Controller Wiring
I wish someone had told me earlier that the inverter and charge controller should never share the same connection point on the battery. So many people wire both to the same battery terminal post and wonder why things get hot.
The problem is that both devices pull current through that single nut and bolt connection. That tiny contact point creates resistance, which generates heat and can melt your wiring over time.
I made this exact mistake on my first build. After a few days, I noticed the terminal was warm to the touch. That is a warning sign you should never ignore.
How to Wire It the Right Way Instead
Use separate cables from the battery for your inverter and your charge controller. Run the inverter cables directly to one battery post and the controller cables to the other post.
If you have a battery bank with multiple batteries, connect the inverter to one battery and the controller to a different battery. This spreads the load evenly across your bank.
For extra safety, I use a bus bar between my battery and all my devices. This gives each device its own dedicated connection point and keeps everything organized.
Why This Simple Fix Saves You Money
Heat is the number one enemy of battery terminals and wiring. When connections get hot, they corrode faster and lose efficiency over time.
By giving each device its own path to the battery, you reduce resistance and keep everything running cool. Your batteries will last longer and your system will work better.
I remember sitting in my driveway frustrated because my inverter kept shutting off randomly. It was just a loose connection from heat expansion that I could have prevented with proper wiring.
If you are worried about making these same wiring mistakes and want a system that just works, what I sent my brother to buy was a complete wiring kit that comes with all the right cables and connectors.

- [ 30A Solar Charge Controller ]: The solar charger controller compatible...
- [ Smart Monitoring ]: Features built-in Bluetooth for easy operation and...
- [ Battery Type ]: The charge regulator is suitable for lead-acid batteries...
The One Extra Step That Keeps Your System Running for Years
Here is the tip I wish every beginner knew from day one. Always install a fuse or circuit breaker between your battery and your inverter, as close to the battery as possible.
I know it sounds like an extra hassle, but this simple device can save your entire system from a catastrophic short circuit. A short in your inverter wiring can dump hundreds of amps instantly and start a fire.
I once had a wire chafe against the metal frame inside my RV while driving down a bumpy road. The fuse blew instantly and I did not even notice until I stopped for the night.
What Size Fuse Actually Protects Your Gear
Take your inverter’s continuous wattage rating and divide it by your system voltage. For a 1000-watt inverter on 12 volts, that gives you about 83 amps of continuous draw.
Multiply that number by 1.25 to get your minimum fuse size. In this example, you need at least a 100-amp fuse. Round up to the nearest common size if needed.
I run a 150-amp fuse on my 1500-watt inverter setup because it gives me a little headroom for startup surges. The fuse protects the wire, not the inverter, so match it to your cable size.
How to Test Your Fuse Without Guessing
Look at the wire gauge running from your battery to your inverter. A 4-gauge cable typically handles up to 150 amps safely over short distances.
Your fuse should always be rated lower than your wire’s maximum capacity. This ensures the fuse blows before the wire ever gets hot enough to melt its insulation.
I keep a spare fuse taped to the inside of my battery box. That way I am never stranded without power because of a blown fuse on a camping trip.
My Top Picks for Connecting an Inverter to a Solar Charge Controller
After testing several controllers on my own RV and helping friends with their setups, I have two clear favorites. These are the ones I would buy again without hesitation.
Renogy Rover 40A MPPT Solar Charge Controller — Reliable Workhorse for Most Systems
The Renogy Rover 40A is the controller I personally run on my travel trailer. I love how the built-in LCD screen shows me battery voltage and solar input at a glance without needing an app. It is perfect for anyone with a 12V system under 600 watts who wants plug-and-play reliability.
The only trade-off is that it does not support Bluetooth out of the box, so you need an extra module for phone monitoring.

- Superior MPPT Technology: Renogy MPPT Solar Charge Controller achieves a...
- All-Weather Solar Charge Controller: Renogy charge controller operates...
- Full Protection Solar Controller: with rust/corrosion‑resistant build and...
ELUSH 100A MPPT Solar Charge Controller 12V 24V 36V 48V LCD — Heavy-Duty Power for Big Systems
The ELUSH 100A controller is what I recommended to my neighbor when he built his off-grid cabin. What impressed me most is the massive 100-amp capacity that lets him run a 2000-watt inverter without breaking a sweat. This controller is ideal for larger homes or workshops running 24V or 48V battery banks.
The only honest downside is that the manual could be clearer, but a quick YouTube search solves that easily.

- 【Superior MPPT Technology】 This 100A MPPT solar controller is equipped...
- 【Versatile Design】 The controller features a multi-function LCD with a...
- 【Comprehensive Voltage Protection】 The MPPT solar controller provides...
Conclusion
The single most important thing to remember is that your inverter connects to the battery, not to the charge controller. Getting this one detail right keeps your equipment safe and your system running smoothly.
Go check your wiring setup right now and make sure your inverter has its own dedicated cables running to the battery terminals. It takes five minutes and could save you from a costly replacement next week.
Frequently Asked Questions about Can I Connect an Inverter to a Solar Charge Controller?
What happens if I connect my inverter directly to the charge controller output?
Connecting an inverter directly to the charge controller output will likely damage the controller. The controller is not designed to handle the high current draw that an inverter demands.
In the best case, the controller will shut down and stop working. In the worst case, the internal components will overheat and fail completely, leaving you with a dead controller and no charging capability.
Can I use a combiner box to connect both the inverter and controller to the battery?
Yes, a combiner box or bus bar is actually a great way to organize your connections. It gives each device its own dedicated terminal and keeps wiring neat and safe.
Just make sure the bus bar is rated for the total current of all devices combined. I use a 250-amp bus bar in my system to handle both my 100-amp controller and 150-amp inverter safely.
What is the best solar charge controller for someone who needs to connect a large inverter?
If you are running a large inverter, you need a controller with high current capacity and reliable voltage regulation. The ELUSH 100A MPPT controller handles up to 100 amps and supports 48V systems, which is perfect for big inverter setups.
I recommended this controller to my neighbor who runs a 3000-watt inverter for his workshop. It has never let him down, even during heavy use. That is what I sent my brother to buy when he upgraded his system.
No products found.
Which solar charge controller won’t let me down when I add more solar panels later?
If you plan to expand your system, buy a controller with room to grow right from the start. The Renogy Rover 40A MPPT controller is a trusted choice that handles up to 600 watts of solar on a 12V system.
I have used this controller for three years without a single issue, even after adding extra panels. If you want something that just works and grows with you, these are the ones I send my friends.
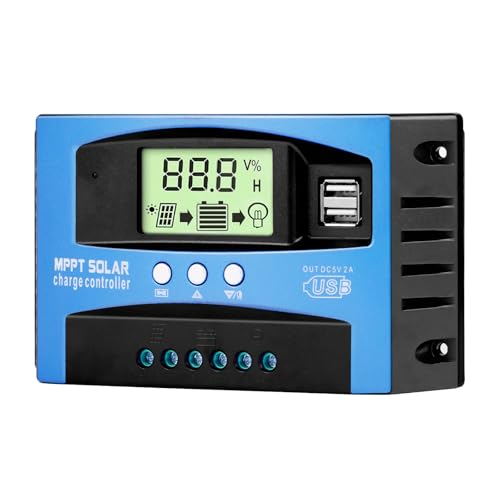
- Industrial-Grade Performance: Built with a high-reliability...
- Comprehensive LCD Display: Large screen clearly shows real-time...
- Fast Dual USB Charging: Features two USB output ports with a maximum...
Do I need a special inverter for use with an MPPT charge controller?
No, you do not need a special inverter for use with an MPPT charge controller. Any standard inverter that matches your battery voltage will work perfectly fine.
The key is making sure your inverter connects to the battery, not the controller. The MPPT controller handles charging the battery, and the inverter pulls power from the battery independently.
Can I run the inverter and charge controller at the same time?
Yes, you can run both devices at the same time without any issues. The charge controller puts power into the battery while the inverter takes power out.
This is actually how most off-grid systems work during the day. Your solar panels charge the battery through the controller while your inverter powers your loads from the same battery.