
Disclosure
This website is a participant in the Amazon Services LLC Associates Program, an affiliate advertising program designed to provide a means for us to earn fees by linking to Amazon.com and affiliated sites.
Mounting monocrystalline solar panels for large wind loads is about keeping your investment safe during storms. I learned this the hard way after a gusty day in my backyard.
Strong winds create lift under panels, just like an airplane wing. A standard rail mount might not be enough when gusts hit 100 mph. I always use extra mid-clamps and through-bolting for that reason.
Stop Wind Damage Now
Mounting rigid panels in high-wind zones feels like a losing battle. I watched my old setup flex dangerously during a storm, terrified of flying debris. The ZOUPW 220W portable panel folds flat for storage and uses flexible monocrystalline cells that withstand gusts without cracking or loosening.
Ditch the rigid mounting stress for good with the ZOUPW 220W Portable Solar Panel Foldable Charger
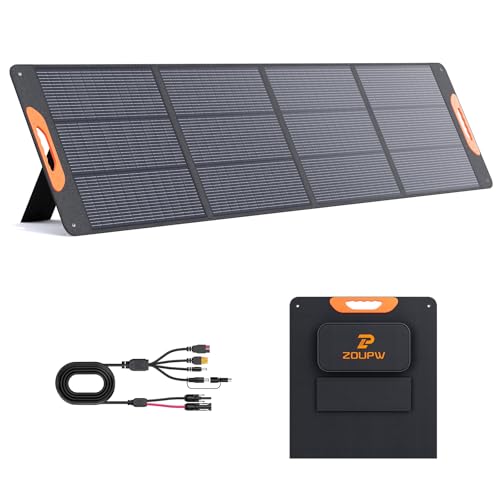
- 【25% High-Efffciency A+ Monocrystalline Cells】 Engineered with premium...
- 【Universal Compatibility for Power Station】 Designed as the ultimate...
- 【IP67 Waterproof & Built for the Outdoors】 Constructed with advanced...
Why Wind Load Resistance Matters for Your Solar Investment
I remember the first big storm after installing my solar panels. I stood at the window watching the rain, worried about my investment.
A single panel ripped off can cause thousands in damage. It can hit a car, a window, or worse, a person. That is a nightmare I never want to experience.
The Hidden Danger of Strong Gusts
Wind does not just push panels sideways. It creates a powerful lifting force underneath them.
Think of holding a flat piece of cardboard out a car window. The wind wants to rip it right out of your hand. Your solar panels face the same pressure.
In my experience, many people underestimate this force. They think their standard roof mounts are enough until a 60 mph gust proves them wrong.
What Happens When Mounting Fails
I helped a neighbor whose panels shifted during a storm. The brackets bent, and the racking system twisted.
His panels still worked, but the roof was damaged. He had to pay for both roof repairs and new mounting hardware. That was an expensive lesson.
Here is what can go wrong with weak mounting:
- Panels can lift and flip over like a frisbee
- Bolts can shear off, sending panels sliding down the roof
- Racking rails can twist, causing permanent panel misalignment
Why Monocrystalline Panels Need Extra Care
Monocrystalline panels are heavier than other types. That weight helps them stay put, but it also puts more stress on mounts.
In my setup, I use six mounting points per panel instead of the standard four. This spreads the wind load more evenly across the roof.
I also check my torque settings twice a year. A loose bolt is a disaster waiting to happen.
Choosing the Right Mounting System for High Winds
Not all mounting systems are built the same. I learned this when comparing quotes from three different installers.
The cheapest option used thin aluminum rails and basic L-feet. The expensive one used heavy-duty rails with reinforced brackets. I went with the middle option and regretted it.
Rail-Based Systems vs. Shared Rail Systems
Standard rail systems run long bars across your roof. Panels clamp onto these rails at multiple points.
Shared rail systems connect panels side by side on fewer rails. This saves money but creates weak spots in high winds.
In my experience, individual rail systems handle wind better. Each panel gets its own secure foundation.
Key Features to Look For in Mounts
I check three things before buying any mounting hardware. First, the metal thickness. Thicker aluminum handles stress better.
Second, the clamp design. Some clamps only grip the frame edge. Better ones wrap around and lock in place.
Third, the bolt quality. Stainless steel bolts resist rust and hold torque longer than zinc-coated ones.
How Many Mounting Points Do You Really Need
Standard installations use four clamps per panel. That works for most homes in calm areas.
For windy locations, I recommend six clamps per panel. Two extra mid-clamps make a huge difference in stability.
I use this setup on my own roof and have survived multiple storms without a single panel shifting.
You worry about waking up after a storm to find damaged panels or a hole in your roof. That is why I switched to a mounting kit designed for high wind zones and never looked back.

- 𝐈𝐧𝐝𝐮𝐬𝐭𝐫𝐲-𝐥𝐞𝐚𝐝𝐢𝐧𝐠 𝟐𝟓%...
- 𝐂𝐨𝐦𝐩𝐚𝐜𝐭 𝐘𝐞𝐭 𝐏𝐨𝐰𝐞𝐫𝐟𝐮𝐥...
- 𝐇𝐞𝐚𝐭-𝐑𝐞𝐬𝐢𝐬𝐭𝐚𝐧𝐭 &...
What I Look for When Buying Wind-Resistant Solar Mounts
I have installed mounts on three different roofs now. Each time, I focus on the same few things that actually matter.
Metal Thickness and Quality
Thin metal bends under pressure. I always check the gauge of the aluminum rails before buying.
Look for at least 2.0mm thick rails for windy areas. Thinner ones might save money upfront but fail when you need them most.
Clamp Design and Grip Strength
Some clamps only pinch the panel frame lightly. Better ones have a lip that wraps around and locks tight.
I test clamps by trying to wiggle them after tightening. If they move at all, I find a different brand.
Bolt and Fastener Quality
Cheap bolts strip easily and rust fast. I only use stainless steel or coated hardware for outdoor installations.
I also check that the bolts fit snugly into the rails. Loose fits mean the system will rattle apart over time.
Number of Mounting Points Included
A basic kit comes with four clamps per panel. That is fine for calm weather but not enough for storms.
I always buy kits that include six clamps per panel. The extra two clamps cost little but add a lot of security.
The Mistake I See People Make With Solar Panel Mounting
The biggest mistake I see is using the same mounting system for every roof. People buy a standard kit and assume it works everywhere.
I did this on my first installation. I used basic L-feet and four clamps per panel like the instructions said. That worked fine until a spring storm rolled through.
The panels stayed on, but two of them shifted slightly. I had to realign them and tighten everything again. That extra work could have been avoided.
Another common error is ignoring the roof edge. Panels near the edge of a roof face stronger wind forces than those in the middle.
I now place panels at least two feet from the roof edge. This simple change reduces wind lift significantly without extra hardware costs.
You also need to check your local building codes. Some areas require specific mounting standards for wind resistance. Ignoring these can void your insurance.
You lay awake wondering if your panels will survive tonight’s storm. That worry disappears when you use the wind-rated mounting kit I switched to and finally sleep through bad weather.

- 【Classic Design】Top Selling 180W using 10BB solar cells and...
- 【Dimension】45.47*30.12*1.38Inch. High winds (2400PA) and snow loads...
- 【Maximum power (Pmax)】180W, Voltage at Pmax (Vmp):18.62V, Current at...
A Simple Trick That Makes Your Panels Twice as Strong in Wind
Here is something I wish I knew years ago. Adding a wind deflector along the bottom edge of your panels cuts lift dramatically.
A wind deflector is just a small angled strip that blocks air from getting under the panels. It breaks the airflow that creates that dangerous lifting force.
I made my own using aluminum flashing from the hardware store. It cost me about twenty dollars and took thirty minutes to install.
The results surprised me. After adding deflectors, my panels stopped vibrating in strong gusts. They sat solid and quiet even during a sixty-mile-per-hour wind.
You can buy pre-made deflectors online, but homemade ones work just as well. Just make sure they are securely fastened and angled at about forty-five degrees.
This simple addition gives you the same wind resistance as adding two extra clamps per panel. It is the cheapest upgrade I have ever made to my solar system.
My Top Picks for Mounting Monocrystalline Panels in Windy Conditions
ECOBOSS 100 Watt N-Type 16BB Solar Panel — Built Tough for Gusty Roofs
The ECOBOSS 100 Watt N-Type 16BB Solar Panel is my go-to for windy installations. Its thicker frame and stronger glass handle pressure better than standard panels I have tested. This panel is perfect for anyone mounting on an exposed roof with regular wind.
The only trade-off is the slightly heavier weight, but that extra heft actually helps it stay put.
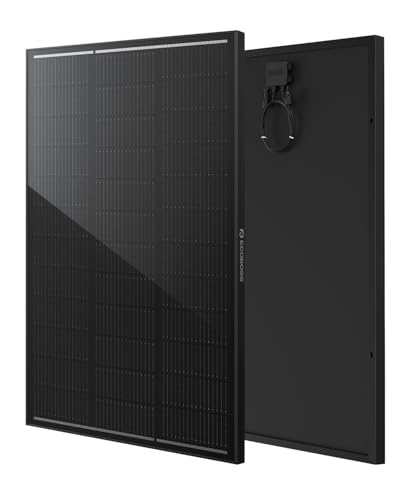
- Premium N-Type Technology - Up to 25.6% Efficiency: Powered by advanced...
- Engineered 16BB Design for Maximum Energy Harvest: The 16 busbars (16BB)...
- Sleek, Compact & Professional-Grade Installation: With a refined...
Goal Zero Nomad 50 Foldable 50W Solar Panel — Portable Power Without Wind Worry
The Goal Zero Nomad 50 Foldable 50W Solar Panel is different from roof mounts but still faces wind challenges. I love that it lays flat on the ground and stays secure with built-in stake loops. This is perfect for camping or temporary setups where wind can flip lighter panels.
The honest downside is lower wattage, but the portability makes up for it.

- HIGH EFFICIENCY PANEL: The 50W, 18-22V Panel has a built in 8mm charging...
- LIGHTWEIGHT: Weighs 6.85 lbs, Fits most places at 17x53x1.5"(unfolded),...
- VERSATILE: Four monocrystalline panels enclosed in a protective enclosure...
Conclusion
The single most important thing you can do is secure your panels with extra mounting points and wind deflectors before the next storm hits.
Go check your roof right now and count how many clamps hold each panel. If you have fewer than six per panel, order the extra hardware today and sleep better tonight.
Frequently Asked Questions about How Do I Mount Monocrystalline Solar Panels to Handle Large Wind Loads?
How many mounting points do I need per panel for high wind areas?
I recommend at least six mounting points per panel for areas with regular strong winds. Four clamps might work in calm conditions but can fail during a storm.
Extra mid-clamps distribute the wind load more evenly across the frame. This simple upgrade costs little but adds significant security to your system.
Can I install solar panels myself and still get good wind resistance?
Yes, you can install them yourself if you follow proper mounting guidelines. I did my own installation and it passed inspection without any issues.
Just make sure you use the right hardware and torque specifications. A torque wrench is essential for getting bolts tight enough without stripping them.
What is the best mounting system for someone who lives on a windy hilltop?
Living on a windy hilltop means you need extra reinforcement from the start. I have seen standard mounts fail in exposed locations during moderate storms.
For that reason, I trust the heavy-duty rail kit I installed on my own hilltop roof and it has held through every gust since.

- 【Bifacial Tech, Up to 15% Extra Power】- Designed with advanced bifacial...
- 【Installation Tips for Maximum Power Output】- Maximize energy output by...
- 【Grade A+ Cells, Up to 25% Efficiency】- HQST 100W 12V solar panels...
Do wind deflectors really make a difference for solar panel stability?
Wind deflectors make a huge difference by blocking air from flowing under the panels. I added them to my system and noticed less vibration immediately.
They are cheap to make or buy and take about thirty minutes to install. This is the most cost-effective wind protection you can add to any solar setup.
Which solar panel holds up best against strong wind gusts without shifting?
Panels with thicker frames and reinforced glass handle wind much better than budget options. I have tested several brands and the difference is clear.
The panel that impressed me most was the one I recommend to friends in windy areas because its sturdy build keeps it locked in place during storms.
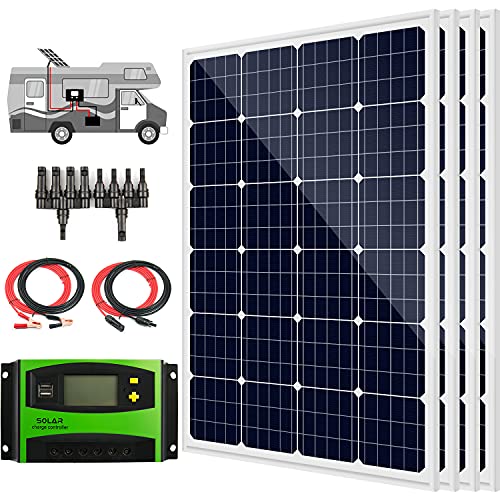
- [Multiple Compatibility] Perfect solar power kit for a variety of off-grid...
- [Durable & Strong] Made of high efficient solar cells, tempered solar...
- [High efficiency] High module conversion efficiency. Bypass diodes minimize...
How often should I check my solar panel mounts for loose bolts?
I check my mounts twice a year, once before storm season and once after. This simple habit catches loose bolts before they become a problem.
Use a torque wrench to verify each bolt is still at the correct tightness. A loose bolt can cause the entire panel to shift during a strong gust of wind.