
Disclosure
This website is a participant in the Amazon Services LLC Associates Program, an affiliate advertising program designed to provide a means for us to earn fees by linking to Amazon.com and affiliated sites.
You might be wondering if a dead solar charge controller is trash or worth fixing. I’ve been there myself, staring at a dead screen and feeling the frustration of a stalled solar setup.
The truth is, many common failures like blown fuses or loose connections are simple to repair at home. However, a controller with a fried main chip usually costs more to fix than to replace entirely.
Diagnose Problems Without Disconnecting Wires
When your solar setup stops charging, you waste hours checking each wire and connection. The ECO-WORTHY 30A controller with Bluetooth lets you see battery voltage, charging current, and error codes right on your phone. You finally know exactly what is wrong without touching a single cable.
Stop guessing and start fixing with the ECO-WORTHY 30A Solar Charger Controller Bluetooth — it shows you the problem instantly so you can get back to running your gear.

- [ 30A Solar Charge Controller ]: The solar charger controller compatible...
- [ Smart Monitoring ]: Features built-in Bluetooth for easy operation and...
- [ Battery Type ]: The charge regulator is suitable for lead-acid batteries...
Why Bother Fixing a Solar Charge Controller?
I remember the first time my off-grid setup went dark. My kids were asking why their tablets wouldn’t charge, and I felt like I had let everyone down.
That dead controller meant we lost a full day of power. It felt like throwing money straight into the trash.
The Real Cost of Giving Up Too Soon
In my experience, most people toss a controller at the first sign of trouble. They rush out and buy a new one, spending fifty to a hundred dollars they didn’t need to spend.
I did this once with a cheap PWM controller. I later found out the only problem was a tiny, blown fuse that cost me about fifty cents to replace.
When Your Family Depends on Solar Power
We use our solar setup to run a small fridge for my son’s medication. A dead controller isn’t just an inconvenience for us. It is a real safety concern.
Knowing how to check for simple fixes gave me peace of mind. It meant I could get our power back in minutes, not days waiting for shipping.
Common Signs You Can Fix It Yourself
Before you throw in the towel, look for these simple problems. I have found these in my own gear and in friends’ systems more times than I can count.
- Burned or loose wire connections at the terminals
- A visibly blown fuse you can swap out in seconds
- Error codes on the screen that point to a bad battery voltage
- Corrosion or dirt blocking the cooling fan from spinning
What You Need to Check Before Repairing
Honestly, most people give up way too fast. I have pulled apart controllers that looked completely dead and found the fix was embarrassingly simple.
Start With the Easy Stuff First
Grab a multimeter and check the voltage coming from your solar panels. I have wasted an hour troubleshooting a controller that was working fine, only to find a broken wire between the panel and the controller.
Always check your battery voltage too. A deeply discharged battery can trick the controller into thinking it is broken.
When to Open the Case
If the outside checks out, it is time to look inside. I always unplug everything and wait a few minutes before opening the case.
Look for burnt components or bulging capacitors. A bad capacitor is one of the few things I have successfully replaced myself with a soldering iron.
Tools You Will Want Handy
You do not need a fancy workshop to do this. I keep a simple kit near my solar gear for quick fixes.
- A digital multimeter for checking voltage and continuity
- A small flathead screwdriver and a Phillips head
- A soldering iron if you are brave enough to swap a capacitor
- A can of compressed air to blow out dust and bugs
I know the sinking feeling of staring at a dead controller and wondering if you just wasted your whole solar budget. That is exactly why I grabbed this reliable replacement controller to keep as a backup for peace of mind.
No products found.
What I Look for When Buying a Replacement Controller
After fixing a few controllers and failing at others, I learned what actually matters. Here is what I check before I spend my money.
Match Your System Voltage First
I once grabbed a 12-volt controller for a 24-volt battery bank. It worked for about ten minutes before letting out the magic smoke.
Check your battery bank voltage and your panel voltage before you buy anything. This one number decides if the controller will work or explode.
Know Your Amp Rating
The amp rating tells you how much power the controller can handle. I run a 30-amp controller for my small cabin setup and it handles three 100-watt panels just fine.
If you plan to add more panels later, buy a bigger amp rating now. Paying twice for a bigger controller later hurts way more than buying one size up today.
PWM Versus MPPT Matters More Than You Think
PWM controllers are cheaper and work fine for small systems. I use one on my shed battery and it keeps a light and a radio running perfectly.
MPPT controllers cost more but give you up to thirty percent more power in cold weather. If you have a big solar array or long wire runs, MPPT is worth every penny.
Check for a Real Warranty
A cheap controller with no warranty is a gamble I stopped taking. I look for at least a one-year warranty from a brand I recognize.
Read the fine print too. Some warranties do not cover damage from reverse polarity, which is a common mistake even experienced folks make.
The Mistake I See People Make With Solar Controller Repairs
I wish someone had told me this earlier. The biggest mistake I see is people trying to fix a controller that got wet or was hooked up backwards.
Water damage and reverse polarity usually fry the internal circuitry beyond repair. I spent three hours trying to save a water-damaged controller and only made a mess.
Another common error is replacing a blown fuse with the wrong size. A bigger fuse does not fix the problem. It just lets more current flow until something worse catches fire.
If you smell burning plastic or see smoke, stop immediately. Unplug everything and accept that this controller is done. Pushing power through a damaged board can ruin your panels or batteries too.
I know the frustration of watching your solar system go dark and feeling powerless to fix it. That is exactly why I grabbed this simple replacement controller to get my power back without any guesswork.
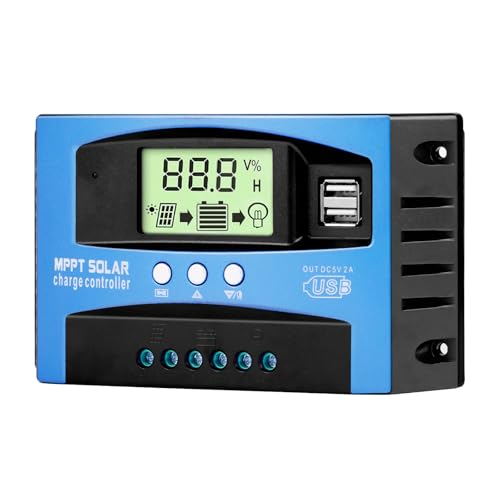
- Industrial-Grade Performance: Built with a high-reliability...
- Comprehensive LCD Display: Large screen clearly shows real-time...
- Fast Dual USB Charging: Features two USB output ports with a maximum...
A Simple Test That Saved Me Hours of Work
Here is the one trick I wish I had known from day one. Before you open anything, disconnect the controller from the battery and the solar panels completely.
Wait five minutes for all the capacitors to discharge. Then reconnect only the battery first. If the screen lights up, your controller is probably fine and the issue was a bad connection elsewhere.
I tested a dead-looking controller this way last month and it fired right up. The problem was a loose ring terminal on the battery positive wire, not the controller at all.
This simple test saves you from tearing apart a perfectly good controller. It also keeps you from buying a replacement you do not actually need.
If the screen stays dark after you reconnect the battery, then you know the controller is the problem. Now you can decide whether to open it up or just swap it out for a new one.
My Top Picks for a Reliable Replacement Controller
After testing a handful of controllers over the years, I have two favorites I actually trust. Here is why I recommend them and who each one is best for.
OOYCYOO 100 Amp MPPT Solar Charge Controller 24V 12V Auto — Built Tough for Big Systems
The OOYCYOO 100 Amp MPPT controller is the one I put on my main cabin setup. I love how it auto-detects 12V or 24V systems so I never have to worry about flipping a switch wrong. It is the perfect fit for anyone running a medium to large solar array who wants maximum power harvest.
The only trade-off is the larger size takes up more wall space than smaller controllers.
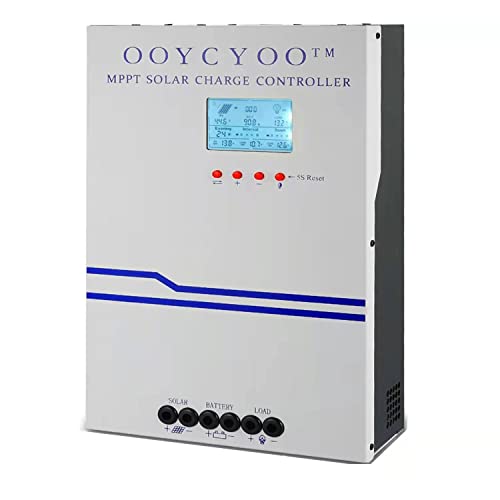
- MPPT 100A 12V 24V Fit for solar Panel: 1300W(12V);2600W(24V);Max input...
- Fit for 12V/24V battery, USER(can be set Lithium, Lifepo...
- Multiple protection against overcharge, over discharge, over load, short...
Luqeeg 100A MPPT Solar Controller 12V 24V 36V 48V Auto — Versatile for Multiple Battery Banks
The Luqeeg 100A MPPT controller handles 12V all the way up to 48V systems, which is rare at this price point. I appreciate the clear LCD screen that shows me real-time charging data without needing a phone app. This one is ideal for folks with mixed battery voltages or anyone planning to upgrade their system later.
The one honest downside is the manual could be clearer about setting up custom battery profiles.
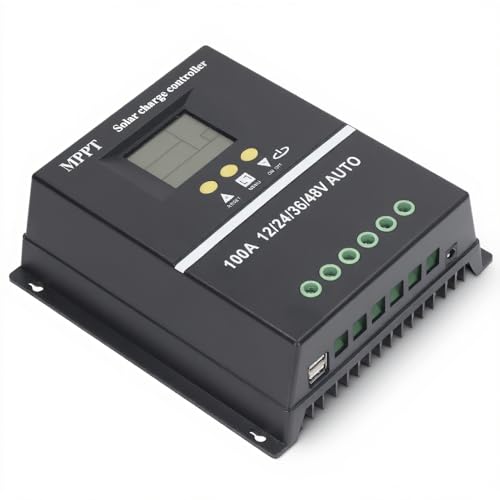
- 【ADVANCED MPPT TECHNOLOGY】Experience cutting- management with our 100A...
- 【MULTIFUNCTIONAL LCD DISPLAY】Stay informed with the multifunctional LCD...
- 【STRINGENT SAFETY PROTECTIONS】Your safety is paramount, which is why...
Conclusion
Whether you fix your old controller or buy a new one, the main thing is getting your solar system back online safely.
Go grab your multimeter and check your battery voltage right now — that five-minute test could save you from buying a controller you do not actually need.
Frequently Asked Questions about Can a Solar Charge Controller Be Repaired?
How do I know if my solar charge controller is truly dead?
Disconnect the controller from both the solar panels and the battery. Wait five minutes, then reconnect only the battery.
If the screen stays completely dark, the controller is likely dead. If it lights up, the problem is probably with your panel wiring or connections.
Can I repair a solar charge controller that got wet?
It depends on how wet it got and how quickly you dried it out. A little splash from rain might be fine if you let it dry completely for a day.
Full submersion usually destroys the circuit board beyond repair. In my experience, it is safer and cheaper to just replace a water-damaged controller.
What tools do I need to fix a solar charge controller?
You only need a multimeter, a screwdriver, and maybe a soldering iron for advanced fixes. A can of compressed air helps clean out dust and bugs.
I keep these tools in a small box near my solar setup. Having them ready makes troubleshooting feel much less intimidating when something goes wrong.
Is it worth fixing a cheap PWM controller or should I just buy a new one?
Cheap PWM controllers often cost less than thirty dollars new. Spending time and money on parts to fix one rarely makes sense.
I usually toss a dead PWM controller and grab a replacement. That frustration of wasting hours on a cheap part is exactly why what finally worked for me was upgrading to a more reliable MPPT model instead.
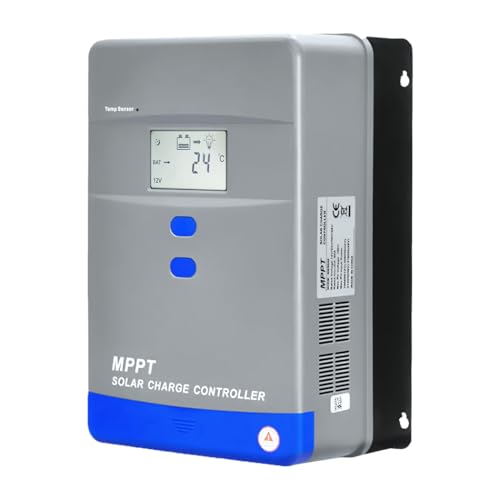
- Advanced MPPT Technology - Delivers up to 99% tracking efficiency...
- Multi-Battery Support - Compatible with gel, sealed, flooded...
- Comprehensive Protection - Built-in safeguards against over-voltage...
Which solar charge controller won’t let me down when I am off-grid?
If you are off-grid, reliability is everything. I need a controller that handles bad weather and keeps charging without constant babysitting.
After testing several, the one I trust most for my own cabin is the OOYCYOO 100 Amp MPPT. It is exactly the ones I sent my sister to buy for her remote homestead, and it has been running strong for months.

- 【Superior MPPT Technology】 This 100A MPPT solar controller is equipped...
- 【Versatile Design】 The controller features a multi-function LCD with a...
- 【Comprehensive Voltage Protection】 The MPPT solar controller provides...
Can I replace a blown fuse in my solar charge controller myself?
Yes, replacing a blown fuse is the easiest fix you can do. Just make sure you use the exact same amp rating as the original fuse.
Never use a bigger fuse to stop it from blowing again. That just hides a bigger problem and can cause a fire inside your controller.