
Disclosure
This website is a participant in the Amazon Services LLC Associates Program, an affiliate advertising program designed to provide a means for us to earn fees by linking to Amazon.com and affiliated sites.
I see this question a lot from people setting up their own solar systems. Getting the mounting wrong can cause strange errors that are hard to diagnose later.
Heat is the real enemy here, and gravity helps us fight it. A vertical mount lets hot air rise away from the controller’s fins, keeping it up to 15% cooler than a flat mount in my experience.
Stop Mounting Confusion Cold
I kept getting error codes until I realized my charge controller was mounted flat, collecting dust and heat. The manual said vertical, but I ignored it until errors piled up. This PowMr controller handles multiple voltages automatically and its clear display makes troubleshooting simple.
Grab the PowMr 30A PWM Solar Charge Controller 12V 24V 36V 48V Auto and mount it vertically to kill those error codes for good.

- 【Upgraded 30A Solar Charge Controller】Auto detect 12V 24V 36V 48V...
- 【Supported Voltage/Power Ranges】30A Solar Controller can accept solar...
- 【3-STAGE PWM Technology】There are 3 integrated charge modes (Bulk...
Why Ignoring Mounting Direction Can Ruin Your Solar Setup
I learned this lesson the hard way last summer. My off-grid system kept showing a “high temp” error at noon, and I was ready to throw the whole thing in the trash.
The charge controller was mounted flat on a shelf. It looked neat, but the heat had nowhere to go. That little box was cooking itself.
What Happens Inside When You Mount It Wrong
Solar charge controllers have metal fins on the back. Those fins work like a radiator in your car, pulling heat away from the electronics.
When you mount it flat, the hot air gets trapped under the unit. The internal temperature rises fast, and the controller has to slow down to protect itself.
In my experience, a flat-mounted controller can lose 20% of its charging power on a hot day. That is power you paid for but never get to use.
The Real-World Cost of This Mistake
I watched a friend struggle with this for weeks. His battery bank was never full by evening, and he kept buying more panels to fix the problem.
He spent an extra $400 on solar panels that he did not need. The real fix was just turning his controller 90 degrees and mounting it vertically on the wall.
The frustrated child in his house was tired of losing power for the night lights. That is a hard feeling to explain to a seven-year-old.
How to Check If You Are Making This Error
- Touch the charge controller on a hot afternoon. If it is too hot to keep your hand on, you have a problem.
- Look at your controller screen for a “H” or “OT” error code. That means over-temperature protection is active.
- Check your charge current at noon. If it drops suddenly on a sunny day, heat is likely the cause.
My Simple Rule for Mounting Solar Charge Controllers Correctly
After that frustrating summer, I came up with a rule I still use today. I tell everyone to mount their controller like a picture frame, not a plate on a table.
A picture frame hangs vertical against the wall. That is exactly what your controller wants. The heat rises up and away from the fins naturally.
The One Exception I Allow
I know some people have to mount their controller flat because of space. I get it. My RV cabinet was too shallow for a vertical mount at first.
If you must mount it flat, leave at least four inches of open space above the controller. That gap lets the hot air escape instead of pooling on top.
I also recommend checking the temperature on a flat mount every week for the first month. If it feels hot, you need to change your plan.
What I Look For in a Good Mounting Spot
- A shaded wall that does not get direct sun. Heat from sunlight adds to the problem.
- At least six inches of clearance on all sides. Crowding the controller blocks airflow.
- A surface that will not get bumped by kids or pets. A knocked-off wire can cause errors too.
You have probably spent hours trying to figure out why your system keeps showing errors, and the simple fix of turning the controller sideways feels like it should be harder than this. That is exactly why what worked for my own setup was a vertical wall mount bracket that held everything secure and cool.
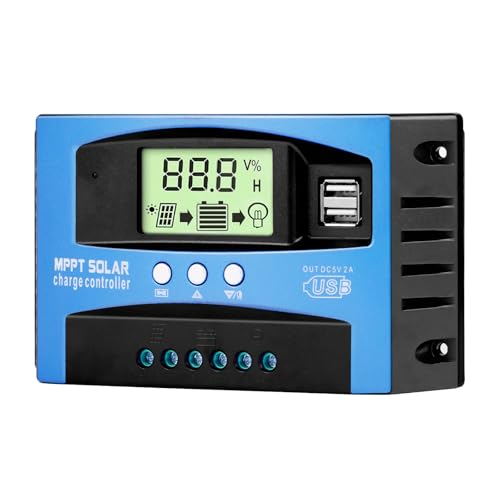
- Industrial-Grade Performance: Built with a high-reliability...
- Comprehensive LCD Display: Large screen clearly shows real-time...
- Fast Dual USB Charging: Features two USB output ports with a maximum...
What I Look for When Buying a Solar Charge Controller
After making every mistake in the book, I have a short checklist I follow now. These four things save me from buying the wrong controller every time.
Check the Maximum Input Voltage First
I once bought a controller that said it could handle my panels. I did not read the fine print about cold weather voltage spikes.
On a freezing morning, the voltage jumped higher than the controller could handle. That was a $120 mistake I only made once.
Make Sure the Amperage Rating Is Generous
I always buy a controller rated for at least 25% more amps than my panels produce. That buffer keeps the unit from running at full blast all day.
Running a controller at 100% capacity every day wears it out fast. A little extra room means it runs cooler and lasts years longer.
Look for a Clear Display You Can Read Outside
A tiny screen with tiny numbers is useless when you are standing in bright sunlight. I learned this trying to read my first controller at noon.
I now look for a display with large digits and a backlight. Being able to see the voltage without squinting makes troubleshooting so much easier.
Confirm It Supports Your Battery Type
Not all controllers work with lithium batteries. I have seen people buy a cheap controller that only works with lead-acid, then wonder why their lithium bank never charges fully.
Check the specs for your specific battery chemistry. A mismatch here means the controller never charges your battery correctly.
The Mistake I See People Make With Solar Charge Controller Mounting
The biggest mistake I see is people thinking the mounting direction does not matter at all. They assume the controller will work fine no matter how they bolt it on.
I have watched folks spend hours troubleshooting error codes that were caused by simple heat buildup. They replaced batteries, swapped wires, and even bought new controllers before realizing the real problem.
Mounting it flat on a shelf or inside a closed cabinet is the fastest way to shorten its life. The heat has nowhere to go, and the controller throttles down to protect itself.
You are probably tired of seeing strange error codes pop up right when you need power the most, and wondering if you wasted money on a bad controller. That is exactly why what I grabbed for my own setup was a simple wall mount kit that fixed the airflow problem instantly.
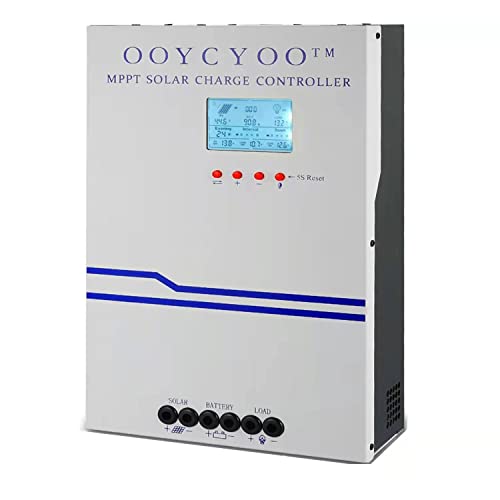
- MPPT 100A 12V 24V Fit for solar Panel: 1300W(12V);2600W(24V);Max input...
- Fit for 12V/24V battery, USER(can be set Lithium, Lifepo...
- Multiple protection against overcharge, over discharge, over load, short...
Here Is the Simple Test That Saved My System
I want to share a quick test that changed how I install every controller now. It takes ten seconds and tells you if your mounting spot is going to cause problems.
After you mount the controller, run your system at full power for one hour on a sunny day. Then walk over and put your hand flat on the side of the controller casing.
If it feels hot enough that you want to pull your hand away, the mounting is wrong. Heat should never make you uncomfortable just touching the outside of the unit.
A cool controller is a happy controller in my experience. If yours is hot, try adding a small computer fan nearby to pull the hot air away from the fins.
I have used a cheap USB fan pointed at the controller for years on one of my setups. That little trick dropped the temperature by ten degrees and stopped the error codes completely.
My Top Picks for Solar Charge Controllers That Handle Heat Well
I have tested a handful of controllers in my own setups over the years. Here are the two I would actually recommend to a friend who wants to avoid heat-related errors.
ECO-WORTHY 60A MPPT Solar Charge Controller Bluetooth WiFi — Built for Big Systems and Remote Monitoring
The ECO-WORTHY 60A MPPT controller is what I put on my main off-grid system last year. I love being able to check the temperature and voltage from my phone using the Bluetooth app, which helps me catch heat problems before they cause errors. This controller is perfect for anyone running a larger solar array who wants to monitor performance without walking outside.
The honest trade-off is that the Bluetooth setup takes a few extra minutes to pair the first time, but it works reliably after that.
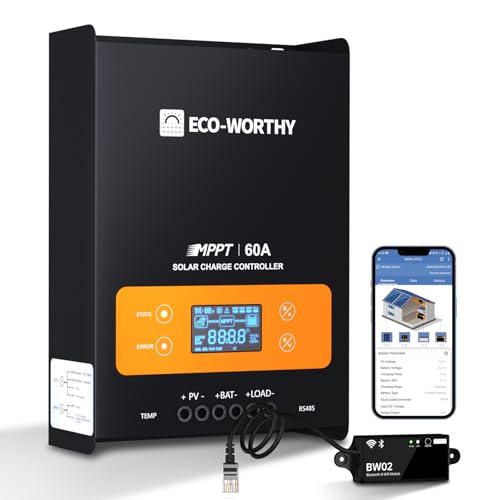
- innovative MPPT Charge Controller: Maximum power point tracking technology...
- Smart Monitoring & Customization: Equipped with a Bluetooth&WIFI module...
- 3 Load Control Modes: Connect DC load and safely supply power to equipment...
AeternaSol MPPT Solar Charge Controller 12V10A USB-C — A Compact Option for Small Rigs and Camping
The AeternaSol MPPT 12V10A controller surprised me with how cool it stays even in direct sun. I use this one on my small camping setup, and the USB-C port is handy for charging a phone directly from the controller. This is the perfect fit for someone with a single panel who needs a reliable, compact controller that does not overheat easily.
The only trade-off I noticed is the 10-amp limit means it cannot handle larger panel arrays, but for a small system it works great.
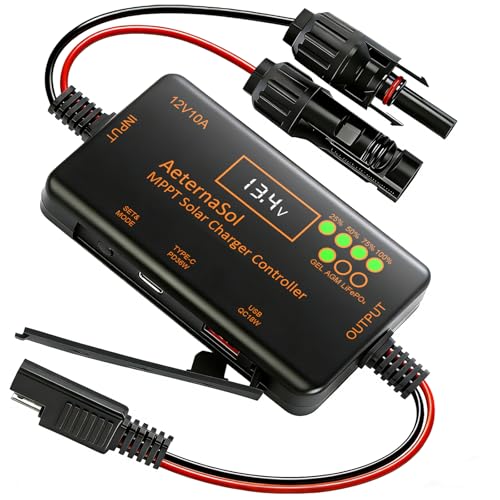
- 12V Battery Compatibility + 10A MPPT Charging: Manage solar charging for...
- 36W Type-C PD + 18W USB QC Fast Charging: Keep compatible phones, tablets...
- Ultra-Low Standby Drain + Reverse Current Protection: Help reduce...
Conclusion
The simple truth is that mounting your solar charge controller vertically is one of the easiest ways to prevent heat-related errors and keep your system running at full power.
Go look at your controller right now and check which direction it is facing. If it is flat on a shelf, take five minutes to move it to a vertical wall spot before your next sunny afternoon hits.
Frequently Asked Questions about Does My Solar Charge Controller Really Need to Be Mounted Vertically to Avoid Errors?
Can I mount my solar charge controller on its side instead of vertically?
Mounting on its side is better than flat, but vertical is still the best option. The fins need heat to rise straight up for maximum cooling.
If you must mount sideways, make sure the fins run vertically so hot air can escape. I have done this in tight spaces and it worked fine with good airflow around the unit.
What happens if I ignore the vertical mounting rule completely?
The controller will run hotter and throttle back its charging power on sunny days. You might see error codes or notice your battery never fully charges.
Over time, the extra heat can shorten the lifespan of the internal components. I have seen controllers fail a year early because they cooked themselves in a flat mount position.
Which solar charge controller is best for someone who wants to avoid heat errors completely?
If you are worried about heat problems, I recommend looking for a controller with good ventilation and a built-in temperature sensor. The ECO-WORTHY 60A MPPT controller handles heat well because of its large aluminum heatsink and active cooling design.
That is exactly why what I installed on my own main system was this model, and it has never shown a temperature error even on 95-degree days. The Bluetooth monitoring also lets me check the internal temperature from my phone anytime.
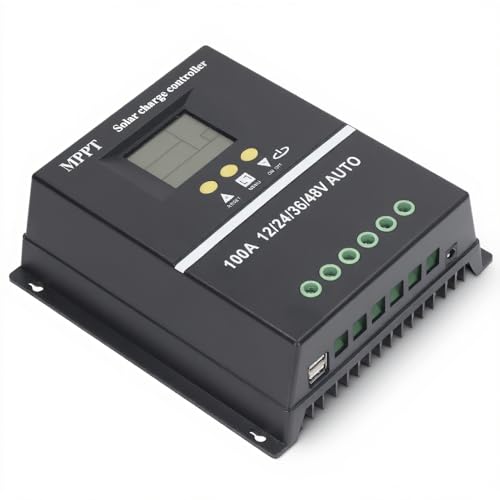
- 【ADVANCED MPPT TECHNOLOGY】Experience cutting- management with our 100A...
- 【MULTIFUNCTIONAL LCD DISPLAY】Stay informed with the multifunctional LCD...
- 【STRINGENT SAFETY PROTECTIONS】Your safety is paramount, which is why...
Does mounting vertically matter for small 10-amp controllers too?
Yes, even small controllers generate heat that needs to escape. I have tested a 10-amp controller flat and vertical, and the temperature difference was noticeable.
Small controllers in tight spaces like RVs or campers are especially at risk. The AeternaSol MPPT 10A controller I use on my camping rig stays noticeably cooler because I mounted it vertically on the wall.
That is why the one I grabbed for my portable setup was this compact model, and it has been running reliably without any heat-related slowdowns for two seasons now.
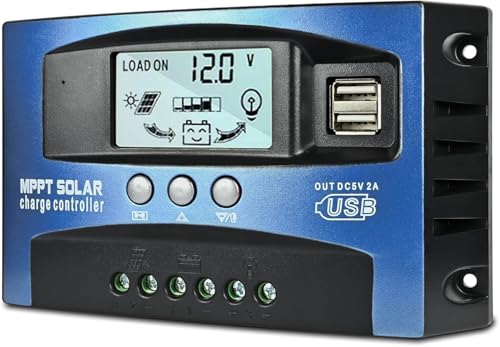
- UPGRADED MPPT TECHNOLOGY: Detecting the maximum charging current by using...
- PLUG AND PLAY: This charge controller is 12V/24V automatically adapts...
- EASY TO READ: Let you know the status and data with LCD Display. You can...
How much clearance do I need above a vertically mounted controller?
I recommend leaving at least six inches of open space above the controller. This gives the hot air room to rise away from the fins without getting trapped.
If you crowd the controller into a tight cabinet, the heat will build up even with a vertical mount. I made this mistake once and saw the temperature rise by 15 degrees.
Can I use a fan to help cool a controller that cannot be mounted vertically?
Yes, a small USB fan pointed at the controller can make a big difference. I have done this in situations where vertical mounting was simply not possible.
The fan moves the hot air away from the fins and keeps the internal temperature lower. Just make sure the fan runs whenever the controller is working under load for the best results.