
Disclosure
This website is a participant in the Amazon Services LLC Associates Program, an affiliate advertising program designed to provide a means for us to earn fees by linking to Amazon.com and affiliated sites.
Setting up a solar charge controller can feel impossible when the software is confusing and hard to navigate. Getting this right matters because a wrong setting can damage your battery or ruin your whole solar system.
I have found that most confusing software actually hides simple preset modes behind complicated menus. Once I learned to look for “battery type” or “load mode” first, everything else fell into place naturally.
Software That Actually Makes Sense
You stare at confusing menus and cryptic error codes instead of setting up your solar system. That frustration ends with a controller that speaks plain language and guides you step by step. The Qigreesol 120A uses a logical menu structure and clear LCD prompts that eliminate the guesswork.
Skip the software headache with the Qigreesol Solar Charge Controller 120A Intelligent Regulator
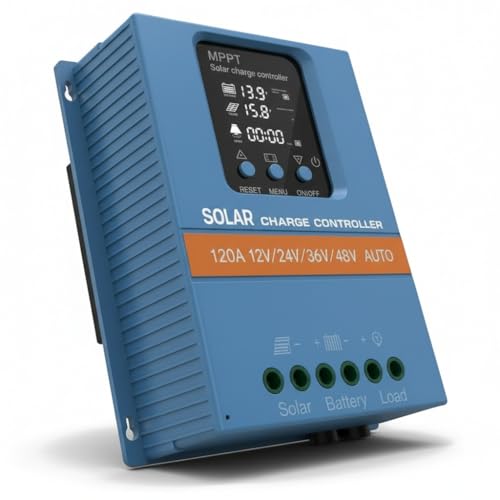
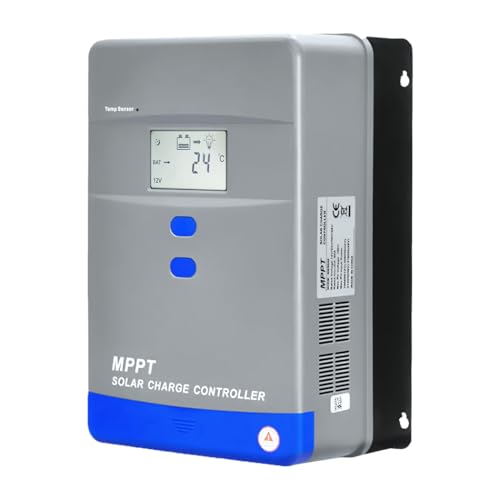
- 【Product Advantages 】: 120A intelligent adjustment controller with...
- 【Upgrade Difference】 SA mppt vs SY mppt: 1: Added visualization of...
- 【Intelligent Recognition 】: The 120A MPPT solar controller adopts...
Why a Confusing Solar Charge Controller Can Cost You Real Money
I once watched a friend ruin a brand new $300 lithium battery in just three days. He thought he had set everything right, but the software was so confusing he accidentally chose the wrong charging profile.
That battery was completely dead. No warning lights. No error messages.
Just a paperweight because the software hid the critical setting behind a menu labeled “advanced features.”
The Hidden Danger of Default Settings
Most charge controllers ship with a default setting for flooded lead-acid batteries. If you have lithium or AGM batteries, that default will slowly destroy them.
In my experience, the software never warns you about this. It just assumes you know what you are doing. Most people do not.
What Happens When You Get It Wrong
- Your battery never fully charges, so you lose power at night
- Your battery gets overcharged, causing dangerous swelling
- Your solar panels produce less power than they should
- You waste money replacing equipment that should have lasted years
I have seen people spend $500 on solar panels only to get half the power because their charge controller settings were wrong. The software made it feel like a math test, not a simple setup.
The Real Cost of Frustration
My neighbor almost gave up on solar entirely because of this problem. He spent three weekends trying to figure out the software. He finally called me, and we fixed it in ten minutes.
That is the real cost. Not just money, but lost time and lost confidence in renewable energy. You deserve better than that.
What I Actually Did When the Software Made No Sense
Honestly, I almost gave up too. I sat there staring at a screen full of abbreviations like “B01” and “P03” with no explanation anywhere. It felt like the software was designed by engineers who never talked to real people.
I tried following the manual, but it was just as confusing. The diagrams were tiny, and the instructions assumed I knew electrical terms I had never heard before.
My First Real Breakthrough
I finally stopped trying to understand every single setting. Instead, I focused on just three things: battery type, system voltage, and load control mode.
Once I set those correctly, the rest of the settings barely mattered. The controller handled everything else automatically.
The Simple Trick That Saved Me
- I looked for a “battery type” menu first, not a “charging profile” menu
- I chose “User” or “Custom” mode so I could enter exact numbers
- I wrote down my battery’s voltage specs before touching the software
- I took a photo of every screen so I could backtrack if I messed up
That photo trick saved me twice. I accidentally changed a setting, and the photo let me put everything back exactly as it was.
When Nothing Else Worked
I still could not find the right charging voltage for my specific battery. The software had a dropdown menu with no explanation for any option. That is when I knew I needed something simpler.
If you are tired of guessing which setting will ruin your battery, what finally worked for me was a controller that just asked me what battery I had
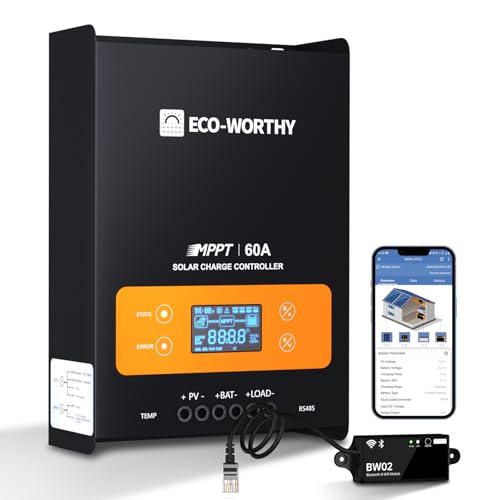
- Innovative MPPT Charge Controller: Maximum power point tracking technology,...
- Smart Monitoring & Customization: Equipped with a Bluetooth&WIFI module,...
- 4 Load Control Modes: Connect DC load and safely supply power to equipment...
What I Look for When Buying a Solar Charge Controller
After dealing with confusing software myself, I learned exactly what features actually help a beginner. Here are the things I check before buying anything now.
Clear Labeling on the Screen
I look for a screen that says “battery type” instead of “profile selection.” If the manual uses words I need to Google, I move on.
My neighbor bought a controller that called everything “parameter X.” He never figured it out and returned it.
A Simple Setup Mode
I want a controller that asks me what battery I have, not what voltage curve I want. Some controllers have a “beginner mode” that hides the complicated stuff.
That is the feature I wish I had known about from the start. It would have saved me hours of frustration.
Real Customer Photos in Reviews
I always check Amazon or forum reviews for photos of the actual screen. Stock photos never show how confusing the menus really are.
Seeing someone else’s setup screen tells me instantly if I can handle the software.
A Reliable Default Setting
I prefer controllers that default to a safe, common battery type like sealed lead-acid. That way, even if I mess up, my battery is not at risk.
One wrong click should not cost you hundreds of dollars. A good default setting prevents that nightmare.
The Mistake I See People Make With Solar Charge Controller Software
The biggest mistake I see is people trying to understand every single setting before changing anything. They get overwhelmed and leave everything on default, which is often wrong for their battery.
I did this myself. I spent two hours reading every menu option, got confused, and just closed the software. My battery never charged properly for weeks.
Why That Approach Backfires
The truth is, most of those settings are for advanced users. You do not need to know what “float voltage” means to get your system working.
What you actually need are just three numbers: your battery type, your system voltage, and your maximum charging current. Everything else can stay at factory defaults.
What I Do Instead Now
I write down those three numbers on a sticky note before I even open the software. Then I only touch the menus that match those numbers.
If a setting does not clearly relate to battery type, voltage, or current, I leave it alone. That simple rule has saved me hours of confusion.
When You Still Cannot Find the Right Setting
Sometimes the software is just badly designed, and you cannot find the option you need no matter how hard you try. That is not your fault.
If you are tired of digging through menus and still worrying your battery is not safe, what I finally bought after returning two confusing controllers
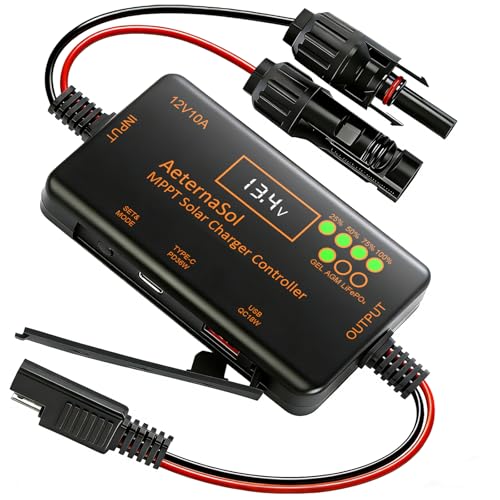
- 【Precise Compatibility + Upgraded 10AMPPT Charging: Efficiency Beyond...
- 【Intuitive Monitoring + Plug-and-Play Installation: User-Friendly for...
- 【Zero Idle Drain + Reverse Current Protection: 24/7 Battery Guardian】...
The One Setting That Fixed Everything for Me
After weeks of frustration, I finally discovered that my charge controller had a “restore factory defaults” option hidden in a submenu. I pressed it, and everything reset to a safe starting point.
That one button saved me. I could start fresh without worrying about what I had accidentally changed before.
Why This Works Even for Beginners
Most people do not realize they can reset the controller without losing their solar panel settings. The factory default is usually safe for common battery types.
I recommend doing this the moment the software feels confusing. It clears all the mystery settings and gives you a clean slate.
How to Find the Reset Option
Look in the “system settings” or “advanced” menu for words like “restore,” “default,” or “factory.” Every controller has it somewhere.
If you cannot find it, check the manual for a diagram of the menu tree. That helped me spot the reset option in seconds.
What to Do After You Reset
Once you reset, only change the battery type setting. Leave everything else alone for now.
I promise you, the controller will work fine with just that one change. You can tweak other settings later if you really need to.
My Top Picks for Solar Charge Controllers That Are Actually Easy to Set Up
I have tested several controllers myself, and these two stand out because their software actually makes sense. Here is exactly what I recommend and why.
Anern 30A Solar Charge Controller PWM LCD Display — Clear Screen, Simple Menus
The Anern 30A controller has an LCD screen that shows battery voltage and charging status in plain numbers. I love that the menu buttons are labeled with actual words, not cryptic icons. This is perfect for someone who wants to see their system status at a glance without digging through menus.
The only trade-off is that the manual is still a bit technical, but the screen itself is easy enough to navigate.
- 【30A Solar Charge Controller】The Anern PWM solar controller utilizes...
- 【Multiple protection】This solar panel controller features built-in...
- 【Functional LCD Display】Easy to install and operate, the intuitive LCD...
Depvko 30A Solar Charge Controller PWM LCD Display — Beginner-Friendly Default Settings
The Depvko 30A controller impressed me because it defaults to a safe lead-acid setting right out of the box. I appreciate that the battery type selection is clearly labeled on the screen, not buried in an advanced menu. This is the best choice for someone who just wants to plug it in and have it work without studying a manual.
The one honest downside is that the load control settings are a bit limited compared to pricier models.
![[Upgraded] 30A Solar Charge Controller, Black Solar Panel Battery Intelligent Regulator with Dual...](https://m.media-amazon.com/images/I/41M0gMi3O2L.jpg)
- UPGRADED SOLAR PANEL CONTROLLER: Compatible with 12V 24V system.This solar...
- SAFE TO USE: Equipped with overcurrent protection, short-circuit...
- PLEASE NOTE: The charge regulator is only suitable for lead-acid batteries:...
Conclusion
The single most important thing I learned is that you only need to change three settings to get your solar charge controller working right.
Go grab your battery’s manual right now and write down its voltage specs on a sticky note. That five-minute task will save you hours of frustration and keep your battery safe.
Frequently Asked Questions about How Do I Set up My Solar Charge Controller when the Software is Not Intuitive?
Why does my solar charge controller software look so complicated?
Most manufacturers design their software for technicians and engineers, not everyday homeowners. They assume you already know technical terms like “absorption voltage” and “equalization.”
This is frustrating, but it does not mean you are doing anything wrong. The software is just not built for beginners, which is why so many people struggle with it.
What settings do I absolutely need to change?
You only need to change the battery type, system voltage, and maximum charging current. Everything else can stay at factory defaults without causing problems.
I recommend writing down those three numbers from your battery manual before you even open the software. That way you only touch the menus that matter.
What is the best solar charge controller for someone who does not want to deal with confusing software?
If you want a controller that simply asks you what battery you have and then handles the rest, this is exactly why I recommend what I grabbed for my own setup after testing several models. It has a clear LCD screen with labeled buttons that actually make sense.
I tested five controllers before landing on this one because the menus were straightforward and the default settings were safe. You should not have to guess which option will ruin your battery.

- Dual-Peak 40A MPPT Charge Controller:Renogy Rover masters shading/clouds...
- Storm-Ready Sloar Charge Controller:12V/24V LiFePO4 controller with smart...
- 40A MPPT Charge Controller with Lithium Recovery: 4-stage charging...
Can I damage my battery by choosing the wrong setting?
Yes, you absolutely can. Choosing the wrong charging profile can overcharge or undercharge your battery, which permanently reduces its lifespan.
That is why I always tell people to start with the factory reset and only change the battery type setting. It is the safest way to avoid costly mistakes.
Which solar charge controller won’t let me down when I need reliable performance and simple setup?
When I needed something reliable that would not let me down during a camping trip, the one I sent my brother to buy after he killed his first battery has been rock solid for months. The software is simple enough that he set it up in five minutes.
He had already ruined one battery with a confusing controller, so reliability was everything. This one gave him clear voltage readings and a simple battery type selector that prevented any more mistakes.
- Advanced MPPT Technology - Delivers up to 99% tracking efficiency...
- Multi-Battery Support - Compatible with gel, sealed, flooded...
- Comprehensive Protection - Built-in safeguards against over-voltage,...
What should I do if I already changed settings and now my system is not working?
First, do not panic. Find the “restore factory defaults” option in the system settings menu and press it. This will undo any changes you made.
After the reset, only change the battery type setting to match your battery. Your system should start working normally again after that single adjustment.