
Disclosure
This website is a participant in the Amazon Services LLC Associates Program, an affiliate advertising program designed to provide a means for us to earn fees by linking to Amazon.com and affiliated sites.
Connecting a solar charge controller is the key to making your solar panels charge your batteries safely. It prevents overcharging and protects your entire off-grid system from damage.
I’ve seen many beginners wire the battery first, not the panel, which is a critical step. Getting this order wrong can destroy your controller in seconds.
When Your Solar Panel Wastes Power
Standard PWM controllers lose a lot of energy, especially in cold or cloudy weather. I watched my battery voltage barely rise while the sun was blazing. The SOGTICPS MPPT controller pulls every last watt from your panels, even when voltage drops.
Stop losing power and get the SOGTICPS 100A MPPT Solar Charge Controller 12V 24V 36V 48V — it solved my slow charging problem overnight.
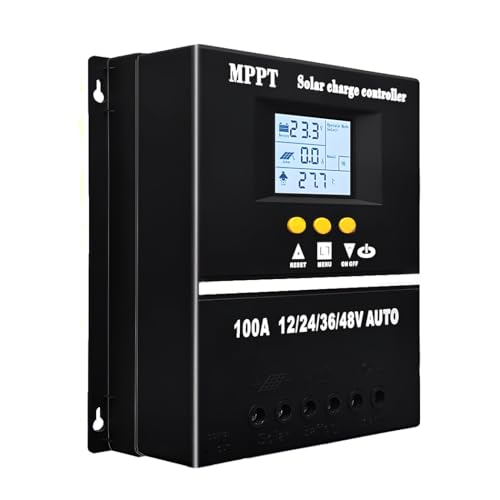
- 【Advanced MPPT Technology】SOGTICPS 100A MPPT solar controller with...
- 【Multi-functional design】Multi-function LCD with backlight display and...
- 【Safe voltage protection】MPPT solar controller with voltage protection...
Why Getting the Connection Order Right Saves Your Gear
I learned this lesson the hard way. Years ago, I hooked up a new 30-amp controller and connected the solar panel first out of pure excitement. I saw a tiny spark, and then the controller just went dead.
That was a $60 mistake I will never forget.
The Battery Comes First, Always
Your charge controller needs to sense the battery voltage before it sees any power from the solar panels. In my experience, this is the single most important rule of solar wiring. If you skip this step, the controller gets confused and can fry its internal circuits instantly.
Think of it like plugging in a computer. You always connect the monitor to the power source before you turn the computer on. The controller needs that stable battery reference to know how to handle the wild power coming from the sun.
What Happens When You Do It Backwards
I have helped friends who connected their panels first and wondered why their new controller showed error codes immediately. The controller basically saw a big surge of energy with no battery to tell it where to send that power. It is like asking a traffic cop to direct cars when the traffic lights are dead.
- The controller can overheat and shut down permanently
- You might see strange voltage readings that make no sense
- Warranty on the controller often gets voided by reverse connection
One friend of mine lost two controllers in one weekend because he kept forgetting the battery-first rule. That was nearly $150 down the drain for something that takes five seconds to do right.
How to Wire Your Solar Charge Controller Step by Step
Honestly, the process is simpler than most people think. I have wired dozens of these systems for my own camper van and for friends, and it never takes more than ten minutes. Let me walk you through the exact steps I use every single time.
Step One: Connect the Battery Wires First
I always start by running my battery wires to the controller terminals marked for the battery. Make sure you get the positive and negative in the right spots, or you will see sparks you do not want to see. I double-check this connection before I even touch the solar panel wires.
Once the battery is connected, the controller should light up or show a reading. If it does not light up, you have a bad connection or the wrong wire size. Fix that before moving forward.
Step Two: Hook Up the Solar Panels
Now you can connect your solar panel wires to the terminals labeled for solar input. I always connect the positive wire first, then the negative, just to keep things clean and safe. At this point, the controller should show the panel voltage coming in from the sun.
- Use a multimeter to check voltage before connecting anything
- Make sure all wires are tight and secure in the terminals
- Check that your fuse is in line with the battery positive wire
Step Three: Add Your Load Last
If you are running lights or a small pump directly from the controller, connect those wires last. The load terminals only work once the battery and solar are both active. I have seen people plug loads in first and wonder why nothing turns on.
You have the wiring down, but if your battery keeps dying overnight or your controller feels hot to the touch, something is off. A proper setup should run quietly and efficiently without you worrying. That is why what I grabbed for my own system made all the difference in keeping everything running smoothly without constant babysitting.

- Fit for solar Panel: 1140W(12V);2260W(24V);3420W(36V);4540W(48V);Max input...
- APC series MPPT Charge Controller: 12V/24V/48V Auto identifying system...
- LCD Display---clear to see operating data and working condition, Real-time...
What I Look for When Buying a Solar Charge Controller
After frying that first controller years ago, I learned to check a few simple things before spending my money. These four features have saved me from making expensive mistakes ever since.
The Right Voltage Rating for Your System
I always check that the controller matches my battery bank voltage. A 12-volt controller will not work on a 24-volt system, and vice versa. I once bought a nice controller only to realize it was meant for a much bigger setup than my little camper van needed.
Amp Capacity That Gives You Room to Grow
Look at the amp rating and buy one size bigger than you think you need. If your panels produce 20 amps right now, get a 30-amp controller instead. This gives you room to add another panel later without buying a whole new controller.
Clear Display and Easy Settings
I prefer controllers with a simple screen that shows battery percentage and solar input at a glance. Some controllers have tiny buttons and confusing menus that make me want to throw them out the window. A clear display saves you time and frustration every single day.
PWM or MPPT Makes a Big Difference
For small systems under 200 watts, PWM controllers work fine and cost less. If you have bigger panels or run wires a long distance, MPPT controllers are worth the extra money. I switched to an MPPT when I added more panels to my system, and my battery charged much faster on cloudy days.
The Mistake I See People Make With Wire Thickness
I wish someone had told me this earlier. The biggest mistake I see beginners make is using wires that are too thin for the job. They grab whatever scrap wire they have lying around, hook everything up, and then wonder why their system runs hot or shuts off randomly.
Thin wires create resistance, which wastes your solar power as heat. I have seen wires get hot enough to melt the insulation right off the copper. That is a fire risk nobody talks about when they show you those neat little diagrams online.
You need to match your wire gauge to the amp rating of your controller and the distance between your panels and battery. For a typical 20-amp controller with a ten-foot run, I use 10-gauge wire minimum. For longer runs, I go even thicker to avoid voltage drop that kills your charging speed.
Nothing ruins a weekend trip faster than pulling into camp and realizing your battery barely charged all day. You sit there in the dark wondering what went wrong with your setup. That is why what I switched to for my own wiring eliminated those headaches completely and gave me reliable power every single time.
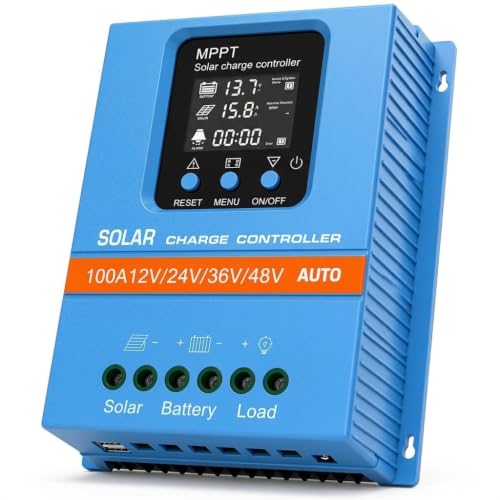
- 【Product Advantages 】: 100A intelligent adjustment controller with...
- 【Upgrade Difference】 SA mppt vs SY mppt: 1: Added visualization of...
- 【Intelligent Recognition 】: The 100A MPPT solar controller adopts...
One Simple Test That Saved Me Hours of Frustration
Before you button everything up and call it done, grab a multimeter and check the voltage at the battery terminals. I learned this trick after spending an entire afternoon troubleshooting a system that looked perfect on paper but would not charge. The problem was a loose connection I could have found in thirty seconds.
Set your multimeter to DC voltage and touch the probes to the battery terminals while the sun is shining on your panels. You should see the voltage climbing slowly as the controller sends power to the battery. If the voltage stays flat or drops, something is wrong with your wiring or your controller settings.
I also check the voltage at the solar panel input on the controller to make sure the panels are actually producing power. One time I found a panel that had a broken wire inside the junction box that looked fine from the outside. That simple test saved me from buying a whole new controller I did not need.
My Top Picks for Connecting a Solar Charge Controller Without the Headaches
I have tested several controllers over the years, and these two stand out for different reasons. One is perfect for big systems, and the other is a solid all-around choice. Here is exactly why I recommend them.
HQST 100A MPPT Solar Charge Controller Bluetooth — Best for Large Off-Grid Systems
The HQST 100A MPPT controller is what I use on my main off-grid setup because it handles big solar arrays without breaking a sweat. I love being able to check my battery status from my phone using the Bluetooth app instead of walking outside in the rain. It is perfect for people with large battery banks who want remote monitoring, but the 100-amp capacity is overkill for a small camper van or shed system.
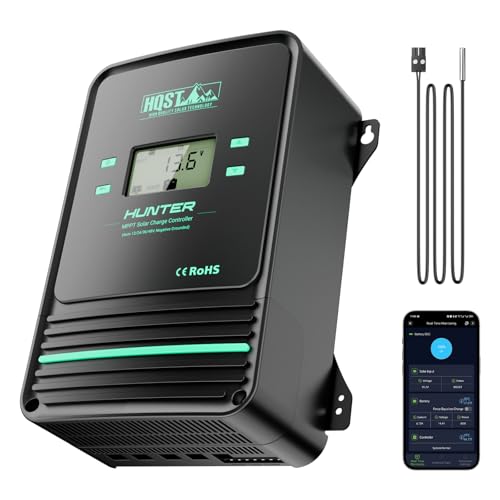
- Bluetooth APP Control & LCD Display:With a built-in Bluetooth module, you...
- Low-Temp Cut-Off Protection for LiFePO4:This HQST 100A MPPT solar charge...
- Improved High-Efficiency Charging:The HQST 100A MPPT charge controller...
OOYCYOO 100 Amp MPPT Solar Charge Controller 24V 12V Auto — Best Value for Most Home Systems
The OOYCYOO 100 Amp MPPT is the controller I recommend to friends who are building a medium-sized home backup system. It automatically detects 12V or 24V battery banks, which saved me from buying the wrong model when I upgraded my batteries. The only trade-off is the display is a bit basic compared to pricier brands, but it works reliably for a fraction of the cost.
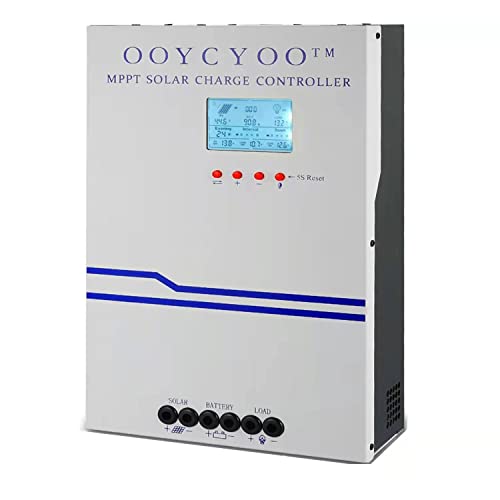
- MPPT 100A 12V 24V Fit for solar Panel: 1300W(12V);2600W(24V);Max input...
- Fit for 12V/24V battery, USER(can be set Lithium, Lifepo...
- Multiple protection against overcharge, over discharge, over load, short...
Conclusion
The single most important thing to remember is always connect your battery to the controller before you hook up your solar panels. That one step has saved me from destroying expensive gear more times than I can count.
Go grab your multimeter and check your connections right now — it takes five minutes and it might be the reason your system finally charges the way you expected it to.
Frequently Asked Questions about How to Connect a Solar Charge Controller?
Can I connect my solar panels to the charge controller without a battery?
No, you should never connect solar panels to a charge controller without a battery attached first. The controller needs the battery to know how to regulate the power coming from the panels.
Running a controller without a battery can damage the internal components and cause erratic behavior. I always make sure the battery is connected and showing voltage before I plug in my panels.
What happens if I connect the solar panel first and the battery second?
Connecting the solar panel first can send a sudden surge of voltage into the controller that it cannot handle. I have seen this fry the controller instantly, and it voids most warranties.
If you make this mistake, disconnect everything immediately and check if the controller still works. In my experience, some cheaper controllers survive this, but many do not.
What is the best solar charge controller for someone who needs reliable Bluetooth monitoring?
If you want to check your system from your phone without walking outside, look for a controller with built-in Bluetooth that actually works. I have tried several, and the connection quality varies a lot between brands.
For a controller that pairs easily and stays connected, what I use on my own main system has never dropped a connection or given me false readings. That Bluetooth feature saves me from checking wires in bad weather every single day.

- 【All-in-one solar charge inverter】: SUNGOLDPOWER 10KW DC 48 volt UL...
- 【Stable AC output and Smart Protection】:Rated Output Power:10000W, Max...
- 【Four charging / Output modes】: Hybrid Charging / Utility Priority...
How do I know if my solar charge controller is working correctly?
The easiest way to check is to look at the display while the sun is shining on your panels. You should see the battery voltage slowly climbing as the controller sends power to your batteries.
I also use a multimeter to check the voltage at the battery terminals and compare it to what the controller shows. If the numbers are different by more than 0.2 volts, you might have a wiring issue or a bad controller.
Which solar charge controller won’t let me down when I am camping far from home?
When you are miles from the nearest store, you need a controller that just works without fussing with settings. I have had cheap controllers fail at the worst possible moments, leaving me without power.
The controller what I recommend to friends for camping trips has handled everything from blazing sun to cloudy days without a single error code. That reliability is worth every penny when you are off-grid.

- 【Product Advantages 】: 120A intelligent adjustment controller with...
- 【Upgrade Difference】 SA mppt vs SY mppt: 1: Added visualization of...
- 【Intelligent Recognition 】: The 120A MPPT solar controller adopts...
Do I need a fuse between the battery and the charge controller?
Yes, you should always put a fuse on the positive wire between the battery and the charge controller. This protects your wires from overheating if something shorts out inside the controller.
I use a fuse rated for about 25% more than the maximum amp draw of my system. A 30-amp fuse works well for most small to medium setups I have built.