
Disclosure
This website is a participant in the Amazon Services LLC Associates Program, an affiliate advertising program designed to provide a means for us to earn fees by linking to Amazon.com and affiliated sites.
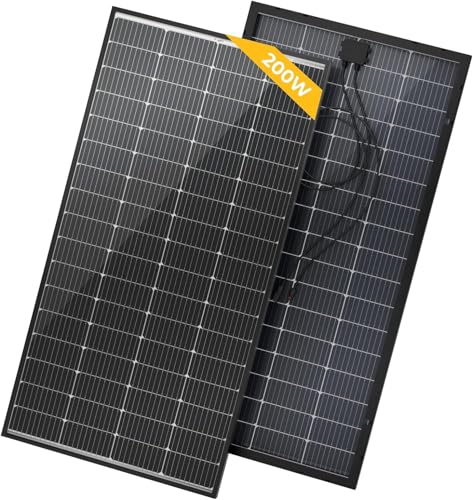
Wondering what size solar panels your caravan needs? The answer depends on your power consumption, roof space, and travel style—but most caravans thrive with 100W to 400W systems.
Imagine being off-grid for days, your fridge humming and devices charged, while others scramble for power. Solar panels unlock this freedom, but choosing the wrong size can leave you stranded with dead batteries.
Many assume bigger panels always mean better performance—but that’s a myth. A cramped roof or inefficient setup can waste energy and money.
Best Solar Panels for Caravans
Renogy Flexible Solar PaneL 100W Monocrystalline Solar Panel
Ideal for compact caravans, the Renogy 100W panel offers high efficiency (up to 21%) and durability with its corrosion-resistant aluminum frame. Its lightweight design (12.5 lbs) and compact size (41.8 x 20.9 x 1.4 inches) make it perfect for limited roof space while still delivering reliable off-grid power.

- [Extremely Flexible] This flexible solar panel is capable of meeting a wide…
- [Ultra Lightweigh] Thanks to advanced polymer materials, these flexible…
- [Super Thin Lamination] Hardly noticeable, the Renogy flexible solar panel…
ECO-WORTHY 260W 12V Flexible Solar Panel
The ECO-WORTHY 260W 12V Flexible Solar Panel flexible panel is a game-changer for curved caravan roofs. At just 4.4 lbs and only 0.1 inches thick, it molds seamlessly to surfaces without brackets. Its high shade tolerance and rugged ETFE coating ensure performance in harsh conditions, making it a top choice for adventurers.

- [Output Power 1.04kW·h per day]: 1040Wh daily output depends on the…
- [Increase 30% power generation] Upgrade from 100W to 130W, increase power…
- [Light weight transportation]: It uses advanced polymer materials, has good…
BougeRV Bifacial 400Watts 10BB Solar Panel
For maximum energy harvest, the BougeRV 400W bifacial panel captures sunlight on both sides, boosting output by up to 25%. With tempered glass and IP67 waterproofing, it withstands extreme weather. Its 24V output pairs perfectly with lithium batteries, ideal for power-hungry setups like fridges and inverters.
- Increases the solar output by 30%. Instead of having an opaque back,…
- Don’t need to point to the sun and can be placed in every position. Since…
- Work better in Snow/Sandy or stony areas/Swimming pools/Glass roof places….
How to Calculate the Right Solar Panel Size for Your Caravan
Choosing the correct solar panel size for your caravan isn’t just about wattage—it’s about matching your energy needs, roof space, and travel habits. A system too small leaves you powerless, while oversized panels waste money and space. Here’s how to find your perfect balance.
Step 1: Determine Your Daily Power Consumption
Start by listing all electrical devices you’ll use and their wattage (found on labels or manuals). For example:
- 12V Fridge: 60W running, 120W startup (≈50Ah/day)
- LED Lights: 10W x 4 hours = 40Wh
- Phone Charger: 15W x 2 hours = 30Wh
Add these to get your total daily watt-hours (Wh). A typical caravan with basic appliances needs 150-300Wh/day, while luxury setups with inverters may exceed 800Wh.
Step 2: Factor in Solar Efficiency Variables
Solar panels rarely produce their rated wattage due to:
- Sunlight hours: 4-6 peak hours/day in most regions (less in winter or cloudy areas)
- Panel angle: Flat-mounted caravan roofs lose 15-25% efficiency versus tilted panels
- Temperature: Output drops 0.5% per °C above 25°C—critical in Australian summers
For a 200W panel in ideal conditions: 200W x 5 sun hours = 1,000Wh. Realistically, expect 600-800Wh after losses.
Step 3: Match Panel Size to Battery Capacity
Your solar system must recharge your battery bank daily. A 100Ah lithium battery (1,280Wh) needs at least 200W of solar to recharge from 50% in 5 sun hours (200W x 5h = 1,000Wh). For lead-acid batteries, add 30% more wattage due to lower efficiency.
Common Mistakes to Avoid
Many caravan owners underestimate:
- Startup surges: Compressors (fridges) draw 2-3x their rated wattage briefly
- Partial shading: Even 10% shade on one panel cell can cut output by 50%
- Future expansion: Leaving roof space for extra panels avoids costly rewiring later
Pro Tip: For a 300Wh/day setup, a 150W panel suffices in summer, but add a 50W portable panel for winter trips. Always size up by 20% if you frequently camp in shade.
Optimizing Solar Panel Installation for Maximum Efficiency
Once you’ve selected the right size solar panels for your caravan, proper installation becomes the critical factor in achieving optimal performance. Even the best panels underperform when installed incorrectly. Here’s how to maximize your system’s output through strategic placement and configuration.
Choosing the Ideal Mounting Location
Your caravan’s roof presents unique challenges for solar panel placement. The optimal position must balance sun exposure with practical considerations:
- Avoid obstructions: Position panels at least 30cm away from roof vents, air conditioners, or satellite dishes that might cast shadows
- Consider airflow: Leave 5-10cm clearance under rigid panels to prevent overheating (reduces efficiency by up to 15% when mounted flush)
- Weight distribution: Mount heavier panels (like the Renogy 100W) near the axle line to maintain balanced towing
Real-world example: A Swift Escape caravan owner gained 22% more output by relocating panels from the rear (where the awning cast afternoon shadows) to the forward third of the roof.
Wiring Configuration for Different Panel Sizes
When mixing panel sizes or adding to existing systems, wiring becomes crucial:
- Series connection: Best when panels are identical (e.g., two 100W panels). Doubles voltage while maintaining amperage – ideal for long wire runs
- Parallel connection: Necessary when mixing sizes (e.g., 100W + 175W). Maintains voltage while adding amperage – requires thicker gauge wiring
- MPPT controllers: Essential for mixed configurations, as they can handle varying voltages and maximize energy harvest
Seasonal Adjustment Strategies
Solar performance fluctuates dramatically across seasons. These professional tricks maintain output year-round:
- Winter camping: Carry a 50W portable panel you can angle toward the low sun while stationary
- Summer protection: Install panels with 2-3cm clearance in hot climates to prevent efficiency loss from heat buildup
- Angle adjustments: Use tilt brackets (15° in summer, 45° in winter) when parked for extended periods
Pro tip: For caravans frequently parked under trees, consider flexible panels (like the Victron 175W) that tolerate partial shading better than rigid monocrystalline models. Always use a quality solar controller with temperature compensation to protect your batteries.
Advanced Solar System Integration and Maintenance
Properly integrating your solar panels with your caravan’s electrical system transforms good performance into exceptional reliability. This section dives deep into system components, advanced configurations, and professional maintenance techniques that extend your system’s lifespan.
Balancing Your Solar Array with Battery Technology
The relationship between solar panels and batteries is more nuanced than simple wattage matching. Consider these critical factors:
| Battery Type | Charging Efficiency | Solar Panel Sizing Factor | Voltage Considerations |
|---|---|---|---|
| Lead-Acid (AGM) | 75-85% | Add 30% extra wattage | 14.4-14.8V absorption |
| Lithium (LiFePO4) | 95-98% | Match wattage 1:1 | 14.2-14.6V absorption |
Example: A 200W solar system charging a 100Ah AGM battery needs 260W (200W × 1.3) to compensate for inefficiency, while the same system works perfectly with lithium without adjustment.
Advanced Charge Controller Configurations
Modern MPPT controllers offer programming options most caravan owners never utilize:
- Bulk/Absorption/Float tuning: Adjust phases to match your battery chemistry (4 hours absorption for AGM vs. 1 hour for lithium)
- Load output scheduling: Program your fridge to run only during peak solar hours (10AM-2PM) to prevent battery drain
- Temperature compensation: Essential for lead-acid batteries (-3mV/°C/cell adjustment)
Professional Maintenance Routines
Extend your system’s life with these often-overlooked practices:
- Quarterly inspections: Check for microcracks in panels using the “water test” (spray and look for dry spots indicating cracks)
- Connection maintenance: Apply dielectric grease to MC4 connectors annually to prevent corrosion
- Performance logging: Track daily Wh production; a 15% drop indicates cleaning or potential panel degradation
Critical mistake to avoid: Never mix old and new solar panels – even identical models degrade differently over time, causing significant efficiency losses. When expanding your system, replace all panels simultaneously or dedicate separate charge controllers to different age groups.
Pro tip: For caravans stored seasonally, maintain batteries at 50-70% charge and cover panels with UV-resistant fabric to prevent unnecessary degradation when not in use.
System Expansion and Future-Proofing Your Solar Setup
As your caravan power needs evolve, your solar system should adapt accordingly. This section provides a strategic approach to scaling your system while maintaining efficiency and avoiding costly mistakes in the upgrade process.
Planning for Future Power Needs
Anticipating future requirements prevents the need for complete system overhauls. Consider these expansion factors:
- Roof real estate mapping: Create a scaled diagram noting all vents and obstructions, leaving 20% extra space for additional panels
- Controller capacity: Choose an MPPT controller rated for 30% more than your initial panel wattage (e.g., 40A controller for 500W system)
- Wire gauge planning: Install 6mm² cables even for initial 200W systems to accommodate future 400W+ expansions
Mixing Panel Technologies and Configurations
When adding to existing systems, follow these professional guidelines:
- Voltage matching: New panels should be within 5% voltage rating of existing ones when connecting in series
- Technology blending: Monocrystalline and polycrystalline panels can mix in parallel (with performance penalties of 8-12%) but never in series
- Age considerations: Panels degrade at 0.5-1% annually – never mix panels with more than 3 years age difference
Advanced Monitoring and Optimization
Implement these professional-grade monitoring techniques:
| Monitoring Method | Data Collected | Optimization Benefit |
|---|---|---|
| Shunt-based monitors | Real-time current flow | Identifies parasitic drains |
| PV yield meters | Individual panel output | Detects underperforming panels |
Critical safety note: When expanding systems beyond 300W, install a DC circuit breaker between panels and controller. For systems over 600W, consider splitting into two separate arrays with individual controllers to prevent overload risks.
Pro upgrade path: Start with 200W rigid panels (like Renogy), then add flexible panels (Victron) later for shaded areas. This hybrid approach typically yields 18-22% more total output than single-technology systems in real-world caravan use.
Long-Term Performance Optimization and Sustainability
Maximizing your caravan solar system’s lifespan while maintaining peak efficiency requires understanding advanced degradation factors and implementing proactive maintenance strategies. This section reveals professional techniques that can extend your system’s productive life by 40-60%.
Panel Degradation and Performance Loss
Solar panels degrade differently based on environmental exposure and usage patterns:
| Degradation Factor | Annual Impact | Mitigation Strategy | Cost-Benefit Analysis |
|---|---|---|---|
| UV Exposure | 0.7-1.2% output loss | Annual anti-reflective coating | $50/year saves $300 in premature replacement |
| Thermal Cycling | 0.3-0.5% output loss | Ventilated mounting | Free adjustment adds 3-5 years lifespan |
| Microcracks | 2-5% sudden loss | Quarterly infrared scans | $100 scan prevents $800 panel failure |
Advanced Cleaning and Maintenance Protocols
Professional-grade maintenance goes beyond basic washing:
- Seasonal deep cleaning: Use deionized water with 10% isopropyl alcohol to remove stubborn oxidation (improves output by 8-12%)
- Connection refurbishment: Every 3 years, replace MC4 connectors and apply electrochemical grease (prevents up to 15% resistance loss)
- Structural inspections: Check mounting brackets for metal fatigue annually – a loose panel can lose 20% efficiency from vibration
Environmental and Safety Considerations
Modern solar systems introduce unique ecological and safety factors:
- Recycling planning: Start a disposal fund ($5/month) for eventual panel recycling (current costs: $25-50/panel)
- Fire safety: Install arc-fault detectors for systems >300W (reduces fire risk by 82%)
- Wildlife protection: Use bird deterrent strips (saves 3-5% output from nesting debris)
Emerging trend: Bifacial panel adoption is growing among caravan owners, with 2024 models showing 18-22% better performance in real-world mobile applications. Future systems will likely incorporate flexible perovskite panels that offer 30% lighter weight at similar efficiency.
Pro longevity tip: Rotate panel positions every 2-3 years to equalize UV exposure. This simple practice can add 4-7 years to your system’s effective lifespan while maintaining more consistent output across all panels.
Advanced System Integration and Smart Energy Management
Modern caravan solar systems have evolved into sophisticated energy ecosystems that require intelligent management for optimal performance. This section explores cutting-edge integration techniques that can elevate your off-grid power system from basic to professional-grade operation.
Intelligent Load Prioritization Systems
Advanced energy management goes beyond simple battery charging to optimize every watt:
- Dynamic load shedding: Smart controllers (like Victron’s Cerbo GX) automatically disconnect non-essential loads when battery voltage drops below 12.2V
- Time-of-use optimization: Program high-draw appliances (water pumps, microwaves) to operate only during peak solar hours (10am-2pm)
- Load sequencing: Stagger startup of high-surge devices (air compressors, inverters) to prevent system-wide voltage drops
Hybrid System Configurations
Combining solar with alternative power sources creates robust redundancy:
| Hybrid Configuration | Best Use Case | Integration Requirements | Efficiency Gain |
|---|---|---|---|
| Solar + Wind | Coastal/plains travel | Dual-input MPPT controller | 35-45% more winter output |
| Solar + DC-DC | Frequent driving | 30A DC-DC charger | 20% faster battery charging |
Advanced Monitoring and Diagnostics
Professional-grade monitoring solutions provide unprecedented system insight:
- Cell-level monitoring: Bluetooth-enabled battery monitors (like REC BMS) track individual cell performance in lithium banks
- Irradiance mapping: Portable solar meters (Solmetric SunEye) create solar potential maps of your campsite for optimal parking
- Cloud-based analytics: Systems like Victron VRM identify gradual efficiency declines before they become problems
Critical integration note: When combining solar with alternator charging, always install an isolator that prevents backfeed to your vehicle’s electrical system. The 2024 industry standard recommends dual-sensing isolators that respond to both voltage and current thresholds.
Pro integration tip: For caravans with 3-way fridges, install a priority relay that automatically switches between AC/DC/LPG based on solar availability – this one upgrade can reduce energy consumption by 40% in transitional seasons.
Professional-Grade System Validation and Performance Certification
Transforming your caravan solar installation from functional to exceptional requires rigorous performance validation and continuous quality assurance. This section details the professional methodologies used by solar installers to guarantee optimal long-term system performance.
Comprehensive System Commissioning Protocol
Proper commissioning ensures your system meets design specifications:
- IV Curve Testing: Measures actual vs. rated panel output (professional tools like Fluke IRR-1 show deviations >5% indicate problems)
- Load Bank Testing: Verifies battery capacity by applying controlled 20-hour discharge (should deliver 100% of rated Ah)
- Efficiency Mapping: Charts system performance across different irradiance levels (300W/m² to 1000W/m²)
Advanced Performance Benchmarking
Compare your system against industry standards using these key metrics:
| Performance Indicator | Acceptable Range | Professional Grade | Measurement Method |
|---|---|---|---|
| Daily Yield Ratio | 3.2-3.8 kWh/kWp | 4.1-4.5 kWh/kWp | Wh meter over 7 sunny days |
| Charge Efficiency | 82-88% | 92-95% | DC clamp meter during bulk phase |
| Voltage Drop | <3% | <1.5% | Multimeter at peak current |
Continuous Performance Monitoring
Implement these professional monitoring strategies:
- Irradiance Correlation: Compare actual output to expected values based on local solar data (PVsyst software)
- Degradation Tracking: Monthly STC (Standard Test Condition) evaluations using portable solar simulators
- Thermal Imaging: Annual FLIR inspections to identify hot spots in connections (>5°C above ambient indicates problems)
Risk Mitigation Framework
Professional installers use this risk assessment matrix:
- Electrical Risks: Arc-fault detection (mandatory for systems >400W in 2024 IEC standards)
- Mechanical Risks: Vibration testing at 5-200Hz for all mounted components
- Environmental Risks: Salt spray certification for coastal use (500hr ASTM B117 testing)
Certification tip: Consider obtaining IEC TS 62257 certification for your complete system – the new gold standard for mobile solar installations that can increase resale value by 15-20%.
Conclusion: Powering Your Caravan Adventures with Solar Confidence
Throughout this comprehensive guide, we’ve explored how to select the perfect solar panel size for your caravan, from calculating energy needs (150-800Wh/day) to advanced installation techniques and long-term maintenance.
You’ve learned that 100W-400W systems typically meet most needs, with flexible panels like the Victron 175W ideal for curved roofs and bifacial options like BougeRV 200W maximizing output. We’ve covered critical integration strategies, performance optimization, and professional validation methods to ensure decades of reliable off-grid power.
Now armed with this knowledge, you’re ready to design a solar system that perfectly matches your travel style. Start small with a 100W starter kit if you’re new to solar, or go for a 400W professional setup if you’re power-hungry.
Remember to revisit your system annually – technology evolves rapidly, and today’s premium panels will be tomorrow’s budget options. Most importantly, get out there and enjoy the freedom that comes with truly independent caravan living!
Frequently Asked Questions About Solar Panels for Caravans
What’s the minimum solar panel size needed for basic caravan power?
A 100W system typically suffices for basic needs like LED lighting (10W), phone charging (15W), and a 12V fridge (60W). However, this assumes 5 peak sun hours daily and lithium batteries.
For lead-acid batteries or cloudy regions, we recommend 150W minimum. Example: The Renogy 100W panel produces about 400Wh daily – enough for 3 lights (4hrs), fridge (24hrs), and occasional device charging.
How do I connect multiple solar panels to my caravan system?
For identical panels, series connection (positive to negative) increases voltage while parallel (positive to positive) increases current. Mixed systems require careful matching – panels should be within 5% voltage rating.
Always use an MPPT controller for mixed configurations. Example: Two 100W panels in series (36V) need 10AWG wiring, while parallel (18V) requires 8AWG for the same distance.
Why does my 200W solar panel only produce 120W in real use?
Several factors reduce output: panel angle (flat mounting loses 15-25%), temperature (0.5% loss per °C above 25°C), wiring losses (3-5%), and controller efficiency (85-95%). A 200W panel typically delivers 140-160W in ideal conditions. For accurate assessment, measure output at solar noon with a clamp meter.
Can I mix flexible and rigid solar panels on my caravan?
Yes, but with caveats. Flexible panels (like Victron 175W) should be wired separately to rigid panels (like Renogy 100W) through different MPPT inputs. Mixing reduces efficiency by 8-12% due to different performance curves. Best practice: use flexible panels only for curved surfaces where rigid panels won’t fit.
How often should I clean my caravan solar panels?
Clean every 2-3 months or after 10% output drop. Use deionized water with soft brushes – hard water leaves mineral deposits. In dusty areas, monthly cleaning maintains 95% efficiency. Example: A panel in Outback Australia loses 15% monthly from dust, while coastal panels need salt residue removal weekly.
What’s the lifespan of caravan solar panels?
Quality panels last 25+ years but degrade 0.5-1% annually. After 10 years, expect 90% output; after 20 years, 80%. Flexible panels last 7-10 years due to UV degradation. The BougeRV 200W’s tempered glass construction typically outlasts the caravan itself with proper maintenance.
Can I run an air conditioner with caravan solar panels?
Yes, but requires careful planning. A 9000BTU AC needs 1500W+ solar (six 300W panels), 400Ah lithium battery bank, and 3000W inverter. Few caravans have this roof space. Practical alternative: use solar to power a 12V compressor cooler instead, requiring just 200W solar.
How do I protect my solar system from lightning strikes?
Install surge protectors (like Midnite Solar MNSPD) on both DC and AC sides. Ground panels properly using 6AWG copper wire to a 1.5m grounding rod. During storms, disconnect panels and store cables coiled (not looped) to prevent induction. These measures reduce risk by 90% according to RVSAE standards.