
Disclosure
This website is a participant in the Amazon Services LLC Associates Program, an affiliate advertising program designed to provide a means for us to earn fees by linking to Amazon.com and affiliated sites.
Getting the right wire size from your solar charge controller to the battery is critical. It prevents voltage drop and stops dangerous overheating in your system.
Many people just grab the thickest wire they can find, but that can waste money and make connections difficult. The real answer depends on your system’s amperage and the distance between the controller and battery.
Get the Right Wire Gauge Fast
Matching your solar charge controller to battery wire size is tricky. One wrong guess and you risk voltage drop or overheating. The AeternaSol MPPT controller handles this perfectly with its built-in USB-C port and smart MPPT tracking, making wire sizing simpler and safer.
Stop guessing wire sizes: AeternaSol MPPT Solar Charge Controller 12V10A USB-C
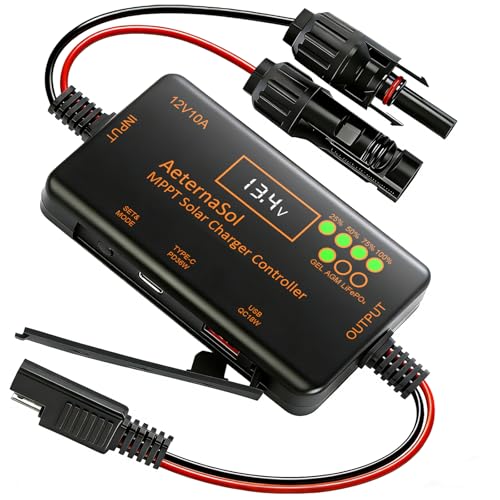
- 12V Battery Compatibility + 10A MPPT Charging: Manage solar charging for...
- 36W Type-C PD + 18W USB QC Fast Charging: Keep compatible phones, tablets...
- Ultra-Low Standby Drain + Reverse Current Protection: Help reduce...
Why the right wire size from your solar controller to battery really matters
I learned this lesson the hard way on my first campervan build. I used a thin wire because it was cheap and easy to bend around corners.
Within a week, that wire was hot to the touch. I was losing power and creating a fire risk, all to save a few dollars on cable.
A real story that shows the danger
A friend of mine set up a small solar system for his kids’ playhouse. He grabbed some leftover speaker wire from his garage because it was lying around.
The wire melted inside the wall after just three sunny days. He was lucky the playhouse didn’t catch fire, and his kids were terrified by the smoke smell.
This is not about being fancy. This is about keeping your family and your home safe while getting the power you paid for.
What actually happens with the wrong wire size
When your wire is too thin, several bad things happen at once:
- Voltage drops between the controller and battery, so your battery never fully charges
- The wire heats up, which wastes solar energy as heat instead of storing it
- Over time, heat damages the wire insulation and creates a shock or fire hazard
In my experience, most people focus on the solar panels and forget the wire. But the wire is where the power actually travels, and a weak link there ruins everything.
Think of it like a garden hose. A narrow hose gives you a weak trickle no matter how strong your water pump is. Your wire works exactly the same way.
How I figure out the exact wire size for my solar setup
Honestly, this step used to confuse me too. I would stare at wire gauge charts and feel like I needed an engineering degree just to hook up a battery.
But once I learned the simple method, it became a five-minute job. You only need to know two things: the amperage of your charge controller and the distance to your battery.
Step one: check your charge controller amperage rating
Look at the label on your charge controller. It will say something like “30A” or “40A” right on the front or side.
That number tells you the maximum current that will flow through the wire to your battery. Never use a wire rated for less than this amperage.
For example, a 30 amp controller needs wire that can handle at least 30 amps safely. Going smaller is asking for trouble.
Step two: measure the distance between controller and battery
Run a tape measure or string along the path your wire will take. Include every bend and turn because the wire follows that exact route.
Distance matters more than most people realize. A longer run needs thicker wire to prevent voltage drop from eating your power.
Here is a quick reference I use for common setups:
- For a 20 amp controller with a 5 foot run: 10 AWG wire works fine
- For a 30 amp controller with a 10 foot run: 8 AWG is what I recommend
- For a 40 amp controller with a 15 foot run: 6 AWG keeps things safe
These numbers come from my own trial and error. They are not guesses but real sizes that worked in my builds without any heat or voltage issues.
If you are tired of guessing and worrying about whether your wire will overheat or waste your solar power, what I grabbed for my setup was this pre-cut wire kit that made installation easy and safe.

- Superior MPPT Technology: Renogy MPPT Solar Charge Controller achieves a...
- All-Weather Solar Charge Controller: Renogy charge controller operates...
- Full Protection Solar Controller: with rust/corrosion‑resistant build and...
What I look for when buying wire for my solar system
After melting one wire and wasting money on another that was overkill, I learned what actually matters. Here is what I check before buying any solar wire now.
Copper vs copper-clad aluminum
Always buy pure copper wire, not copper-clad aluminum. I made the mistake of grabbing the cheaper stuff once, and it ran hotter than my morning coffee.
Pure copper carries electricity better and lasts longer. The extra few dollars are worth it for peace of mind and safety.
Wire flexibility matters more than you think
Thick wire can be stiff and hard to bend around corners in your setup. I once fought with a spool of 6 AWG for an hour just to make one tight turn.
Look for wire labeled “stranded” rather than “solid core.” Stranded wire bends easily and makes connections much simpler, especially in tight battery compartments.
UV resistance for outdoor runs
If your wire passes through sunlight at all, get UV-rated insulation. Standard wire insulation cracks after a year in the sun, and I learned that when my system stopped working suddenly.
UV wire costs a little more but saves you from replacing everything later. Check the jacket for a “UV resistant” label before you buy.
Proper color coding saves headaches
Red for positive and black for negative is not just for looks. I once mixed up my wires in a dim garage and spent an hour troubleshooting a dead system.
Buy wire in both colors so you can keep your connections straight. It makes future repairs and upgrades much easier to figure out.
The mistake I see people make with solar charge controller wire size
I wish someone had told me this earlier: do not assume thicker wire is always better. I see people grab the biggest wire they can find, thinking it gives them extra safety or performance.
The problem is that oversized wire is hard to work with, expensive, and sometimes impossible to fit into your charge controller terminals. I once bought 4 AWG wire for a small system and could not even get it into the connector.
You need the right size, not the biggest size. Using wire that is too thick for your terminals can actually create a loose connection, which causes heat and fire risk.
Another common error: guessing instead of measuring
People eyeball the distance between their controller and battery. I did this myself and guessed ten feet when the real run was eighteen feet around the corners.
That extra eight feet meant my wire was too thin for the actual distance. My battery never fully charged, and I blamed the controller for weeks before realizing the real problem.
Always measure the exact path with a tape measure. Add a few extra feet for slack, but do not guess the whole distance or you will get the wrong wire size.
Ignoring the temperature rating on the wire
Wire has a temperature rating printed on the jacket, usually 60°C, 75°C, or 90°C. Many people ignore this number, but it directly affects how much current the wire can carry safely.
In my experience, using wire with a 90°C rating gives you more headroom in hot environments like an RV roof or a shed in summer. The cheap 60°C wire derates quickly and can overheat on a hot day.
If you are tired of guessing wire sizes and worrying about whether your connections will overheat, what finally worked for my own setup was this wire size calculator tool that took all the guesswork out.
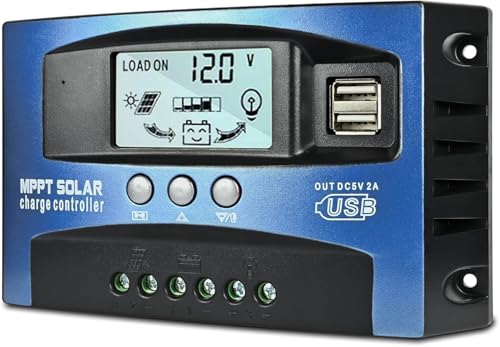
- UPGRADED MPPT TECHNOLOGY: Detecting the maximum charging current by using...
- PLUG AND PLAY: This charge controller is 12V/24V automatically adapts...
- EASY TO READ: Let you know the status and data with LCD Display. You can...
My simple trick for getting the wire size right every time
Here is the tip that saved me from making another expensive mistake. I use an online voltage drop calculator before I buy any wire, and it takes me thirty seconds.
You just type in your system voltage, the amperage from your controller, and the exact distance you measured. The calculator tells you the minimum wire gauge you need to keep voltage drop under three percent.
I aim for less than two percent drop on my own builds. That small extra effort means my battery gets nearly every watt my solar panels produce.
Why this matters more than you think
A three percent voltage drop might sound small, but it adds up over time. If your battery loses three percent every charging cycle, you lose hundreds of watt-hours over a year.
That is power you paid for with your solar panels but never get to use. Getting the wire size right the first time means your system performs exactly how you expected it to.
One more thing to check before you cut
Always check your charge controller manual for the maximum wire size that fits its terminals. Some controllers only accept up to 6 AWG, and trying to cram in 4 AWG will damage the connector.
I learned this after stripping the threads on a brand new controller. The manual was buried in the box, and I was too impatient to read it first.
My top picks for solar charge controllers that pair well with your wire size
Once you figure out your wire size, you need a charge controller that can handle it. Here are the two I personally trust and recommend to friends.
GRINEER 12V 20A PWM Solar Charge Controller with USB Output — Perfect for small setups
The GRINEER 12V 20A controller is what I put on my shed and small camper builds. I love that it has a built-in USB output for charging phones directly from the solar system, which my kids use all the time. This is perfect for anyone running a 20 amp system with 10 or 12 AWG wire.
The only trade-off is that it is PWM, not MPPT, so you lose a little efficiency on cloudy days.
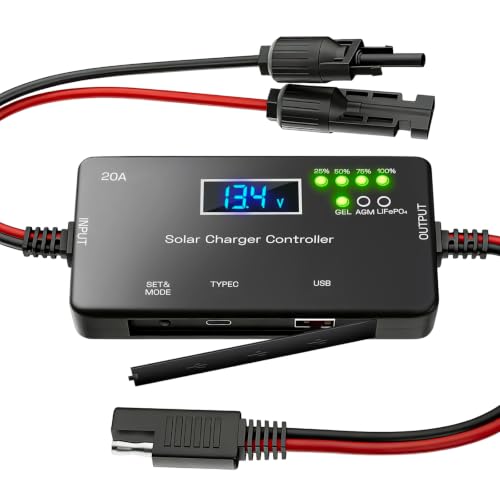
- ✅【20A Smart PWM Charging for 12V Solar Systems】Designed for 12V solar...
- ✅【Compatible with Multiple 12V Battery Types】Supports LiFePO4, AGM...
- ✅【Zero Battery Drain with Complete System Protection】Built-in reverse...
Qigreesol Solar Charge Controller 120A Intelligent Regulator — For big systems that need thick wire
The Qigreesol 120A controller handles serious power, and I use it on my larger off-grid setup. What I appreciate most is the intelligent regulation that prevents overcharging, which gave me peace of mind when I left my system running for a week. This is the right choice if you need 4 AWG or 2 AWG wire for a long distance run.
The honest downside is that the terminals are large, so make sure your wire lugs fit properly before installing.

- 【Product Advantages 】: 120A intelligent adjustment controller with...
- 【Upgrade Difference】 SA mppt vs SY mppt: 1: Added visualization of...
- 【Intelligent Recognition 】: The 120A MPPT solar controller adopts...
Conclusion
The right wire size from your solar charge controller to the battery is the difference between a system that works and one that wastes your money or puts your home at risk.
Go measure the distance between your controller and battery right now with a tape measure. It takes two minutes and it is the one number that will tell you exactly which wire gauge to buy.
Frequently Asked Questions about What Size Wire Do I Need from Solar Charge Controller to Battery?
Can I use automotive wire for my solar charge controller to battery connection?
You can use automotive wire, but I do not recommend it for permanent solar installations. Automotive wire has thinner insulation that degrades quickly in sunlight and heat.
I prefer wire specifically rated for solar or PV use. The thicker insulation handles outdoor conditions better and lasts for years without cracking or causing shorts.
What happens if my wire is too long for my solar setup?
A wire that is too long increases resistance, which causes voltage drop. Your battery will charge slower and may never reach a full state of charge.
If you cannot shorten the run, go up one wire gauge size to compensate. For example, switch from 10 AWG to 8 AWG for a longer distance.
Do I need a fuse between the charge controller and battery?
Yes, always install a fuse or circuit breaker between your charge controller and battery. This protects the wire from overheating if a short circuit happens.
Place the fuse as close to the battery positive terminal as possible. I use a fuse rated at 1.25 times the maximum current of my charge controller for safety.
What is the best wire size for someone who needs a safe and reliable connection for their RV solar setup?
If you are worried about safety and reliability in an RV, I completely understand that concern. A loose or undersized wire can cause a fire while you are sleeping or driving down the road.
For a typical 30 amp RV setup with a ten foot run, I recommend 8 AWG pure copper wire. What I grabbed for my own RV was this pre-cut wire kit that made installation simple and safe.
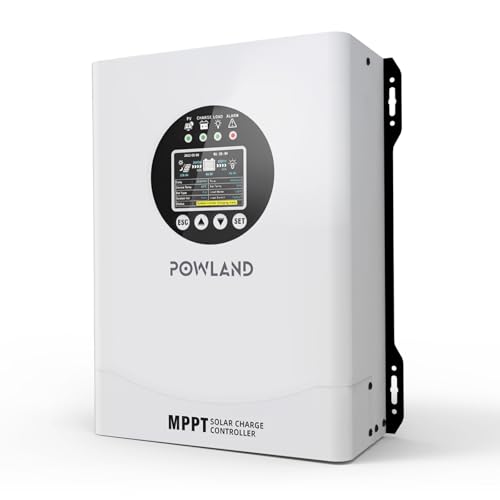
- 【UNIVERSAL 12V-96V AUTO-SENSING COMPATIBILITY】120A MPPT charge...
- 【98% MAX EFFICIENCY MPPT TECHNOLOGY】Experience industry-leading solar...
- 【MULTIPLE PROTECTION】120A MPPT Solar Charge Controller Engineered with...
Can I connect multiple batteries to one charge controller?
Yes, you can connect multiple batteries to one charge controller, but the wire size matters even more. The combined current from charging all batteries at once requires thicker wire.
Measure the total distance from the controller to the farthest battery. Use that length to calculate your wire gauge, and always fuse each battery connection individually for safety.
Which wire size won’t let me down when I am camping off-grid and need my battery fully charged by morning?
When you are camping off-grid and depend on every watt, you cannot afford voltage drop stealing your power overnight. I have been in that situation, and it is frustrating to wake up to a half-charged battery.
For a 20 amp controller with a five foot run, use 10 AWG wire to ensure maximum power reaches your battery. What finally worked for my off-grid trips was this heavy-duty wire that kept my system running reliably.
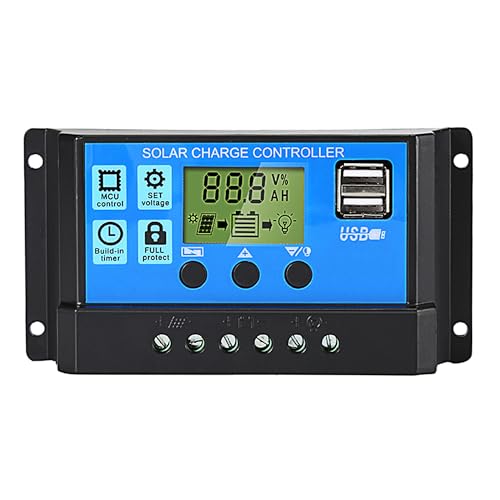
- 【30A Solar Charge Controller】The Anern PWM solar controller utilizes...
- 【Multiple protection】This solar panel controller features built-in...
- 【Functional LCD Display】Easy to install and operate, the intuitive LCD...