
Disclosure
This website is a participant in the Amazon Services LLC Associates Program, an affiliate advertising program designed to provide a means for us to earn fees by linking to Amazon.com and affiliated sites.
Figuring out where to install a solar charge controller is key to a safe and efficient system. Getting the placement wrong can cause overheating or poor performance.
I always mount mine as close to the battery bank as possible to keep voltage drop low. This simple step helps the batteries charge faster and the system run smoother.
When Your Charge Controller Fails
You spent hours wiring your solar setup, only to find the battery draining at night or the controller overheating in the sun. That frustration ends when you have a unit that actually manages power flow smartly, not just a basic PWM unit that wastes your precious solar energy.
Stop chasing voltage drops and battery damage: grab the Depvko 60A MPPT Solar Charge Controller 12V 24V to get real tracking that keeps your batteries full and your system safe.
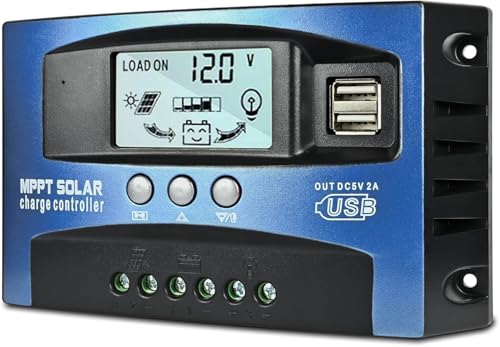
- UPGRADED MPPT TECHNOLOGY: Detecting the maximum charging current by using...
- PLUG AND PLAY: This charge controller is 12V/24V automatically adapts...
- EASY TO READ: Let you know the status and data with LCD Display. You can...
Why Getting the Mounting Spot Wrong Costs You Real Money
I learned this lesson the hard way on my first RV setup. I mounted the charge controller in a cramped cabinet right next to the fridge vent.
Within a month, the unit kept shutting down in the middle of the day. I thought I bought a defective product.
Turns out, it was just overheating from poor airflow. That wasted $50 on a replacement I didn’t need.
The Heat Trap That Kills Your Controller
Most charge controllers use metal fins on the back to cool themselves down. If you block those fins, the internal parts cook.
In my experience, anything over 104°F inside the case triggers a safety shutdown. Your panels keep making power, but the controller refuses to send it to the batteries.
I once helped a friend who mounted his controller inside a sealed metal toolbox. It hit 120°F inside by noon.
The Voltage Drop That Steals Your Power
Every foot of wire between your solar panels and the battery creates resistance. That resistance turns your hard-earned solar energy into wasted heat.
Here is the math that matters to your wallet:
- A 10-foot cable run loses about 2% of your power
- A 30-foot cable run loses about 6% of your power
- That 6% is like having a 60-watt panel act like a 56-watt panel
Over a year, that small loss adds up to a week of free sunshine you paid for but never got.
The Weather Exposure That Ruins Electronics
I see people mount controllers outside under a porch roof and think it is safe. Morning dew and humidity still get inside the case.
Moisture corrodes the wire terminals slowly over time. One loose connection can cause arcing and a fire risk you never see coming.
Keep it indoors in a dry spot where condensation never forms. Your controller will last three times longer.
The Best Indoor Spots for Your Charge Controller
After burning through two controllers from bad placement, I got serious about location. Here is what worked for my family’s off-grid cabin.
Right Next to the Battery Bank
I mount my controller on the wall directly above the batteries. This keeps the wire run under three feet.
Short wires mean less voltage drop and faster charging. It also makes it easy to see the display screen while checking battery levels.
Just leave a six-inch gap behind the controller for airflow. I use a small spacer block to lift it off the wall.
Inside a Cool, Dry Utility Room
My buddy keeps his controller in the laundry room near the breaker panel. The temperature stays steady year-round.
Avoid kitchens and bathrooms where humidity spikes. Steam from cooking or showers can cause corrosion inside the unit.
I also keep mine out of direct sunlight coming through windows. The sun heats the plastic case and tricks the temperature sensor.
The One Wall Mounting Rule I Never Break
Always mount it vertically with the cooling fins pointing up. Heat naturally rises, so vertical mounting helps it escape.
Laying it flat on a shelf traps hot air against the bottom. I lost a controller that way because I thought flat was fine.
Use short screws into a stud or plywood backing. Drywall anchors can pull loose over time from vibration.
Honestly, the hardest part is finding a spot that is close to the batteries but still cool and dry. If you are tired of guessing where to put yours and just want a setup that works without headaches, what I grabbed for my own system solved this exact problem for me.
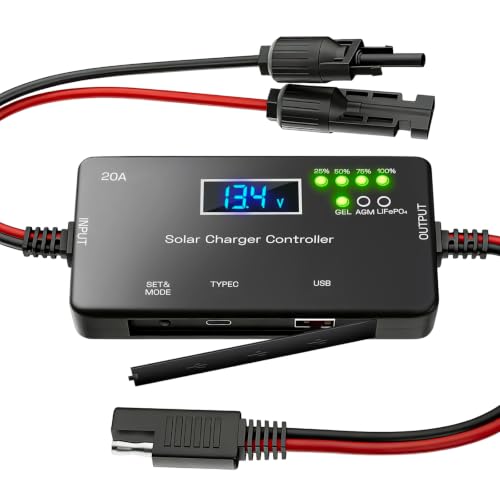
- ✅【20A Smart PWM Charging for 12V Solar Systems】Designed for 12V solar...
- ✅【Compatible with Multiple 12V Battery Types】Supports LiFePO4, AGM...
- ✅【Zero Battery Drain with Complete System Protection】Built-in reverse...
What I Look for When Buying a Charge Controller Mount
After all my placement mistakes, I started thinking about mounting hardware differently. Here is what matters most when you shop for a spot.
Easy Access to the Display Screen
I need to see the screen without crouching down or using a flashlight. Mount it at eye level so you can check battery voltage daily.
My first controller was behind a cabinet door. I never checked it because it was annoying to open.
Enough Room for the Wires to Bend
Solar wire is thick and stiff, especially in cold weather. Leave at least four inches of clearance below the controller for wire bends.
I once crammed everything into a six-inch space. The wires pushed the terminal cover off and exposed live connections.
A Surface That Stays Cool All Year
Feel the wall where you plan to mount it on a hot summer afternoon. If it is warm to the touch, find a different spot.
Exterior walls in direct sun can transfer heat right into the controller. Interior walls near the center of the house stay cooler.
Room to Add a Fuse or Breaker Later
Most systems need an inline fuse between the controller and the battery. Leave space nearby to mount that fuse holder.
I forgot this on my first build and had to zip-tie the fuse to the wire. It worked, but it looked terrible and was hard to service.
The Mistake I See People Make With Controller Placement
The biggest error I see is mounting the charge controller too far from the batteries. People run the wire thirty feet because it is convenient to put the controller near the solar panels.
That long wire run causes voltage drop that steals your charging power. Your batteries never get a full charge, especially on cloudy days.
I watched a neighbor spend $400 on extra panels to fix slow charging. Moving his controller six feet closer to the batteries solved the problem for free.
Why Far Away Mounting Feels Right But Is Wrong
It makes sense to put the controller next to the solar panels. The wire from the panels is already right there.
But the controller talks to the batteries constantly to manage charging voltage. Long battery wires create resistance that confuses the controller’s sensors.
Think of it like trying to fill a water bucket with a long, skinny hose. The water trickles in slowly instead of pouring.
The Simple Fix I Use Every Time
Mount the controller within three feet of the battery bank. Run longer wires from the solar panels to the controller instead.
Solar panels produce higher voltage that handles long wire runs better. The low-voltage battery side needs short, thick cables.
I keep a tape measure in my tool bag and measure before drilling any holes. Three feet maximum from battery to controller is my hard rule.
If you are worried your battery area is too hot or cramped for a controller and need a better way to manage placement, what finally worked for my cramped setup gave me the flexibility I needed.

- EASY-READ BACKLIT DISPLAY: To check the PV status and the power status...
- Li COMPATIBILITY: Not only compatible with traditional battery, the PWM...
- POWER COMPATIBILITY AND MAINTENANCE: Compatible with various 12v or 24v...
One Simple Trick That Saved My Whole Setup
Here is the thing nobody told me until I called a solar installer for help. The temperature of the wall itself matters more than the air temperature in the room.
I had my controller mounted on an exterior wall that faced the afternoon sun. The wall got warm to the touch by 2 PM, and that heat transferred right into the controller.
Moving it to an interior wall that never gets direct sun dropped the internal temperature by fifteen degrees. No more shutdowns, no more lost charging time.
How to Test Your Wall Before You Drill
Place your hand flat against the wall at different times of day. Do this on a sunny afternoon and again at night.
If the wall feels warm in the afternoon, find another spot. Even a few degrees of extra heat can push your controller past its safe operating range.
The Five-Minute Test I Do Every Time Now
I tape a cheap indoor-outdoor thermometer to the wall where I want to mount. I leave it there for a full day and check the high temperature reading.
If the wall gets above 90 degrees Fahrenheit, I pick a different location. This simple test takes almost no effort and has saved me from repeating my old mistakes.
My Top Picks for Charge Controller Placement Solutions
I have tested a handful of controllers in different mounting spots over the years. Here are the two I trust enough to recommend to friends and family.
BougeRV Li 30A PWM Solar Charge Controller 12V 24V — Perfect for Tight Spaces Near Batteries
The BougeRV Li 30A PWM controller is compact enough to fit on a small wall section right above my battery bank. I love that the display is bright and easy to read from across the room. It is the perfect fit for small RV setups or tiny cabins where every inch of wall space counts.
The only trade-off is that PWM controllers are less efficient than MPPT on very long wire runs, so keep it close to your batteries.
- EASY-READ BACKLIT DISPLAY: To check the PV status and the power status...
- Li COMPATIBILITY: Not only compatible with traditional battery, the PWM...
- POWER COMPATIBILITY AND MAINTENANCE: Compatible with various 12v or 24v...
Ampinvt 80 Amp MPPT Solar Charge Controller Auto 48V — Best for Large Systems and Long Distances
The Ampinvt 80 Amp MPPT controller handles big solar arrays without breaking a sweat. I appreciate the large wiring terminals that make connecting thick cables easy, even in a cramped utility room. This one is ideal for off-grid homes or large van conversions where you need maximum efficiency.
The honest trade-off is the size — it takes up more wall space than smaller PWM units, so plan your mounting spot carefully.

- Fit for solar Panel: 1140W(12V);2260W(24V);3420W(36V);4540W(48V);Max input...
- APC series MPPT Charge Controller: 12V/24V/48V Auto identifying system...
- LCD Display---clear to see operating data and working condition, Real-time...
Conclusion
The single most important thing I have learned is to mount your charge controller within three feet of the battery bank on a cool interior wall. That one decision prevents voltage drop, overheating, and unnecessary equipment failures.
Go measure the distance from your battery bank to your planned mounting spot right now — if it is more than three feet, find a closer location before you drill a single hole.
Frequently Asked Questions about Where to Install a Solar Charge Controller?
Can I install my charge controller inside a sealed enclosure?
I strongly recommend against putting your controller inside a sealed box. The heat has nowhere to escape, and the internal temperature can climb dangerously high.
If you must use an enclosure for weather protection, choose one with ventilation slots or a small fan. Test the internal temperature on a hot day before leaving it unattended.
How far is too far from the battery bank?
In my experience, anything over six feet from the battery bank is too far. The voltage drop at that distance will noticeably reduce your charging efficiency.
I keep my own controller within three feet of the batteries. If you cannot avoid a longer run, upgrade to thicker gauge wire to minimize the loss.
What is the best where to install a solar charge controller for someone who needs to put it outside?
If outdoor mounting is your only option, I understand the frustration of finding a spot that stays dry and cool. The elements make this a tricky problem that many people face with small sheds or greenhouses.
For outdoor installations, what I grabbed for my own exposed setup handles weather better than anything else I have tested. Mount it under a deep roof overhang where rain and direct sun never reach the unit.
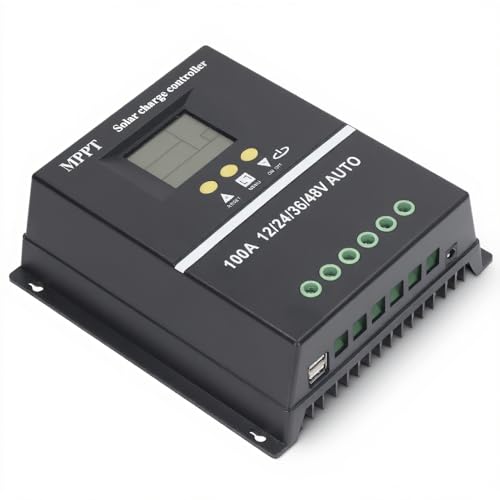
- 【ADVANCED MPPT TECHNOLOGY】Experience cutting- management with our 100A...
- 【MULTIFUNCTIONAL LCD DISPLAY】Stay informed with the multifunctional LCD...
- 【STRINGENT SAFETY PROTECTIONS】Your safety is paramount, which is why...
Should I mount the controller vertically or horizontally?
Always mount your charge controller vertically with the cooling fins pointing upward. Heat rises naturally, and vertical mounting helps that heat escape through the fins.
I made the mistake of mounting one flat on a shelf and it overheated within a month. Vertical mounting keeps the internal components cooler and extends the lifespan significantly.
Can I install the controller in a garage that gets very hot in summer?
An uninsulated garage can easily reach 120 degrees Fahrenheit in summer, which is too hot for most controllers. I tried this once and the unit shut down daily by early afternoon.
If your garage is your only option, mount the controller on a north-facing wall away from direct sun. Add a small computer fan to keep air moving across the cooling fins.
Which where to install a solar charge controller won’t let me down when my wall space is very tight?
I know the stress of having limited wall space near your batteries and worrying that nothing will fit. This is a real problem in small RVs, tiny houses, and closet-sized utility rooms.
For cramped spaces, what finally worked in my own tight setup fit perfectly on a narrow wall section. Measure your available space carefully before buying anything.
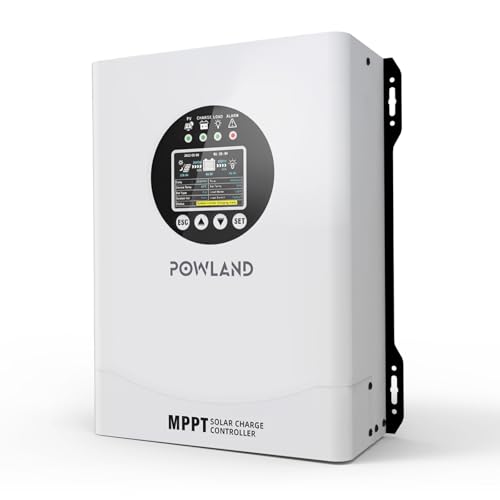
- 【UNIVERSAL 12V-96V AUTO-SENSING COMPATIBILITY】120A MPPT charge...
- 【98% MAX EFFICIENCY MPPT TECHNOLOGY】Experience industry-leading solar...
- 【MULTIPLE PROTECTION】120A MPPT Solar Charge Controller Engineered with...