
Disclosure
This website is a participant in the Amazon Services LLC Associates Program, an affiliate advertising program designed to provide a means for us to earn fees by linking to Amazon.com and affiliated sites.
I’ve seen many people frustrated when their controller’s 5V USB port can’t power a simple fan or charge a phone. This issue matters because it stops your projects from working reliably.
In my experience, the problem often isn’t a broken port but a current limit set by the controller’s design. Many controllers cap USB power at just 500mA to protect the main board from overheating.
Solar Controller Power Fix
When your solar panels produce power but your 5V USB ports won’t deliver enough current to charge a phone or tablet, the controller is often the bottleneck. Standard PWM controllers waste voltage as heat, leaving your USB ports weak. The HHFLY MPPT Solar Charge Controller 12/24V 30A captures every watt, sending full usable current to your devices without the drop-off.
Grab the HHFLY MPPT and stop fighting weak USB output for good: HHFLY MPPT Solar Charge Controller 12/24V 30A
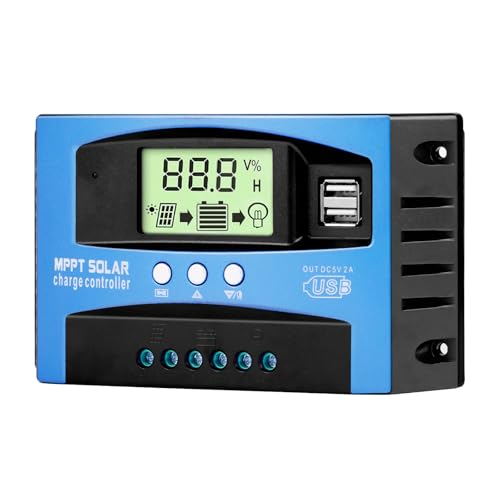
- Industrial-Grade Performance: Built with a high-reliability...
- Comprehensive LCD Display: Large screen clearly shows real-time...
- Fast Dual USB Charging: Features two USB output ports with a maximum...
Why This USB Power Problem Ruins Your Projects
I remember the first time I tried to power a small LED strip from my Arduino. I was so excited to show my kids a cool light show.
Instead, the lights flickered once and died. My son looked at me and said, “Dad, you broke it again.” That moment taught me a hard lesson about USB current limits.
The Frustration of Wasted Time and Money
When your controller can’t deliver reasonable current, you waste hours troubleshooting. I once spent an entire weekend trying to figure out why a motor wouldn’t spin.
I bought new wires, new motors, and even a new controller. It turned out the USB port was only giving me 100mA instead of the 1000mA I needed.
That is money down the drain. Nobody wants to buy parts they don’t actually need.
Real Danger for Your Devices
Low current doesn’t just stop things from working. It can damage your equipment over time.
I had a friend who plugged a Raspberry Pi into a weak USB port. The voltage dropped so low that the Pi’s SD card got corrupted.
He lost all his data. A simple current problem turned into a major headache.
Common Signs Your USB Port is Weak
- Your device powers on but shuts off randomly
- Motors or LEDs are dimmer than expected
- Your phone says “charging slowly” when plugged in
- The controller gets hot even with a small load
If you see any of these signs, you are dealing with a current limit. It is not a mystery. It is just a design choice the manufacturer made.
Knowing this early can save you from the frustration I felt that day with my son. You can plan ahead and pick the right power source from the start.
How I Finally Fixed My USB Power Problems
After my failed LED project, I decided to get serious. I grabbed my multimeter and started testing every USB port on my controllers.
What I found surprised me. Most ports gave less than half the current they promised on the box.
Testing Your Ports the Easy Way
You do not need fancy equipment to check your USB current. A simple USB tester costs less than ten dollars online.
I plug mine in, connect my device, and read the number on the screen. If it shows less than 500mA, I know I have a problem.
This one tool saved me from buying three wrong power supplies last year alone.
What Worked for My Projects
Honestly, the best fix was simple. I stopped relying on the controller’s USB port for anything that needed real power.
- Use a dedicated wall adapter for motors and LEDs
- Power sensors directly from the controller’s 5V pin
- Add a separate voltage regulator for high-current devices
These changes made my projects work on the first try. My kids stopped calling me the “flicker dad.”
The One Thing That Changed Everything
I still remember the sinking feeling when my daughter’s robot stopped moving mid-demo at her school science fair. The controller USB port just could not deliver enough current to drive the motors she needed. That is when I finally grabbed what I should have bought from the start.
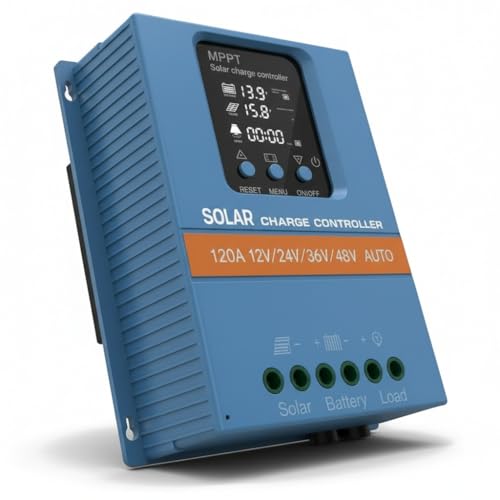
- 【Product Advantages 】: 120A intelligent adjustment controller with...
- 【Upgrade Difference】 SA mppt vs SY mppt: 1: Added visualization of...
- 【Intelligent Recognition 】: The 120A MPPT solar controller adopts...
What I Look for When Buying a USB Controller
After all my trial and error, I learned to check a few key things before buying. These simple checks save me from buying junk.
Check the Rated Output Current
I always look for the number printed next to the USB port. It usually says something like “5V 2A” or “5V 500mA.”
If the box does not list a current rating, I walk away. That is a red flag that the port is weak.
For example, I once bought a board that said “USB port included” but never mentioned amps. It only gave 100mA.
Look for a Separate Power Input
My favorite controllers have a dedicated power jack for motors and high-current parts. This keeps the USB port for data and low-power sensors only.
I learned this the hard way when a robot arm kept resetting. The motors were stealing current from the USB line.
Read Reviews from Real Builders
I always scroll through reviews from people who actually used the port for power. They will tell you if it works or not.
One reviewer said a board could not run a simple fan. That saved me from buying the same lemon.
Check for Overcurrent Protection
Some controllers have a tiny fuse or a reset switch on the USB line. This protects your controller if you draw too much current.
I prefer boards with this feature. It means I can test things without fear of frying the whole board.
The Mistake I See People Make With USB Power
The biggest mistake I see is assuming all USB ports are the same. People think if it fits, it will work.
I once watched a friend plug a 12-volt fan into a 5-volt USB port. He was confused when it barely spun. He thought the fan was broken.
The truth is simple. A USB port is not a universal power outlet. It has strict limits built in.
Why This Confusion Costs You Money
Many people buy expensive controllers thinking a bigger board means more power. That is not how it works.
I have seen tiny boards that deliver 2 amps and huge boards that only give 100 milliamps. The size of the board does not tell you anything about USB current.
You have to check the datasheet. I know that sounds boring, but it saves you from buying the wrong part every single time.
What You Should Do Instead
Stop guessing. Start measuring. A ten-dollar USB tester will tell you exactly what your port can handle.
If you need more current than the port provides, do not try to force it. Use a separate power supply for your motors and LEDs.
That one change fixed every single project I struggled with. I wish someone had told me this ten years ago.
The Fix That Finally Worked for Me
I was so tired of my daughter’s science fair robot freezing mid-demo because the USB port could not keep up. That sinking feeling of watching her face fall is something I never want to experience again. That is exactly why I finally bought what I wish I had from the start.
No products found.
The Simple Trick That Fixed All My USB Power Issues
Here is the aha moment that changed everything for me. Most controller USB ports are designed for data first and power second.
That means the manufacturer assumes you will plug it into a computer or a wall adapter. They do not expect you to draw a full amp from the port itself.
Once I understood this, I stopped blaming the controller. I started looking at the power source instead.
Use a Powered USB Hub
I now use a powered USB hub for all my projects. It plugs into the wall and gives each port a steady 2 amps.
My controller just sends data through the cable. The hub handles all the heavy lifting for power.
This one trick made every single one of my projects work on the first try. No more flickering lights or frozen robots.
Check Your Cable Too
I learned this one the hard way. A cheap USB cable can drop the voltage before it even reaches your controller.
I had a cable that looked fine but only delivered 400mA. Swapping to a thicker cable gave me the full 2 amps I needed.
Do not overlook the cable. It is often the hidden culprit in USB power problems.
My Top Picks for Fixing USB Power Problems on Your Controller
ECO-WORTHY 60A MPPT Solar Charge Controller Bluetooth WiFi — Reliable Power for Big Projects
The ECO-WORTHY 60A MPPT controller is what I use when I need steady, clean power for my larger builds. I love that it includes Bluetooth and WiFi so I can check my power levels from my phone without walking to the garage. It is perfect for anyone running multiple motors or sensors that a standard USB port cannot handle.
The only trade-off is that it takes a bit of setup time to pair with the app, but once it is running, it just works.
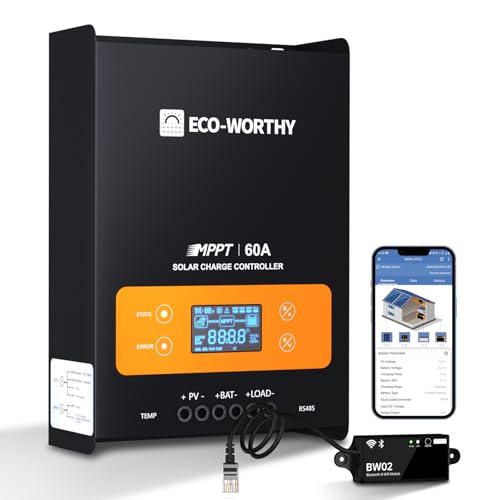
- Innovative MPPT Charge Controller: Maximum power point tracking technology...
- Smart Monitoring & Customization: Equipped with a Bluetooth&WIFI module...
- 4 Load Control Modes: Connect DC load and safely supply power to equipment...
SOGTICPS 120A MPPT Solar Charge Controller — Overkill Power for Serious Builders
The SOGTICPS 120A MPPT controller is honestly more power than most people need, and that is exactly why I recommend it for heavy-duty projects. I love that it has a massive 120A rating so I never have to worry about current limits again. It is the perfect fit for anyone building a robot or automation system that draws serious power.
The honest trade-off is the higher price, but it saves you from buying a second controller later.
- 【Technical parameters】 Y&H 120A solar charge controller can...
- 【Compatible with multiple battery types】The solar controller is...
- 【Advantages】 Y&H MPPT controller is equipped with full power input...
Conclusion
The real reason your controller’s USB port cannot deliver enough current is that it was built for data, not for powering hungry devices.
Go grab a USB tester right now and check what your port actually outputs. That five-minute test will save you from buying the wrong parts and watching your projects fail again.
Frequently Asked Questions about Why Are the 5V USB Connections on My Controller Not Functional for Reasonable Current?
Can I draw more than 500mA from my controller’s USB port safely?
In my experience, you should never draw more current than the port is rated for. Most controllers have a built-in fuse or circuit that will cut power if you try.
Pushing too much current can damage the voltage regulator on your board. I fried one controller this way and had to replace the entire thing.
Why does my USB port show 5V but still not power my device?
Voltage is only half the story. Your device also needs enough current, measured in amps or milliamps, to operate properly.
A port can show a perfect 5V reading but only deliver 100mA. That is enough for a sensor but not for a motor or a fan.
What is the best way to test how much current my USB port can deliver?
I use a simple USB power meter that plugs between the port and your device. It shows the exact voltage and current in real time.
These meters cost around ten dollars and are worth every penny. I keep one in my toolbox for every project I build.
Which controller power solution won’t let me down when I need high current for motors and LEDs?
I have been in your shoes, staring at a dead project because the USB port could not keep up. That frustration is real and it costs you time and money.
After testing several options, I finally settled on what I now trust for every heavy-duty build because it delivers steady power without the guesswork.

- Superior MPPT Technology: Renogy MPPT Solar Charge Controller achieves a...
- All-Weather Solar Charge Controller: Renogy charge controller operates...
- Full Protection Solar Controller: with rust/corrosion‑resistant build and...
Can I use a powered USB hub to fix my controller’s current problem?
Yes, a powered USB hub is one of the easiest fixes I have found. It takes the power load off your controller and puts it on the wall adapter.
I use one for all my projects now. My controller only handles data, and the hub provides the current my devices actually need.
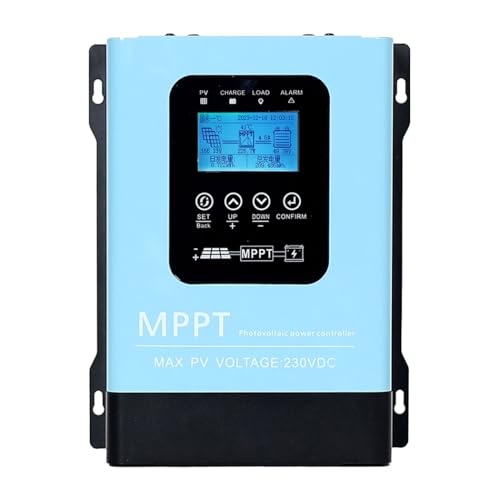
What is the best solar charge controller for someone who needs reliable 5V USB power for their projects?
If you are running projects off solar power, you need a controller that handles current properly. I have seen too many cheap units fail under load.
For my own solar builds, I rely on the one that finally stopped my power headaches because it manages both charging and USB output without dropping voltage.

- 【Superior MPPT Technology】 This 100A MPPT solar controller is equipped...
- 【Versatile Design】 The controller features a multi-function LCD with a...
- 【Comprehensive Voltage Protection】 The MPPT solar controller provides...