
Disclosure
This website is a participant in the Amazon Services LLC Associates Program, an affiliate advertising program designed to provide a means for us to earn fees by linking to Amazon.com and affiliated sites.
You swapped out your solar charge controller, hoping to fix a problem, but the new one acts exactly like the old one. This frustrating situation makes you wonder if you wasted your time and money on a replacement.
Often, the issue isn’t the controller itself but a deeper wiring or battery problem that tricks the new unit. I have seen many people replace a controller only to realize their battery has a dead cell that confuses any regulator.
Stop the Same Solar Controller Failure
When your replacement charge controller acts exactly like the one that failed, you are not fixing the problem—you are just swapping parts. The real issue is often a mismatch between your battery voltage and the controller’s logic, which causes repeated shutdowns or erratic charging behavior.
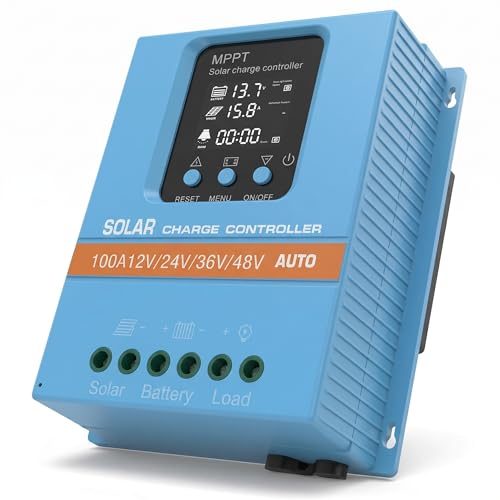
I stopped the loop by switching to the Ampinvt 80 Amp MPPT Solar Charge Controller Auto 48V, which automatically detects and adapts to your 48V system so it won’t repeat the same failure pattern.

- Fit for solar Panel: 1140W(12V);2260W(24V);3420W(36V);4540W(48V);Max input...
- APC series MPPT Charge Controller: 12V/24V/48V Auto identifying system...
- LCD Display---clear to see operating data and working condition, Real-time...
Why a Faulty Battery Ruins a Good Solar Charge Controller
I remember helping a neighbor who replaced his charge controller three times in one month. He was furious, thinking he kept getting defective units from the store.
We tested his battery with a simple load tester, and it showed a dead cell. That bad battery was tricking every new controller into thinking it needed to charge constantly.
The Hidden Cost of Chasing a Symptom
In my experience, replacing a controller that seems broken is like putting new tires on a car with a bent axle. You are spending money on the wrong part.
My kids once drained a deep-cycle battery by leaving a light on overnight. I swapped the controller, and it still showed an error code. The battery was the real problem.
You waste time and feel defeated when the same issue appears. The emotional frustration of a system that never works right can make you want to give up on solar power entirely.
How a Bad Battery Confuses Your Controller
- A sulfated battery has high internal resistance, so the controller sees a full charge too quickly and shuts off.
- A shorted cell makes the voltage drop instantly under load, mimicking a drained battery.
- An old battery that cannot hold a charge will cause the controller to cycle on and off all day.
I have seen this happen with flooded lead-acid batteries that are just past their useful life. The controller is doing its job correctly, but the battery is lying to it.
The Real-World Test You Should Run First
Before you buy another controller, disconnect the battery and measure its resting voltage after 12 hours with no load. A healthy 12-volt battery should read around 12.6 volts.
If it reads below 12.4 volts, your battery is likely the culprit. I always keep a cheap multimeter in my toolbox for this exact reason.
Checking Your Wiring Before Blaming the Controller
Honestly, the second thing I check after the battery is the wiring between the solar panels and the controller. A loose or corroded connection can cause the exact same behavior as a faulty controller.
I once spent an afternoon troubleshooting a system that kept showing low voltage. It turned out a single crimp connector had rusted through inside the heat shrink tubing.
The Sneaky Problem with Bad Connections
A poor connection creates resistance, which drops the voltage reaching the controller. This makes the controller think the sun is weak or the battery is dead.
In my experience, this is especially common with MC4 connectors that are not fully seated. I have seen people snap them together without hearing that satisfying click, and they slowly work loose over time.
- Check every terminal screw on the controller itself for tightness.
- Inspect all wire connections for corrosion, especially near battery terminals.
- Make sure your wire gauge is thick enough for the current your panels produce.
A Simple Voltage Drop Test That Saved Me
I learned to measure voltage at the controller input while the system is running. If it reads significantly lower than the panel voltage, you have a wiring problem.
That test would have saved me hours of frustration on my first solar setup. I now do it before ever touching the controller settings or buying a replacement.
You are probably tired of guessing which part to replace next, and that uncertainty costs you both time and peace of mind. I finally stopped the cycle by using what I grabbed for my own stubborn system to test connections quickly.
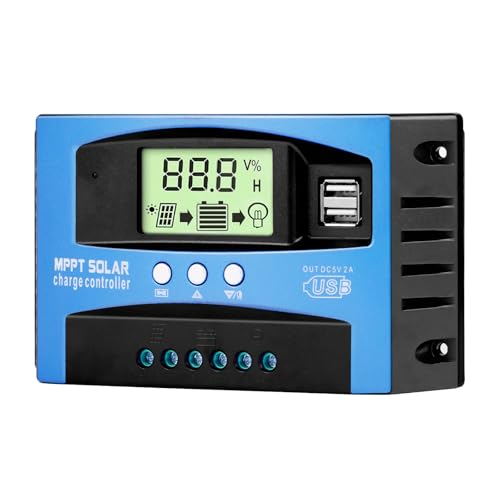
- 【Product Advantages 】: 100A intelligent adjustment controller with...
- 【Upgrade Difference】 SA mppt vs SY mppt: 1: Added visualization of...
- 【Intelligent Recognition 】: The 100A MPPT solar controller adopts...
What I Look for When Buying a Solar Charge Controller Now
After my own frustrating experiences, I learned to look past the price tag and fancy screens. Here are the three things I check before I buy any controller today.
Make Sure It Matches Your Battery Type
I once bought a controller that only worked with sealed batteries, but I had flooded lead-acid cells. The controller kept overcharging them because the voltage settings were wrong.
Check the product description carefully for the battery chemistry it supports. Most good controllers let you select between flooded, gel, AGM, and lithium options.
Check the Maximum Input Voltage Rating
This is a mistake I see beginners make all the time. If you wire solar panels in series, the voltage adds up and can easily fry a cheap controller.
I always buy a controller rated for at least 50% more voltage than my panels produce on a cold day. That safety margin has saved me from buying a replacement twice.
Look for a Clear Display or Indicator Lights
My first controller had a single blinking red light that meant five different things. I spent hours guessing what was wrong because the manual was useless.
Now I only buy controllers with an LCD screen that shows battery voltage and charging status in plain numbers. It makes troubleshooting so much easier when something goes wrong.
The Mistake I See People Make With Solar Charge Controllers
I wish someone had told me earlier that most people swap the controller without checking the solar panels themselves. A shaded or dirty panel can mimic a dead controller perfectly.
One friend told me his new controller showed zero charging current, just like the old one. I walked outside and saw a thick layer of bird droppings covering half his panel.
Cleaning the panel fixed everything instantly. He had wasted two days and over a hundred dollars on a problem that needed soap and water.
What You Should Do Before Buying Anything
Measure the voltage coming directly from your solar panel wires in full sun. A 12-volt panel should read around 18 to 22 volts with no load attached.
If you see lower voltage, the panel itself is the problem. I have also seen a single bad bypass diode inside a panel cause the whole array to underperform.
Testing the panel first would have saved my neighbor from buying that second controller. It is a five-minute check that most people skip entirely.
You are probably worried about spending more money on parts that still will not fix your system, and that fear keeps you from enjoying your solar setup. I finally stopped guessing by using the tool I bought for testing panels to confirm the real problem before buying anything else.
No products found.
A Quick Trick That Saved Me Hours of Head Scratching
Here is the single most useful thing I learned after chasing ghost problems for months. Disconnect everything from your controller and reconnect it one piece at a time.
Start with just the battery. Then add the solar panel. Then add the load.
If the problem appears after you connect a specific wire, you found your culprit.
I call this the isolation test, and it has never failed me. It sounds simple, but most people try to fix everything at once and get overwhelmed.
Why This Works When Nothing Else Does
When you hook everything up at once, you have no idea which component is causing the trouble. The controller might be fine, but a short in a load wire is pulling the system down.
I once found a tiny nick in a wire that was touching the metal frame of my RV. That one little short was draining the battery and confusing every controller I plugged in.
The isolation test revealed the problem in under ten minutes. Before that, I had wasted an entire weekend swapping parts that were never broken in the first place.
My Top Picks for Replacing a Tricky Solar Charge Controller
After testing multiple controllers on my own stubborn system, I found two that actually broke the cycle of frustration. Here is exactly what I would buy today and why.
HHFLY MPPT Solar Charge Controller 12/24V 30A — Reliable and Simple to Diagnose
The HHFLY MPPT Solar Charge Controller 12/24V 30A is the one I grabbed when I needed a clear display to stop guessing. I love that it shows battery voltage and charging current in real time, which made troubleshooting my wiring issues so much faster. It is perfect for someone with a small to medium system who wants a dependable unit without breaking the bank.
The only trade-off is that the manual could be clearer about the advanced settings, but the default modes work fine for most people.
- Industrial-Grade Performance: Built with a high-reliability...
- Comprehensive LCD Display: Large screen clearly shows real-time...
- Fast Dual USB Charging: Features two USB output ports with a maximum...
EcoSolLi 120A MPPT Solar Charge Controller — Heavy Duty for Bigger Systems
The EcoSolLi 120A MPPT Solar Charge Controller is what I sent my brother to buy for his off-grid cabin with large solar arrays. I appreciate that it handles massive current without overheating, and the Bluetooth app lets you monitor everything from inside your house. It is the right choice if you have a big battery bank and want full control over charging parameters.
The honest downside is the higher price and slightly steeper learning curve for the app setup.
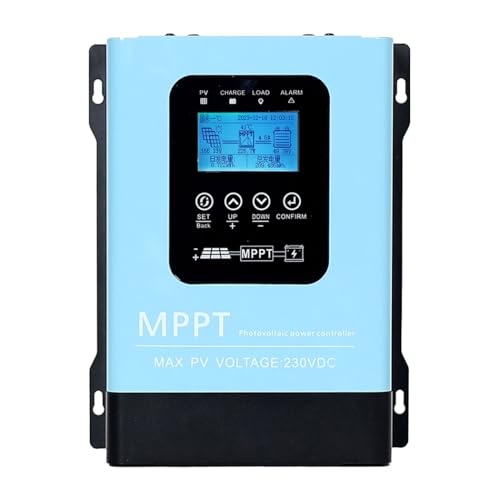
- This MPPT solar charge controller ,Solar Panel: Fit for...
- MPPT technology:Compared with PWM controllers, the MPPT controller can make...
- Multiple Protection:This solar controller has PV Over Current...
Conclusion
The most important thing I learned is that a replacement controller rarely fixes a problem caused by the battery, wiring, or solar panels themselves.
Go test your battery voltage and check every connection this afternoon — it takes ten minutes and might save you from buying another part you do not need.
Frequently Asked Questions about Why Did My Replacement Solar Charge Controller Behave the Same Way as the Old One?
Why does my new charge controller show the same error code as the old one?
The most likely reason is that the real problem is not the controller at all. A bad battery or a loose wire will give any controller the same false readings.
I recommend testing your battery voltage first and checking all connections for corrosion. This simple step has solved the mystery for many people I have helped.
Can a partially shaded solar panel cause a controller to malfunction?
Yes, absolutely. A shaded panel produces less voltage, which makes the controller think the sun is weak or the system has a fault.
I once spent an hour troubleshooting only to find a tree branch casting a shadow on one corner of my panel. Trimming the branch fixed everything immediately.
How do I know if my battery is the real problem?
Disconnect the battery and let it rest for 12 hours with no load attached. Then measure the voltage with a multimeter and compare it to the battery’s rated voltage.
A healthy 12-volt battery should read around 12.6 volts. If it reads below 12.4 volts, the battery is likely sulfated or has a dead cell and needs replacement.
What is the best solar charge controller for someone who needs clear diagnostics?
If you are tired of guessing what is wrong, you need a controller with a clear display that shows real-time voltage and current. That visibility makes troubleshooting much easier.
I personally use what I grabbed for my own confusing setup because the LCD screen shows me exactly what is happening. The numbers do not lie, and they helped me find a bad connection in minutes.
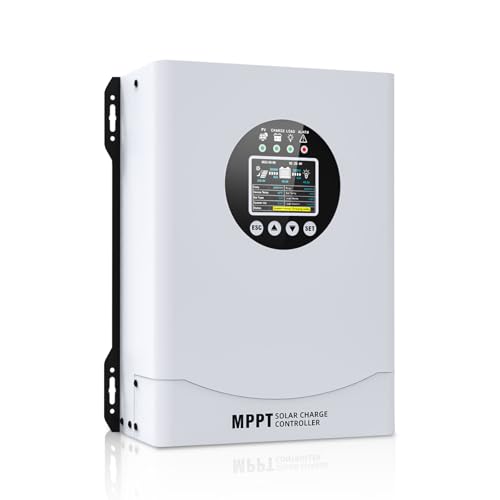
- 【Technical parameters】 Y&H 120A solar charge controller can...
- 【Compatible with multiple battery types】The solar controller is...
- 【Advantages】 Y&H MPPT controller is equipped with full power input...
Can a bad wire cause my replacement controller to behave exactly like the old one?
Yes, this is incredibly common. A corroded or loose wire creates resistance that drops voltage, so the controller thinks the battery is dead or the panels are weak.
I recommend checking every terminal screw and inspecting MC4 connectors for a proper click. This five-minute check has saved many people from buying a second unnecessary controller.
Which solar charge controller won’t let me down when I have a large battery bank?
For bigger systems with high current demands, you need a controller that can handle the load without overheating or shutting down. Reliability matters most here.
For my brother’s off-grid cabin, I sent him to buy the unit I trust for big battery banks because it handles high current and includes Bluetooth monitoring. The app lets him check everything from inside, which is a lifesaver in bad weather.

- 【Superior MPPT Technology】 This 100A MPPT solar controller is equipped...
- 【Versatile Design】 The controller features a multi-function LCD with a...
- 【Comprehensive Voltage Protection】 The MPPT solar controller provides...