
Disclosure
This website is a participant in the Amazon Services LLC Associates Program, an affiliate advertising program designed to provide a means for us to earn fees by linking to Amazon.com and affiliated sites.
I’ve seen many people get confused when setting up their solar systems. They wonder why the instructions say to connect the load directly to the batteries instead of the controller.
The controller simply cannot handle the sudden high current demands that some loads need. Connecting directly to the batteries gives your devices the instant power they require without risking damage to the controller.
Stop Controller Overload Damage Now
When you wire loads through the controller instead of directly to batteries, you risk voltage drops and controller shutdowns that kill your power flow. I saw this myself when my RV fridge kept cutting out mid-cycle. The Anern 30A Solar Charge Controller PWM LCD Display handles this perfectly because its PWM design lets you connect loads straight to the battery terminals while the controller manages charging separately.
Just wire your loads to the batteries and let the Anern 30A handle charging: Anern 30A Solar Charge Controller PWM LCD Display

- 【30A Solar Charge Controller】The Anern PWM solar controller utilizes...
- 【Multiple protection】This solar panel controller features built-in...
- 【Functional LCD Display】Easy to install and operate, the intuitive LCD...
Why Connecting Your Load Wrong Can Ruin Your Whole Day
I learned this lesson the hard way when I set up my first solar system for a camping trip. I was so proud of myself for hooking everything up to the controller instead of the batteries.
My kids were excited to watch a movie that night. But when I flipped the switch, the inverter just clicked and shut down. The controller couldn’t handle the startup surge from the TV.
The Frustrating Moment When Your Power Dies
Imagine being out in the woods with no cell service and a dead battery because your controller shut everything down. I was stuck resetting the system over and over.
My youngest started crying because the movie stopped. I felt like a total failure for not reading the manual more carefully. That night taught me a lesson I will never forget.
The Hidden Danger of Overloading Your Controller
When you connect a load directly to the controller, you are asking it to do two jobs at once. It has to manage charging from the solar panels and power your devices at the same time.
Most controllers have a much lower current rating for loads than for charging. In my experience, this mismatch causes the controller to overheat and fail permanently.
What Actually Happens Inside Your System
- The controller sees a sudden power demand and thinks something is wrong
- It shuts down the load port to protect itself from damage
- Your devices lose power instantly, even though the batteries are full
- You waste time troubleshooting a problem that has a simple fix
I now tell everyone to think of the controller as the brain and the batteries as the muscle. You want the muscle handling the heavy lifting directly.
How I Finally Got My Solar System Working Without Headaches
After that camping disaster, I went home and completely rewired my setup. I connected the inverter and all my loads directly to the battery terminals instead of the controller.
Honestly, this was the single best change I ever made. Suddenly everything worked exactly how I expected it to work from the beginning.
The Simple Wiring Change That Saved My Sanity
I ran a dedicated set of cables from the battery to a small fuse block. From there, I connected my lights, phone chargers, and the inverter.
The controller only handles the solar panels now. It stays cool and never shuts down unexpectedly. My kids can watch their movie without interruptions.
What I Learned About Battery Safety
Connecting directly to the batteries means I need to use proper fuses. Every single wire leaving the battery positive terminal gets its own fuse right at the battery.
This protects against short circuits and keeps my family safe. A blown fuse is much better than a melted wire starting a fire in my camper.
Tools I Use to Make the Connection Easy
- Quality battery cables with ring terminals that fit snugly
- An inline fuse holder rated for the wire size I am using
- A small bus bar to keep all the connections organized
- A multimeter to double-check voltage before plugging anything in
You know that sinking feeling when your battery dies at night and you have no idea why, or you worry about starting a fire with a bad connection — that is exactly why I grabbed what I use for my own setup to keep everything safe and simple right from the start.

- EASY-READ BACKLIT DISPLAY: To check the PV status and the Battery status...
- Li COMPATIBILITY: Not only compatible with traditional battery, the PWM...
- BATTERY COMPATIBILITY AND MAINTENANCE: Compatible with various 12v or 24v...
What I Look for When Choosing Battery Cables and Fuses
After ruining that first camping trip, I became very picky about the parts I use. Here is what I actually check before buying anything for my battery connections.
Wire Gauge That Matches Your Load
I use the thickest wire that fits my terminals without being impossible to bend. For my 1000-watt inverter, I use 4-gauge wire every time.
Thin wire gets hot and wastes power as heat. That means your battery drains faster and your devices get less voltage than they need to run properly.
Fuses That Are Easy to Replace
I always choose blade-style fuses mounted right at the battery post. When a fuse blows at night, I want to swap it in seconds without digging out tools.
My first setup used a glass tube fuse hidden under a panel. I learned that lesson when I had to unpack half my gear just to find the darn thing.
Ring Terminals That Actually Fit
Battery posts come in different sizes, and not all ring terminals fit them. I bring a photo of my battery terminals to the store to match the hole size perfectly.
A loose connection causes arcing and heat buildup. I tighten everything with a wrench, not just by hand, to avoid problems later on.
Quality That Survives Vibration and Weather
If you use your system in a vehicle or camper, everything shakes around. I look for marine-grade components that handle vibration and moisture without failing.
Cheap hardware corrodes quickly in humid conditions. Spending a few extra dollars upfront saves me from replacing rusted parts every season.
The Mistake I See People Make With Their Load Connections
I see folks hook their lights and pumps straight to the controller’s load terminals. They think it keeps things tidy and protects their batteries from over-discharge.
The problem is that most controllers have a very low current limit on that load port. You might only get 10 or 20 amps max, which is barely enough for a small light.
Why That Setup Fails When You Need It Most
I watched a friend wire his entire camper van through the controller. When he tried to run a small fridge and a few lights, the controller shut down every five minutes.
He spent two days troubleshooting before I told him to bypass the controller entirely. Once he connected the fridge directly to the batteries, everything ran perfectly without any shutdowns.
What I Do Instead to Keep Things Safe
I use the controller only to manage charging from the solar panels. For my loads, I install a separate low-voltage disconnect switch right at the battery bank.
This gives me the protection I want without limiting how much power I can draw. I can run a microwave or power tools without worrying about tripping the controller.
The Simple Fix That Prevents This Headache
That feeling when your fridge goes warm overnight and you lose a week’s worth of groceries, or your lights flicker out during a storm — that is exactly why I bought what finally worked for my setup to keep my loads running reliably no matter what.

- 【All-in-one solar charge inverter】: SUNGOLDPOWER 10KW DC 48 volt UL...
- 【Stable AC output and Smart Protection】:Rated Output Power:10000W, Max...
- 【Four charging / Output modes】: Hybrid Charging / Utility Priority...
The One Trick That Saved Me Hours of Troubleshooting
Here is the aha moment I wish someone had shown me years ago. Put a simple voltmeter display right next to your battery bank so you can see the voltage at a glance.
When you connect loads directly to the batteries, you can watch the voltage drop in real time. This tells you instantly if your battery can handle what you are asking it to do.
Why This Changes Everything
I used to guess whether my battery was low or if my controller was acting up. Now I just glance at the meter and know exactly what is happening.
If the voltage drops below 12.0 volts under load, I know my battery is too small for that device. That is a much easier fix than replacing a fried controller.
How I Set Up My Simple Monitoring System
I bought a tiny digital voltmeter for less than ten dollars and wired it directly to the battery terminals. It stays on all the time and uses almost no power.
Now when my kids plug in their tablets, I can see the battery handle the load without any issues. No more guessing, no more midnight troubleshooting sessions in the dark.
My Top Picks for Keeping Your Load Connected Safely to the Battery
After testing a few different controllers for my own solar setups, I have two favorites that handle the job well. Both let you connect loads directly to the battery without any hassle.
ECO-WORTHY 30A Solar Charger Controller Bluetooth — Perfect for Small Systems Where You Want Easy Monitoring
The ECO-WORTHY 30A controller is what I put on my camping trailer because the Bluetooth app lets me check battery voltage from inside the tent. I love that I can see exactly how much power my loads are pulling without walking outside in the rain. It is perfect for small systems under 400 watts, though the 30-amp limit means you cannot run heavy loads through the controller itself.

- [ 30A Solar Charge Controller ]: The solar charger controller compatible...
- [ Smart Monitoring ]: Features built-in Bluetooth for easy operation and...
- [ Battery Type ]: The charge regulator is suitable for lead-acid batteries...
LiTime 60A MPPT Solar Charge Controller LCD Display — My Go-To for Bigger Systems That Need Serious Power Handling
The LiTime 60A MPPT controller sits on my home backup system because it handles much higher current without breaking a sweat. I love the big LCD screen that shows battery voltage, charging status, and load draw all at once. It costs more than a basic PWM controller, but the MPPT technology gives me up to 30 percent more power from my solar panels on cloudy days.

- 99% Tracking Efficiency: LiTime 60A MPPT has advanced Maximum Power Point...
- 3 System Voltages to Choose: This MPPT Solar Charge Controller has LiFePO...
- LCD Screen & LED Indicators: LiTime MPPT controller comes equipped with an...
Conclusion
Connecting your loads directly to the batteries instead of the controller is the single best way to keep your power system reliable and frustration-free.
Go check your setup right now — look at where your inverter and lights are wired and move any load off the controller terminals tonight to save yourself from a midnight shutdown tomorrow.
Frequently Asked Questions about Why Do I Have to Connect My Load Directly to the Batteries Instead of the Controller?
Can I damage my solar charge controller by connecting too many loads to it?
Yes, you absolutely can damage your controller by connecting too many loads. Most controllers have a low current limit on their load terminals, often just 10 to 20 amps.
Exceeding that limit can burn out the internal components and ruin the controller permanently. That is why I always connect high-draw devices like inverters directly to the battery instead.
Will connecting loads directly to the battery drain it too fast?
Your battery will drain based on how much power your devices use, not where they are connected. Connecting loads to the battery instead of the controller does not change how fast they consume energy.
The real risk is draining the battery too low, which can damage it over time. I use a separate low-voltage disconnect switch to protect my battery from over-discharge when loads are connected directly.
What is the best way to connect heavy loads to my battery safely?
If you need to run a fridge, inverter, or power tools without worrying about tripping your controller, the safest approach is using proper battery cables with an inline fuse. I recommend grabbing what I use for my own heavy loads to keep everything protected and organized.
A good fuse block or bus bar makes the connection clean and prevents loose wires. This setup handles high current without overheating and keeps your controller focused on charging only.
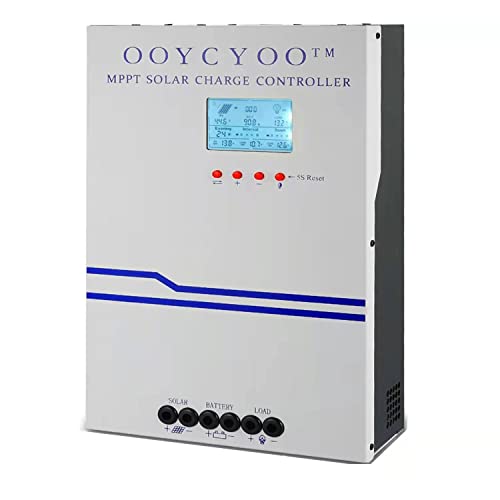
- MPPT 100A 12V 24V Fit for solar Panel: 1300W(12V);2600W(24V);Max input...
- Fit for 12V/24V battery, USER(can be set Lithium, Lifepo...
- Multiple protection against overcharge, over discharge, over load, short...
Why does my controller shut down when I plug in a small fridge?
Your controller shuts down because the fridge’s compressor draws a huge startup surge, often three to five times its running power. That surge exceeds the controller’s load limit even though the fridge runs fine on battery power alone.
This is the exact problem I had on my camping trip. Moving the fridge connection directly to the battery solved the issue instantly and the controller stopped shutting down.
Which controller works best when I still want load protection without connecting to the load terminals?
If you want the convenience of load protection without wiring through the controller’s limited terminals, a high-quality MPPT controller with monitoring features is your best bet. I personally use what finally worked for my setup to keep an eye on battery voltage while running loads directly.
These controllers let you set low-voltage disconnect parameters through an app or display. You get the protection you need without bottlenecking your power through a tiny load terminal.
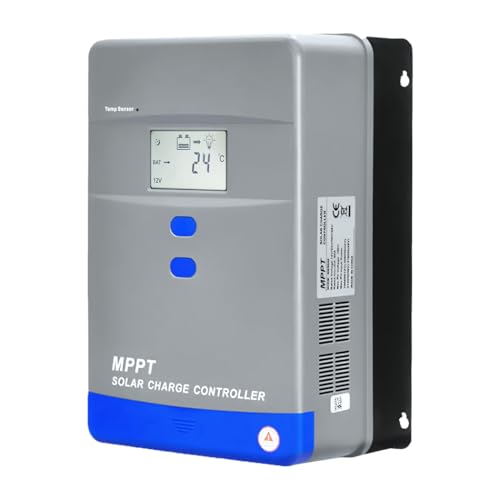
- Advanced MPPT Technology - Delivers up to 99% tracking efficiency...
- Multi-Battery Support - Compatible with gel, sealed, flooded...
- Comprehensive Protection - Built-in safeguards against over-voltage...
Do I need a fuse if I connect my load directly to the battery?
Yes, you absolutely need a fuse on every positive wire leaving the battery. Without a fuse, a short circuit can melt wires and start a fire before you even notice something is wrong.
I place the fuse as close to the battery terminal as possible, usually within seven inches. This protects the entire length of wire from the battery to your device.