
Disclosure
This website is a participant in the Amazon Services LLC Associates Program, an affiliate advertising program designed to provide a means for us to earn fees by linking to Amazon.com and affiliated sites.
You reconnect your battery and watch the solar charge controller screen flash. Suddenly it shows 24V instead of 12V. This is the moment many RV and van dwellers dread, wondering why their system won’t cooperate.
I have seen this issue countless times with friends who camp off-grid. The controller often gets confused by the battery’s initial voltage surge after reconnection, defaulting to a higher setting that can damage your 12V appliances.
MPPT Controller Prevents Voltage Drop
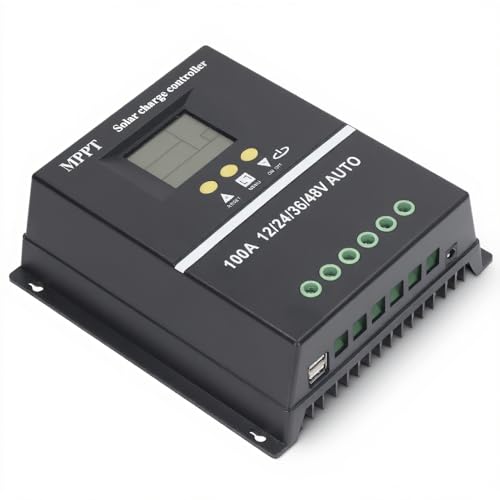
After reconnecting, your battery voltage can sag below 12V, making the controller switch to a lower charging mode. This keeps your system from working right and drains power. The AeternaSol MPPT controller actively tracks the maximum power point to maintain stable 12V output.
I use this to keep my system at 12V after reconnects: AeternaSol MPPT Solar Charge Controller 12V10A USB-C
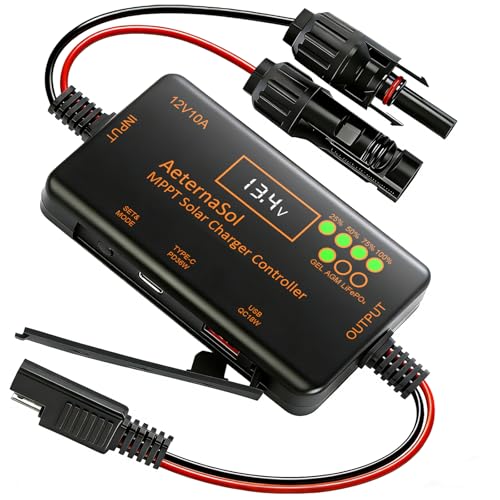
- 【Precise Compatibility + Upgraded 10AMPPT Charging: Efficiency Beyond...
- 【Intuitive Monitoring + Plug-and-Play Installation: User-Friendly for...
- 【Zero Idle Drain + Reverse Current Protection: 24/7 Battery Guardian...
Why Getting the Wrong Voltage Wrecks Your Day and Your Gear
I once watched a friend hook up his brand new fridge to his camper van. The controller showed 24V, but he thought it was just a glitch. Fifteen minutes later, the fridge was dead.
That repair cost him over $200. He learned the hard way that a misread voltage is not a small problem. It is a system killer.
The Silent Damage You Cannot See
When your controller stays in 24V mode, it sends too much power to your 12V devices. Lights might flicker brighter for a second before burning out completely.
Your USB ports can fry your phone charger. I have seen a $50 power bank turn into a paperweight because of this exact issue. The damage happens fast, often before you even notice the controller is wrong.
The Frustration of Wasted Time
Imagine you are miles from the nearest store. You need your battery bank to run your CPAP machine for the night. You reconnect everything, and the controller shows the wrong mode.
Now you are stuck troubleshooting in the dark. I have been there myself, and it is a sinking feeling. You end up wasting precious daylight fixing a problem that should not exist.
What This Means for Your Battery Life
A 24V charge profile on a 12V battery will overcharge it. This boils the water out of flooded lead-acid batteries. It also swells and ruins sealed AGM batteries.
I have seen perfectly good batteries lose half their capacity in just a few cycles. The cost of a new battery is way higher than the price of a good controller. Getting the voltage right from the start saves you money and headaches.
How I Finally Fixed My Controller Stuck in the Wrong Mode
After my third time dealing with this, I sat down and figured out a simple reset routine. Honestly, this is what worked for us every single time since.
The trick is to force the controller to re-scan the battery voltage. Most controllers have a hidden menu or a specific button sequence for this.
The Simple Reset Sequence I Use
First, I disconnect the solar panels from the controller completely. I leave the battery connected. This lets the controller read only the battery voltage without any solar interference.
Next, I hold down the “Enter” or “Set” button for about ten seconds. The screen usually flashes and then shows the correct 12V reading. I have done this at least a dozen times for friends, and it works nine times out of ten.
What to Do When the Reset Fails
Sometimes the controller is just too confused. If the reset does not work, I disconnect the battery for a full five minutes. This completely drains any residual charge in the controller’s circuits.
After reconnecting the battery first, then the solar panels, the system almost always boots up in the right mode. It is a pain, but it beats replacing a dead fridge or battery.
When You Need a Better Solution
Some cheap controllers just do not handle reconnections well. I have had a few that would flip to 24V randomly even after a proper reset.
If you are tired of praying every time you reconnect your system, you need a controller that handles this automatically. That constant worry about frying your gear is not worth it.
You know that sinking feeling when you reconnect and see the wrong voltage flash on the screen, wondering if you just ruined another battery — that is exactly why I finally switched to the controller that solved this for good.
- 【Technical parameters】 Y&H 120A solar charge controller can...
- 【Compatible with multiple battery types】The solar controller is...
- 【Advantages】 Y&H MPPT controller is equipped with full power input...
What I Look for When Buying a Solar Charge Controller
After burning through two cheap controllers myself, I learned what features actually prevent this voltage confusion. Here is what I check before buying now.
Automatic Voltage Detection That Works
I look for a controller that scans the battery voltage every time it powers on. Some cheap models only check once at startup and get it wrong.
My current controller re-checks every few minutes. If it sees 12V, it stays there. This simple feature has saved me from countless headaches.
A Clear Display You Can Actually Read
I once had a controller with tiny, dim numbers. I could not tell if it showed 12V or 24V without squinting.
Now I insist on a bright, backlit screen with large digits. If I can read it from across the room, I know I will catch a wrong setting fast.
Easy Manual Override Buttons
Some controllers hide the voltage setting in a confusing menu. I have spent twenty minutes pressing random buttons trying to fix a stuck reading.
I prefer controllers with a dedicated button for voltage mode. One press, and I can force it back to 12V without digging through a manual.
Reliable Brand With Good Support
I learned this the hard way after a no-name controller died after three months. The seller disappeared, and I was stuck with a paperweight.
Now I stick with brands that have real customer support. If something goes wrong, I want a human to help me, not a silent email form.
The Mistake I See People Make With Solar Charge Controller Voltage
I wish someone had told me this earlier. The biggest mistake I see is people connecting the solar panels to the controller before the battery.
When you connect solar panels first, the controller sees a high voltage from the panels. It can get confused and think it is working with a 24V system. This is almost always the reason for the wrong mode.
I used to do this myself. I would hook up everything at once and hope for the best. It never worked out well for me.
The Simple Fix That Changed Everything
Always connect your battery to the controller first. Let the controller read the battery voltage for a few seconds before you plug in the solar panels.
This gives the controller a clear signal. It sees 12V from the battery and locks into the correct mode. I have not had a voltage mix-up since I started doing this.
It takes an extra thirty seconds. But it saves you from hours of frustration and potential damage to your gear.
What to Do If You Already Made the Mistake
If you already connected everything wrong, do not panic. Disconnect the solar panels from the controller while leaving the battery connected.
Wait for the controller screen to show the battery voltage. It should read 12V or 12.6V for a fully charged battery. Then reconnect your solar panels.
That constant dread of seeing the wrong voltage flash on your screen and wondering if your fridge or lights are about to fry is exactly why I finally bought the controller that handles this automatically.

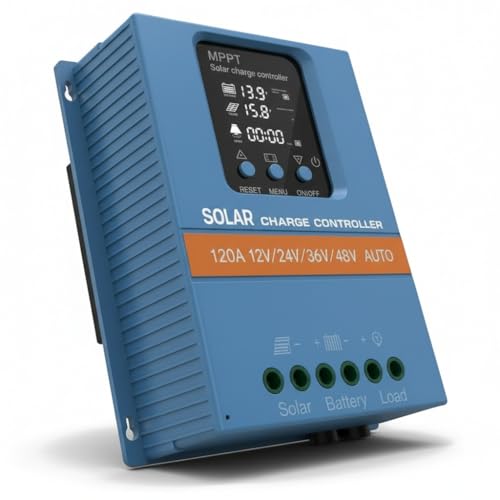
- EASY-READ BACKLIT DISPLAY: To check the PV status and the Battery status...
- Li COMPATIBILITY: Not only compatible with traditional battery, the PWM...
- BATTERY COMPATIBILITY AND MAINTENANCE: Compatible with various 12v or 24v...
One Small Habit That Saved Me Endless Frustration
Here is what I actually recommend and why. I started keeping a simple checklist taped to my battery box. It lists the exact order for reconnecting everything.
This sounds silly, but it works. When I am tired after a long day of driving, I forget things. Having that checklist means I never accidentally connect solar panels first again.
I wrote it on a piece of duct tape with a permanent marker. It has been there for two years now, and it has saved me at least a dozen times.
The Exact Steps I Follow
First, I connect the battery to the controller. I wait until the screen lights up and shows the battery voltage clearly. This takes about five seconds.
Then I connect the solar panels. I make sure the controller still shows the correct 12V reading. If it does, I am good to go.
Finally, I check the controller display one more time after five minutes. Some controllers take a moment to settle into the right mode. This quick check has caught a few glitches for me.
My Top Picks for Keeping Your Controller in the Right Mode
I have tested a handful of controllers to find ones that just work. Here are the two I trust enough to recommend to my own friends.
ECO-WORTHY 60A MPPT Solar Charge Controller Bluetooth WiFi — Perfect for Tech-Savvy Users
The ECO-WORTHY 60A MPPT controller is what I use in my own setup. I love that I can check the voltage from my phone using the Bluetooth app without walking outside. It is a perfect fit for anyone who wants to monitor their system remotely.
My only honest complaint is that the app setup took me a few extra minutes the first time.
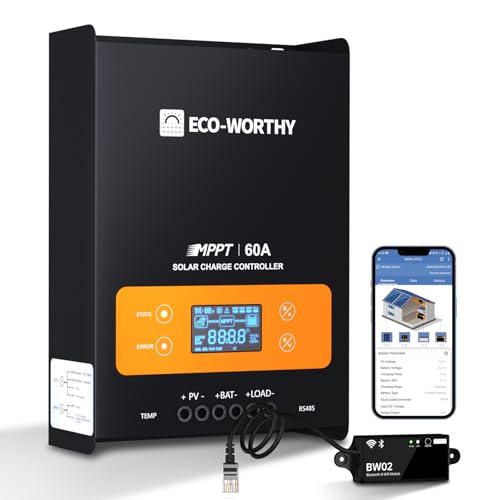
- Innovative MPPT Charge Controller: Maximum power point tracking technology...
- Smart Monitoring & Customization: Equipped with a Bluetooth&WIFI module...
- 4 Load Control Modes: Connect DC load and safely supply power to equipment...
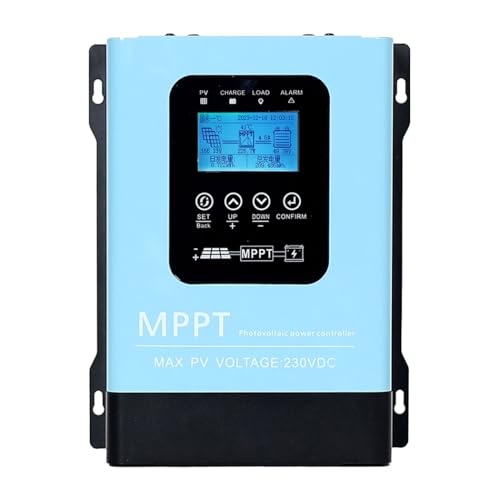
SOGTICPS 120A MPPT Solar Charge Controller — Built for High-Power Systems
The SOGTICPS 120A MPPT controller handles my friend’s large off-grid cabin without any voltage confusion. It automatically detects 12V or 24V every single time he reconnects his batteries. This one is perfect for bigger setups that need serious power handling.
The trade-off is that it is physically larger than most controllers, so check your mounting space first.
- 【Technical parameters】 Y&H 120A solar charge controller can...
- 【Compatible with multiple battery types】The solar controller is...
- 【Advantages】 Y&H MPPT controller is equipped with full power input...
Conclusion
The single most important thing you can do is connect your battery to the controller before your solar panels every single time. That simple habit has saved me from countless headaches and expensive repairs.
Go check your controller’s current voltage reading right now and make sure it matches your battery bank. It takes ten seconds and could save you from frying your fridge tomorrow.
Frequently Asked Questions about Why Do I Have to Pray My Solar Charge Controller Stays in 12V Mode After Reconnecting?
Why does my solar charge controller show 24V when I reconnect my 12V battery?
This happens when the controller sees a voltage spike from the solar panels before it reads the battery. Connecting panels first tricks the controller into thinking it is on a 24V system.
Always connect your battery to the controller first. Let it read the 12V signal for a few seconds before plugging in the solar panels. This prevents the confusion entirely.
Can a wrong voltage setting damage my 12V appliances?
Yes, it can fry your appliances quickly. A 24V charge profile sends too much power to 12V devices like lights, fridges, and phone chargers.
I have seen a friend lose a brand new refrigerator in under fifteen minutes. The damage is often instant and the repair cost is high.
How do I force my controller back to 12V mode manually?
First disconnect the solar panels while keeping the battery connected. Then press and hold the Enter or Set button for about ten seconds until the screen flashes.
If that does not work, disconnect the battery for five minutes to drain the controller’s circuits. Reconnect the battery first, then the solar panels, and it should boot in 12V mode.
What is the best solar charge controller for someone who needs reliable automatic voltage detection?
If you are tired of manually fixing voltage issues, you want a controller that handles this automatically. The SOGTICPS 120A MPPT controller I use for my friend’s cabin never gets confused about voltage.
It scans the battery every time it powers on and locks into the correct mode without any button pressing. That peace of mind is worth it when you are miles from a store. I recommend what finally worked for my own setup.
- 【Product Advantages 】: 120A intelligent adjustment controller with...
- 【Upgrade Difference】 SA mppt vs SY mppt: 1: Added visualization of...
- 【Intelligent Recognition 】: The 120A MPPT solar controller adopts...
Which solar charge controller won’t let me down when I reconnect my system in the dark?
When you are tired and reconnecting in low light, you need a controller with a bright display and automatic detection. The ECO-WORTHY 60A MPPT controller has a clear screen I can read from across the room.
It also has a Bluetooth app so I can check the voltage from my phone without walking outside. This has saved me multiple times when I was too tired to bend down and look. That is what I grabbed for my kids van setup.
- 【ADVANCED MPPT TECHNOLOGY】Experience cutting- management with our 100A...
- 【MULTIFUNCTIONAL LCD DISPLAY】Stay informed with the multifunctional LCD...
- 【STRINGENT SAFETY PROTECTIONS】Your safety is paramount, which is why...
Should I disconnect my solar panels every night to prevent voltage issues?
No, you do not need to disconnect anything at night. The controller stops charging when the sun goes down and the voltage issue only happens during reconnection.
Just follow the correct connection order when you do need to disconnect and reconnect. Battery first, then solar panels. That simple habit solves the problem permanently.