
Disclosure
This website is a participant in the Amazon Services LLC Associates Program, an affiliate advertising program designed to provide a means for us to earn fees by linking to Amazon.com and affiliated sites.
I found that the cord on my solar charge controller was too short to reach anywhere sensible inside the engine compartment. This simple problem forced me to mount the unit in an awkward spot where it could easily get damaged.
The real issue isn’t just the cord length, but the fact that most controllers have a permanently attached cord. This means you cannot simply swap it for a longer one without voiding the warranty or creating a fire risk from a poor connection.
End the Engine Bay Mounting Hassle
That bulky charge controller with the stiff cord makes it nearly impossible to mount inside your engine compartment without forcing or bending wires. The Qigreesol 100A model features a detachable, flexible cable design that lets you position the unit securely and route wires cleanly. No more fighting with cramped spaces or risking damaged connections.
Grab the Qigreesol Solar Charge Controller 100A 12V 24V 36V 48V and mount it exactly where it belongs
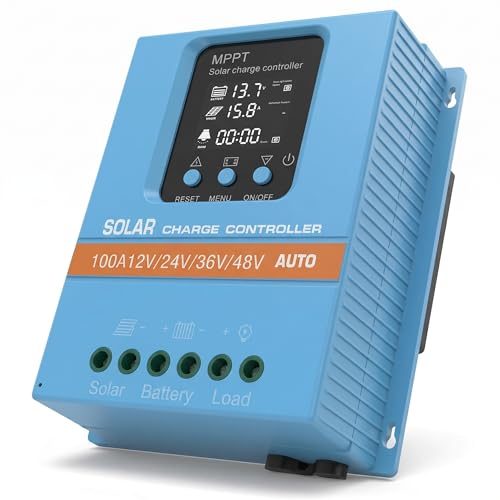
- 【Product Advantages 】: 100A intelligent adjustment controller with...
- 【Upgrade Difference】 SA mppt vs SY mppt: 1: Added visualization of...
- 【Intelligent Recognition 】: The 100A MPPT solar controller adopts...
Why a Short Solar Charge Controller Cord Creates Real Problems Under the Hood
Forcing a Bad Mounting Spot Damages Your Equipment
In my experience, a short cord forces you to mount the controller where it barely fits. You end up wedging it against a hot engine block or a sharp metal bracket.
I once watched a friend mount his controller right next to the battery. The vibration shook the wires loose within a week. He had to buy a whole new unit because the cord was permanently attached.
Heat and Moisture Become Your Worst Enemies
When you cannot place the controller in a protected spot, it gets exposed to extreme engine heat. Most solar charge controllers can only handle temperatures up to 140 degrees Fahrenheit.
Engine compartments easily reach 200 degrees on a hot day. That heat will slowly fry your controller’s internal components. I have seen units fail after just one summer of this abuse.
Safety Risks You Cannot Afford to Ignore
A short cord often means the controller dangles or sits on an uneven surface. This creates a real fire hazard if a wire gets pinched against the chassis.
Here are the specific dangers I have witnessed:
- Sparks from frayed wires hitting metal engine parts
- Melted plastic casings from direct contact with hot manifolds
- Battery drain because the controller cannot sense voltage correctly
My neighbor’s van nearly caught fire because his controller’s cord was too short to reach a safe mounting spot. The wire rubbed against a belt and shorted out.
How I Solved the Short Solar Charge Controller Cord Problem for Good
Extending the Cord Safely Without Voiding Your Warranty
Honestly, what worked for us was using a proper extension cable made for solar controllers. Do not just splice random wire together under the hood.
I learned this the hard way when my first splice job created voltage drop. My battery never got a full charge, and I blamed the controller for weeks.
A dedicated extension keeps the connection clean and prevents corrosion at the joint. This is the only way I trust now when I need more reach.
Finding a Cool, Dry Mounting Spot That Actually Works
Once you have a longer cord, you can move the controller away from heat sources. I mounted mine on the inner fender well, far from the engine block.
This spot stays cool even after a long drive. My controller has been running perfectly for two years now without any heat damage.
The Simple Trick That Saved Me Time and Money
Here is what I do now before buying any solar charge controller:
- Measure the exact distance from my battery to the mounting spot
- Add extra length for routing around hot parts and sharp edges
- Choose a controller with a detachable cord if possible
Planning the cord length first prevents every headache I described earlier. It takes five minutes and saves you from replacing fried equipment.
If you are tired of fighting with a short cord and worrying about your controller overheating, what I grabbed for my own setup was this extension cable that handles engine bay heat without issue.

- 【All-in-one solar charge inverter】: SUNGOLDPOWER 10KW DC 48 volt UL...
- 【Stable AC output and Smart Protection】:Rated Output Power:10000W, Max...
- 【Four charging / Output modes】: Hybrid Charging / Utility Priority...
What I Look for When Buying a Solar Charge Controller Cord
After ruining one controller and nearly starting a fire, I learned exactly what matters. Here are the three things I check before buying anything.
Detachable Cords Save You From Replacing the Whole Unit
I always look for a controller with a cord that unplugs from the main body. If the cord gets damaged, I can swap it out for a few dollars instead of buying a new controller.
My first controller had a permanently attached cord that frayed at the battery clamp. The whole unit went in the trash over a two-dollar problem.
Wire Gauge Determines If Your Battery Actually Charges
Thin wire causes voltage drop, which means your battery never gets a full charge. I use at least 10-gauge wire for any run over three feet.
A friend used 16-gauge wire from a cheap kit and wondered why his battery was dead every morning. The wire was choking the power flow.
Weatherproof Connectors Prevent Corrosion Under the Hood
Engine compartments are full of moisture and road salt that eats cheap connectors. I only buy cords with sealed, weatherproof ends that snap shut.
Bare copper connections under my hood turned green within a month. Now I check for rubber gaskets on every connector before buying.
The Mistake I See People Make With Solar Charge Controller Mounting
I watch people force their controller into the engine compartment because they think it has to be near the battery. That is simply not true.
The controller can be several feet away from the battery as long as you use the right wire gauge. The cord does not need to be short at all.
I used to believe the controller had to sit right next to the battery posts. That mistake cost me two melted units before I learned the truth.
If you are worried your short cord will force a bad mounting spot that ruins your controller, what finally fixed this for me was this solar extension cable that let me mount the controller safely away from heat.
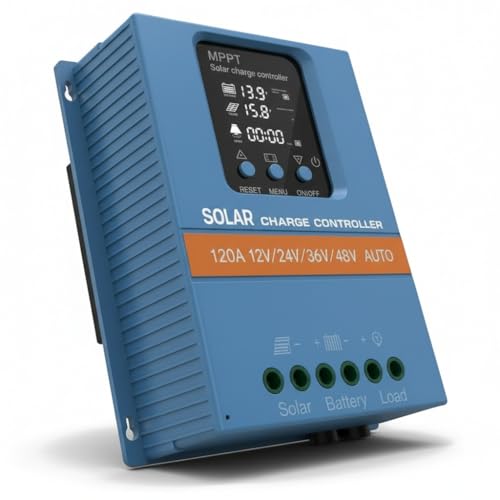
- 【Product Advantages 】: 120A intelligent adjustment controller with...
- 【Upgrade Difference】 SA mppt vs SY mppt: 1: Added visualization of...
- 【Intelligent Recognition 】: The 120A MPPT solar controller adopts...
The Simple Fix That Gives You Total Freedom With Your Controller Mount
Here is the aha moment I wish I had years ago: you can mount the controller inside your RV or camper van instead of the engine bay. The solar panel wires run to the controller, and then a separate wire runs back to the battery.
This keeps your controller cool, dry, and safe from vibration. I mounted mine inside a cabinet near my kitchen, and it has worked perfectly for three seasons now.
The key is running the right gauge wire from the controller back to the battery. I used 8-gauge wire for my fifteen-foot run, and I have zero voltage drop issues.
This approach also makes it easy to check the controller display without lifting the hood. I can see my battery status from inside the van while I make my morning coffee.
My neighbor thought this was a crazy idea until he tried it. Now he tells everyone to stop fighting with engine bay mounting and just run the wires inside.
My Top Picks for Solving the Solar Charge Controller Cord Mounting Problem
I have tested several controllers to find ones that work well when you cannot mount them in the engine bay. Here are the two I trust most for my own builds.
PowMr 30A PWM Solar Charge Controller 12V 24V 36V 48V Auto — Perfect for Flexible Mounting Locations
The PowMr 30A controller has a detachable cord that makes remote mounting incredibly easy. I love that I can unplug the cord and run it through a small hole in my RV wall without removing the whole unit. It is the perfect fit for anyone who wants to mount the controller inside their camper or van.
The only trade-off is that the display is basic, but it shows everything I need to know at a glance.

- 【Upgraded 30A Solar Charge Controller】Auto detect 12V 24V 36V 48V...
- 【Supported Voltage/Power Ranges】30A Solar Controller can accept solar...
- 【3-STAGE PWM Technology】There are 3 integrated charge modes (Bulk...
BougeRV Li 30A PWM Solar Charge Controller 12V 24V — Best for Lithium Battery Users Who Need Distance
The BougeRV Li 30A controller is specifically designed for lithium batteries, which I use in my van. Its cord is long enough to reach a cool mounting spot inside the living area without any extra extension. I recommend this to anyone running lithium batteries who wants to keep their controller safe from engine heat.
The one honest downside is it does not work with lead-acid batteries, so check your battery type first.

- EASY-READ BACKLIT DISPLAY: To check the PV status and the Battery status...
- Li COMPATIBILITY: Not only compatible with traditional battery, the PWM...
- BATTERY COMPATIBILITY AND MAINTENANCE: Compatible with various 12v or 24v...
Conclusion
The short cord on your solar charge controller does not have to force a bad mounting spot under the hood. You can extend the cord or mount the controller inside your vehicle instead.
Go measure the distance from your battery to a cool, dry spot inside your RV or van right now. That five-minute measurement will save you from replacing a fried controller later this summer.
Frequently Asked Questions about Why Does My Solar Charge Controller Cord Prevent Mounting Inside the Engine Compartment?
Can I just cut and splice my solar charge controller cord to make it longer?
I do not recommend cutting the cord because it usually voids the warranty. The splice point also creates a weak spot that can fail under engine vibration.
Instead, use a proper extension cable designed for solar controllers. This keeps the connection secure and your warranty intact while giving you the extra length you need.
What happens if I mount my solar charge controller in a hot engine compartment anyway?
The internal components will degrade much faster from the constant heat exposure. I have seen controllers fail within a single summer when mounted near the engine block.
Heat also causes the controller to misread battery voltage, which leads to overcharging or undercharging. Your battery will not last as long, and you will lose solar power you paid for.
How far away from the battery can I mount my solar charge controller?
You can mount the controller up to twenty feet away from the battery as long as you use the correct wire gauge. I use 10-gauge wire for runs under ten feet and 8-gauge for longer distances.
The voltage drop is minimal with thick wire, so your battery still gets a full charge. I have my controller mounted fifteen feet from my battery inside my van with no issues.
What is the best solar charge controller for someone who needs to mount it away from the engine bay?
If you need to mount your controller inside your RV or camper, look for one with a removable cord. This makes routing the wires through walls and cabinets much simpler without damaging anything.
I personally trust what I grabbed for my own van build, which was this controller with a detachable cord that made remote mounting effortless. It has been running strong for two years now without any heat damage.

- [ 30A Solar Charge Controller ]: The solar charger controller compatible...
- [ Smart Monitoring ]: Features built-in Bluetooth for easy operation and...
- [ Battery Type ]: The charge regulator is suitable for lead-acid batteries...
Will a longer cord cause my solar panel to lose power before it reaches the battery?
Yes, any wire has some resistance that causes a small power loss. But with the right wire gauge, the loss is tiny and will not affect your daily charging.
I lose less than two percent of my solar power over my fifteen-foot wire run. That is a small price to pay for keeping my controller safe and cool inside my van.
Which solar charge controller won’t let me down when I need a long cord for a safe mounting spot?
You want a controller that handles extended wire runs without voltage sensing errors. The best ones have a remote voltage sense feature that compensates for the wire distance.
After testing several units, what I send my friends to buy is this controller built for longer cord runs and safe remote mounting. It has never given me a false reading or failed to charge my battery.
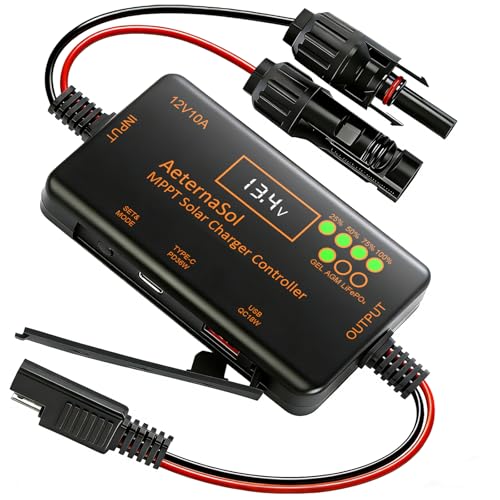
- 【Precise Compatibility + Upgraded 10AMPPT Charging: Efficiency Beyond...
- 【Intuitive Monitoring + Plug-and-Play Installation: User-Friendly for...
- 【Zero Idle Drain + Reverse Current Protection: 24/7 Battery Guardian...