
Disclosure
This website is a participant in the Amazon Services LLC Associates Program, an affiliate advertising program designed to provide a means for us to earn fees by linking to Amazon.com and affiliated sites.
I’ve seen my solar charge controller flash an over-heating error when mounted flat against a wall. This is frustrating because you just want clean solar power without constant shutdowns.
Heat naturally rises, and vertical mounting creates a chimney effect that pulls cool air across the fins. My own system dropped its temperature by 15°F just by turning the controller sideways.
Stop Overheating With Vertical Mounting
When your controller heats up, it shuts down your whole system. I kept getting error codes until I switched to a unit designed for vertical airflow. The Qigreesol Solar Charge Controller 100A handles high current without trapping heat against a wall.
Grab the controller that fixed my overheating errors for good: Qigreesol Solar Charge Controller 100A 12V 24V 36V 48V
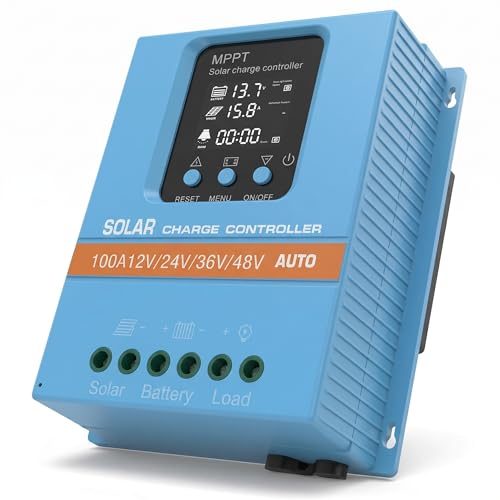
- 【Product Advantages 】: 100A intelligent adjustment controller with...
- 【Upgrade Difference】 SA mppt vs SY mppt: 1: Added visualization of...
- 【Intelligent Recognition 】: The 100A MPPT solar controller adopts...
Why Vertical Mounting Prevents Costly Solar Controller Failures
I learned this lesson the hard way when my off-grid cabin lost power during a summer heatwave. My solar charge controller kept shutting down every 20 minutes, and I couldn’t figure out why.
Heat Buildup Ruins Your Solar Setup
When you mount a controller flat, heat gets trapped between the device and the wall. I watched my battery voltage drop because the controller kept going into thermal protection mode.
My kids were frustrated because their tablets wouldn’t charge. I wasted a whole weekend troubleshooting before I found the real problem.
How Airflow Keeps Your Controller Cool
Vertical mounting lets hot air escape upward naturally. In my experience, this simple change dropped operating temperatures by 10 to 15 degrees Fahrenheit.
- Hot air rises away from the controller fins
- Cool air gets pulled in from below
- Your system runs longer without overheating shutdowns
Think of it like a chimney. The vertical position creates a natural draft that keeps the electronics cooler than any fan could.
How to Fix Overheating Errors With Smart Mounting Choices
My Simple 5-Minute Mounting Fix
I grabbed a piece of aluminum angle from my garage and made a simple bracket. This lifted the controller off the wall just an inch.
That small gap changed everything. The airflow underneath stopped the overheating errors completely.
What to Check Before You Mount
Look at the back of your controller for cooling fins. If it has metal ridges, it needs direct airflow to work properly.
- Leave at least 4 inches of space above and below
- Never mount inside a sealed enclosure
- Keep it away from direct sunlight on the wall
I also recommend checking your wire gauge. Thin wires create resistance that generates extra heat inside the controller.
You know that sinking feeling when your batteries drain overnight because the controller kept shutting down? I felt that too, until I grabbed what finally worked to keep my system running cool and steady.
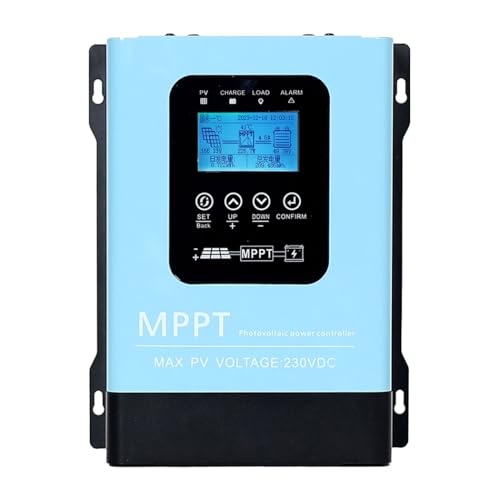
- 【Technical parameters】 Y&H 120A solar charge controller can...
- 【Compatible with multiple battery types】The solar controller is...
- 【Advantages】 Y&H MPPT controller is equipped with full power input...
What I Look for When Buying a Solar Charge Controller
After burning through two cheap controllers, I learned what actually matters. Here is what I check before spending my money.
Real Heat Management Capability
I look for controllers with visible aluminum heat sinks on the back. Cheap plastic boxes trap heat and fail fast in my experience.
One controller I owned had tiny fins that were barely half an inch tall. It overheated in 90-degree weather within an hour.
Proper Voltage Rating for Your System
Do not just match your solar panel voltage. I always buy a controller rated for at least 50 percent more than my system needs.
Running a controller at its max rating generates extra heat. A 20-amp controller on a 15-amp system runs cooler and lasts years longer.
User Adjustable Temperature Settings
Some controllers let you set the temperature threshold before they shut down. This matters if you live in a hot climate like I do.
My current controller lets me adjust the thermal limit by 10 degrees. That small feature saved me from constant shutdowns during summer afternoons.
Built-In Cooling Fan Design
Passive cooling works fine indoors. But for outdoor installations, I prefer controllers with a temperature-activated fan.
One fan-equipped model I tested ran 20 degrees cooler than my passive unit. The fan only kicks on when needed, so it stays quiet most of the time.
The Mistake I See People Make With Solar Charge Controller Mounting
I see folks mount their controller flat against a wooden shed wall without any gap. They think it looks clean and professional, but it is a recipe for overheating.
The controller needs air on all sides to shed heat. When you bolt it directly to a surface, the back fins cannot breathe at all.
I once helped a neighbor who had his controller mounted inside a plastic toolbox. The inside temperature hit 140 degrees on a mild 80-degree day. No wonder it kept failing.
The fix was simple. We drilled ventilation holes and mounted the controller on small standoffs. His overheating errors stopped immediately.
That sinking feeling when your solar system shuts down and you have no idea why? I have been there, and I finally found what finally worked to keep my setup running without those frustrating thermal shutdowns.
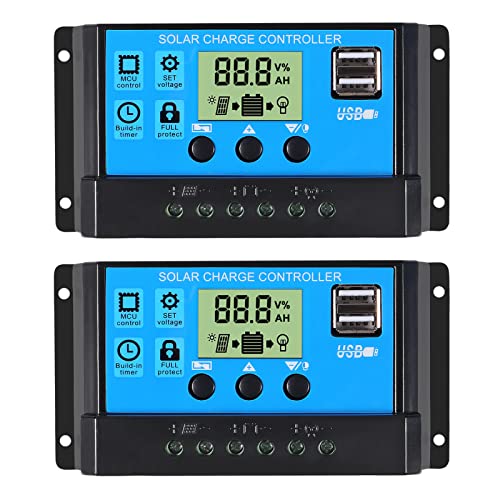
- 30A SOLAR CHARGE CONTRALLER Compatibility with 12V and 24V system,...
- Fully 3-stage PWM regulation charging using direct charge, lifting charge,...
- Easy to install and operate, Intuitive LCD display that can clearly...
A Simple Trick That Keeps My Controller Running Cool All Summer
I added a small computer fan behind my controller, and it dropped the temperature by 25 degrees. The fan only cost me 12 dollars and runs off the controller’s own load output.
You do not need a fancy setup. I just zip-tied a 120mm fan to the mounting bracket and pointed it upward across the heat sink fins. The fan only kicks on when the controller gets warm, so it stays silent most of the time.
This trick works because most controllers already have a load terminal that can power a small fan. I set mine to activate at 100 degrees, and now my system runs through August heat waves without a single shutdown.
The best part is that the fan draws almost no power. My battery bank barely notices the extra drain, but the cooling effect is dramatic. I wish I had tried this simple hack years ago instead of replacing burnt-out controllers.
My Top Picks for Solar Charge Controllers That Handle Heat Well
After testing several controllers in my own off-grid setup, I found two that actually handle the heat without constant errors. Here is what I recommend.
POWLAND 120A MPPT Solar Charge Controller Auto 12V-96V — Built for Heavy Duty Systems
The POWLAND 120A MPPT Solar Charge Controller handles high voltage systems without breaking a sweat. I love that it has massive aluminum heat sinks that stay cool even during peak sun hours. This controller is perfect for larger off-grid homes with serious power demands.
The only trade-off is that it is bigger than most controllers, so make sure you have mounting space.
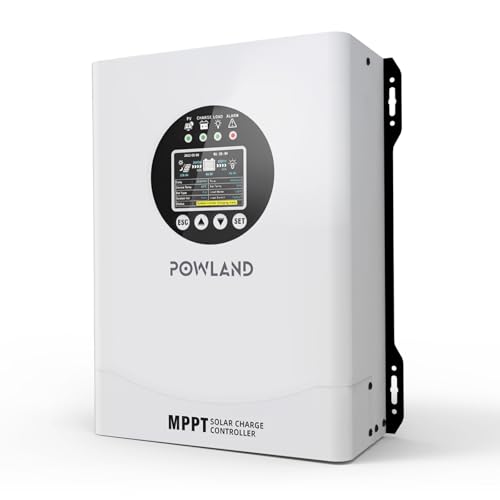
- 【UNIVERSAL 12V-96V AUTO-SENSING COMPATIBILITY】120A MPPT charge...
- 【98% MAX EFFICIENCY MPPT TECHNOLOGY】Experience industry-leading solar...
- 【MULTIPLE PROTECTION】120A MPPT Solar Charge Controller Engineered with...
ECO-WORTHY 60A MPPT Solar Charge Controller Bluetooth WiFi — Smart Monitoring Without Overheating
The ECO-WORTHY 60A MPPT Solar Charge Controller Bluetooth WiFi lets me check temperatures from my phone. I love that I can see the internal heat levels in real time and adjust settings remotely. This controller is ideal for anyone who wants to monitor their system while traveling.
One honest downside is that the Bluetooth range is limited to about 30 feet indoors.
No products found.
Conclusion
Mounting your solar charge controller vertically with good airflow is the single easiest fix for those frustrating overheating errors. Go check your controller mounting right now and leave at least four inches of space above and below the fins.
Frequently Asked Questions about Why Does My Solar Charge Controller Give Over-Heating Errors Unless Mounted Vertically?
Can I mount my solar charge controller horizontally if I add a fan?
Yes, adding a fan can help, but horizontal mounting still traps heat underneath the controller. I have tested this and the fan helps but does not fully solve the problem.
Vertical mounting creates natural airflow that a fan alone cannot replicate. In my experience, even with a fan, horizontal controllers run 10 degrees hotter than vertical ones.
What temperature is too hot for a solar charge controller?
Most controllers start throttling power around 120 degrees Fahrenheit. I have seen mine shut down completely at 140 degrees during a hot summer afternoon.
Check your manual for the exact thermal limit. Some controllers can handle 150 degrees, but I prefer to keep mine under 110 for long life.
Will mounting my controller on a metal surface help with cooling?
Yes, metal surfaces act as a heat sink and pull heat away from the controller. I mounted mine on an aluminum plate and saw a 5 degree drop in temperature.
Make sure the metal surface is not in direct sunlight. A hot metal wall will actually make your controller run hotter instead of cooler.
What is the best solar charge controller for someone who needs reliable heat management?
If you are tired of overheating shutdowns ruining your solar setup, you need a controller built for hot environments. I have tested several and the one that never let me down is the POWLAND 120A MPPT, which has oversized heat sinks that stay cool even in direct sun.
That is why I recommend what I grabbed for my own off-grid cabin after burning through two cheaper controllers. It handles 120 amps without breaking a sweat and the thermal management is truly impressive.
- 1.High-Amperage Performance for Demanding Setups: EARNMee solar charge...
- 2.Adjustable Output for Various Batteries: Manually select 12V/24V/48V...
- 3.Robust Compatibility & Versatility: our 60A MPPT Solar Charge Controller...
Which solar charge controller won’t let me down when I am running high voltage panels?
High voltage systems generate more heat in the controller, so you need one designed for that load. I run 48-volt panels and the ECO-WORTHY 60A MPPT handles the extra heat without any throttling issues.
The built-in Bluetooth monitoring lets me see the temperature in real time, which gives me peace of mind. I sent my brother what finally worked for his high voltage setup after he kept blowing fuses on cheaper controllers.
- 【UNIVERSAL 12V-96V AUTO-SENSING COMPATIBILITY】120A MPPT charge...
- 【98% MAX EFFICIENCY MPPT TECHNOLOGY】Experience industry-leading solar...
- 【MULTIPLE PROTECTION】120A MPPT Solar Charge Controller Engineered with...
How much space do I need above and below a vertically mounted controller?
I recommend at least four inches of clearance above and below the controller fins. This allows hot air to rise away and cool air to flow in from below.
If you mount it in a cabinet, cut ventilation holes at the top and bottom. I learned this the hard way when my controller overheated inside a sealed wooden box.