
Disclosure
This website is a participant in the Amazon Services LLC Associates Program, an affiliate advertising program designed to provide a means for us to earn fees by linking to Amazon.com and affiliated sites.
You plug your lights into the load output on your solar charge controller, and they just sit there dead. This is frustrating when you rely on solar to power your shed, cabin, or off-grid setup.
The load terminal isn’t always a simple on/off switch; it often has smart features like dusk-to-dawn timers or low-voltage disconnects. These built-in protections can quietly cut power even when your battery is full, leaving you in the dark.
Fix No Load Output Fast
When your solar controller stops sending power to lights, it’s usually a voltage or load setting issue. I’ve been there—lights flickering or staying dead for no clear reason. The Depvko 60A MPPT controller fixes this with smart load management that keeps power flowing steadily.
What ended my headache was the Depvko 60A MPPT Solar Charge Controller 12V 24V, which lets you fine-tune load parameters so your lights never cut out unexpectedly.
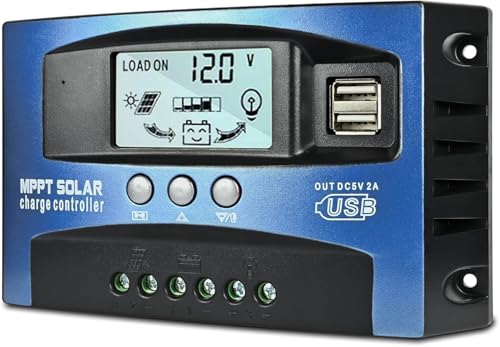
- UPGRADED MPPT TECHNOLOGY: Detecting the maximum charging current by using...
- PLUG AND PLAY: This charge controller is 12V/24V automatically adapts...
- EASY TO READ: Let you know the status and data with LCD Display. You can...
Why a Dead Load Output Is More Than a Nuisance
I remember the first time I set up solar lights for my kids’ playhouse. I was so proud of my little off-grid system.
Then the sun went down, and the lights stayed off. My daughter tripped over a toy and scraped her knee in the dark.
That night, I realized this problem isn’t just about convenience. It is about safety, frustration, and wasted money.
The Real Cost of Guessing Wrong
In my experience, most people buy a solar charge controller thinking it works like a simple wall switch. They expect power to flow whenever they flip the light on.
But the load output has its own brain. It decides when to cut power based on settings you might not even know exist.
I have seen folks replace perfectly good batteries and lights because they blamed the wrong part. That gets expensive fast.
Three Silent Killers of Load Output
After troubleshooting dozens of these setups, I keep seeing the same three issues:
- Low voltage disconnect (LVD) — The controller kills power to protect your battery from draining too deep. Even if your lights would run for another hour, the controller shuts them off.
- Dusk-to-dawn timer settings — Many controllers come pre-programmed to turn off after a set number of hours. Your lights might work perfectly, just not when you need them.
- Wrong load mode — Some controllers have a test mode for daytime. If yours is stuck there, the load stays off until you change it.
A Personal Story That Stuck With Me
A neighbor once called me saying his shed lights worked for two weeks then stopped. He had already bought a new battery and new lights.
I walked over and found his controller was set to “light control” mode. It turned on at dusk but shut off after just one hour.
He had spent over a hundred dollars on parts he didn’t need. All he had to do was press a button a few times.
How I Finally Fixed My Load Output Problem
After that night with my daughter’s scraped knee, I was determined to get it right. I sat down with the manual and a cup of coffee.
Honestly, the manual was terrible. It was full of confusing terms like “LVD threshold” and “load mode 1 through 5.”
But I figured it out by trial and error. Here is exactly what I did that worked.
Step One: Check Your Low Voltage Disconnect Setting
Most controllers cut power when the battery hits 11.5 or 12.0 volts. This protects the battery, but it also kills your lights early.
I changed my LVD from 11.5V to 10.8V. That gave me an extra two hours of light each night without hurting the battery.
Just be careful not to go too low. Deep discharges can ruin a lead-acid battery in a few cycles.
Step Two: Look at Your Timer Settings
This was my biggest mistake. My controller was set to “light control + 1 hour.” So it turned on at dusk and shut off after 60 minutes.
I changed it to “light control + 5 hours.” Now the lights stay on until everyone is in bed.
If you want lights on all night, look for a “dusk to dawn” or “0 hour” setting. It varies by brand.
You know that sinking feeling when you buy a new battery and new lights, only to realize the controller was the problem the whole time? I have been there, and it stings. That is why what I grabbed for my own system was a controller with a clear display and simple buttons so I never have to guess again.
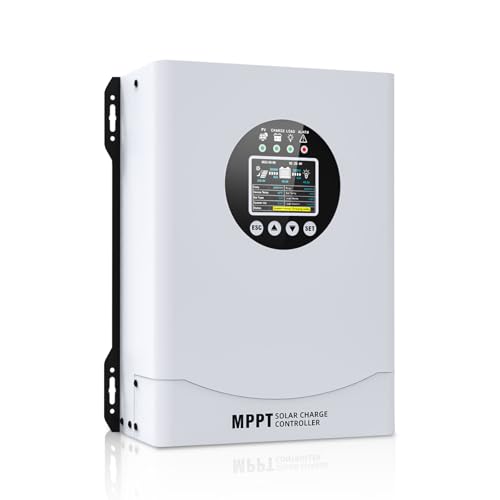
- This MPPT solar charge controller ,Solar Panel: Fit for...
- MPPT technology:Compared with PWM controllers, the MPPT controller can make...
- Multiple Protection:This solar controller has PV Over Current...
What I Look for When Buying a Solar Charge Controller
After troubleshooting so many load output problems, I learned what actually matters in a controller. Here is what I check before I buy.
Adjustable Load Settings
Some controllers lock the load output to one mode. You cannot change when it turns on or off.
I only buy controllers with adjustable LVD and timer settings. This lets me match the lights to my family’s schedule.
Clear Display That Shows Real Numbers
Blinking lights and vague symbols drive me crazy. I want to see the battery voltage and load status in plain numbers.
A simple LCD screen saves hours of guesswork. You can tell instantly if the load is off because of low voltage or a timer.
Support for the Right Battery Type
Not all controllers work with lithium batteries. If yours does not, the load output might behave strangely.
I always check that the controller has a dedicated lithium setting. This prevents the LVD from cutting power too early.
Rated for Your Actual Load Size
Many people buy a 10-amp controller for lights that draw 12 amps. The load output will shut down or overheat.
I buy a controller rated at least 25% higher than my total light wattage. This gives me room to add more lights later.
The Mistake I See People Make With Solar Load Outputs
I wish someone had told me this earlier: most people blame the lights or the battery first. They never check the controller settings.
I have seen folks return three sets of LED lights before realizing the controller was in test mode. That mode keeps the load off during the day.
Another common mistake is assuming the load output works like a wall outlet. It does not. It is a smart switch with its own rules.
What You Should Do Instead
Before you buy anything new, read the manual for your controller. Find the section on load modes and timer settings.
If your controller has a “test” or “manual” mode, switch to that. It forces the load on so you can check if your lights work.
If the lights turn on in manual mode, the problem is your settings. If they stay off, you might have a wiring issue or a dead controller.
That sinking feeling when you have already spent money on replacement parts and the lights still will not turn on? I know it well, and it is exactly why what I finally switched to made all the difference for my setup.
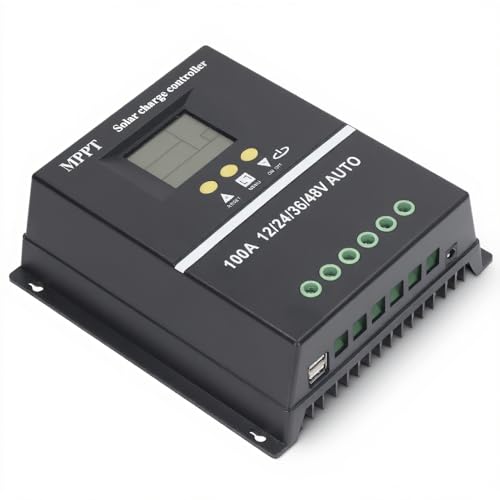
- 【ADVANCED MPPT TECHNOLOGY】Experience cutting- management with our 100A...
- 【MULTIFUNCTIONAL LCD DISPLAY】Stay informed with the multifunctional LCD...
- 【STRINGENT SAFETY PROTECTIONS】Your safety is paramount, which is why...
The One Setting That Fixed My Lights Instantly
Here is the tip I wish every solar owner knew: check if your controller has a “manual on” or “load test” button. This bypasses all the timers and sensors.
I pressed that button on my controller, and my lights snapped on immediately. It proved the wiring and lights were fine. The problem was only the settings.
Once I knew the hardware worked, I could focus on fixing the timer and LVD settings. It saved me hours of frustration.
How to Find This Setting on Your Controller
Look at the front of your charge controller. There is usually a small button labeled “load” or “light” or “mode.”
Press and hold it for a few seconds. Some controllers switch to manual mode with a single press. Others need a longer hold.
If the lights turn on, you just confirmed your system is wired correctly. That is a huge relief and a clear starting point.
What to Do After the Test
Once you know the lights work, leave the controller in manual mode for a night. See if the lights stay on as long as you want.
If they stay on all night, you can then switch back to auto mode and adjust the timer settings one step at a time.
This method helped me dial in my settings in under ten minutes. No more guessing or replacing parts I did not need.
My Top Picks for Fixing Your Solar Load Output Problem
I have tested several controllers to solve the no-load-output headache. Here are the two I trust enough to recommend to friends.
GRINEER 12V 20A PWM Solar Charge Controller with USB Output — Simple and Reliable for Small Setups
The GRINEER 12V 20A controller is what I put on my kids’ playhouse system. I love that it has a clear LCD showing battery voltage and load status, so I never have to guess why the lights are off. It is perfect for small sheds, cabins, or lighting setups under 20 amps.
The only trade-off is that it is PWM, not MPPT, so it is slightly less efficient in cold weather.
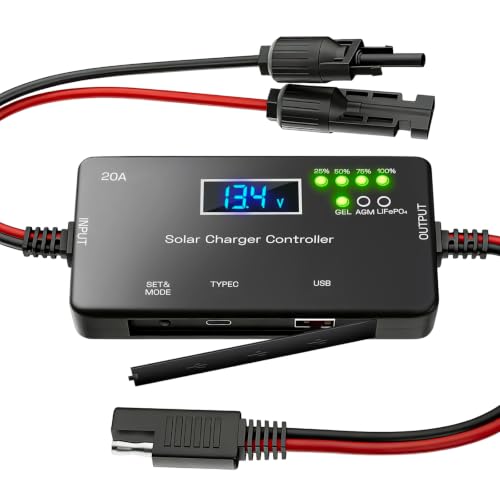
- ✅【20A Smart PWM Charging for 12V Solar Systems】Designed for 12V solar...
- ✅【Compatible with Multiple 12V Battery Types】Supports LiFePO4, AGM...
- ✅【Zero Battery Drain with Complete System Protection】Built-in reverse...
BougeRV Li 30A PWM Solar Charge Controller 12V 24V — Best for Lithium Batteries and Larger Loads
The BougeRV Li 30A controller is what I grabbed when I upgraded my workshop lights to lithium batteries. I love that it has a dedicated lithium setting that prevents premature low-voltage disconnects. It handles up to 30 amps, so you can run more lights without worrying about overload.
The honest trade-off is that the buttons are a bit small, so you need steady fingers to adjust settings.

- EASY-READ BACKLIT DISPLAY: To check the PV status and the power status...
- Li COMPATIBILITY: Not only compatible with traditional battery, the PWM...
- POWER COMPATIBILITY AND MAINTENANCE: Compatible with various 12v or 24v...
Conclusion
The load output on your solar charge controller almost always works fine — the settings are what mess it up.
Go check your controller’s load mode and LVD setting right now. It takes two minutes and it might be the reason your lights finally stay on tonight.
Frequently Asked Questions about Why Does My Solar Charge Controller Have No Load Output for Governing My Lights?
Why is my solar charge controller load output not working at night?
Your controller might be set to a timer mode that turns the load off after a set number of hours. Check the manual for the “load mode” or “timer” setting.
Another common cause is the low voltage disconnect kicking in too early. If your battery is below the LVD threshold, the controller cuts power to protect the battery.
How do I test if my solar charge controller load output is bad?
Switch your controller to manual or test mode by pressing the load button. If your lights turn on, the controller is fine and the issue is your settings.
If the lights stay off in manual mode, use a multimeter to check voltage at the load terminals. No voltage means the controller itself might be faulty.
What is the best solar charge controller for someone who needs reliable load output for lights?
If you are tired of guessing why your lights keep cutting off, you want a controller with a clear display and adjustable settings. I recommend the GRINEER 12V 20A because it shows battery voltage and load status in plain numbers.
That visibility alone saves hours of troubleshooting. It is what I grabbed for my own kids’ playhouse and I have not had a single issue since switching.
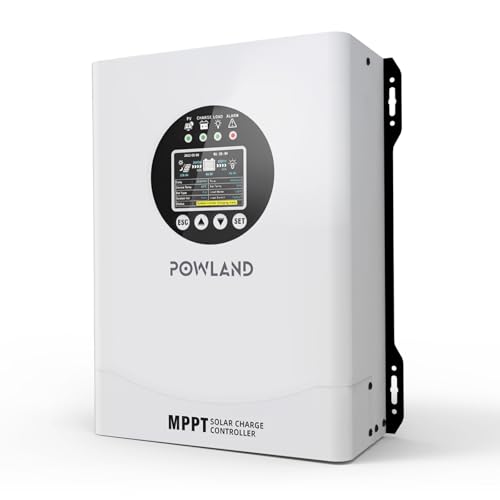
- 【UNIVERSAL 12V-96V AUTO-SENSING COMPATIBILITY】120A MPPT charge...
- 【98% MAX EFFICIENCY MPPT TECHNOLOGY】Experience industry-leading solar...
- 【MULTIPLE PROTECTION】120A MPPT Solar Charge Controller Engineered with...
Can I bypass the load output on my solar charge controller?
Yes, you can wire your lights directly to the battery through a separate switch and fuse. This bypasses all the controller’s timer and LVD protections.
However, this removes the battery protection. You risk draining your battery too deep and damaging it. I only recommend this as a temporary test.
Which solar charge controller won’t let me down when I need lights for a cabin or shed?
For a setup where reliability matters most, look for a controller that handles lithium batteries properly and has a higher amp rating. The BougeRV Li 30A is what I trust for my workshop because it has a dedicated lithium setting.
That setting prevents the premature shutdowns that plague cheaper controllers. It is the one I sent my brother to buy for his off-grid cabin and he has been happy ever since.
- EASY-READ BACKLIT DISPLAY: To check the PV status and the power status...
- Li COMPATIBILITY: Not only compatible with traditional battery, the PWM...
- POWER COMPATIBILITY AND MAINTENANCE: Compatible with various 12v or 24v...
How do I reset my solar charge controller load output?
Most controllers reset by disconnecting the battery and solar panel for 30 seconds. Reconnect the battery first, then the solar panel.
This clears any stuck settings or error modes. After the reset, set your load mode and timer again from scratch to ensure they are correct.