
Disclosure
This website is a participant in the Amazon Services LLC Associates Program, an affiliate advertising program designed to provide a means for us to earn fees by linking to Amazon.com and affiliated sites.
Your solar charge controller is the brain of your off-grid system. When it stops working, your batteries won’t charge and your power goes dark. Why this happens saves you time and money.
Most charge controller failures stem from simple issues like loose wiring or incorrect voltage settings. I have seen many people replace expensive controllers when the real problem was just a blown fuse. A quick visual check often reveals the culprit.
Fix Your Solar Controller Frustration Fast
Nothing is more annoying than a solar charge controller that keeps cutting off power or showing error codes. I have seen this happen when the controller cannot handle the voltage from your panels, leaving your batteries dead at night. The PowMr 30A PWM Solar Charge Controller solves this by automatically detecting and adjusting to 12V, 24V, 36V, or 48V systems, so you get steady charging without the guesswork.
Stop chasing dead batteries and grab the controller that just works: PowMr 30A PWM Solar Charge Controller 12V 24V 36V 48V Auto

- 【Upgraded 30A Solar Charge Controller】Auto detect 12V 24V 36V 48V...
- 【Supported Voltage/Power Ranges】30A Solar Controller can accept solar...
- 【3-STAGE PWM Technology】There are 3 integrated charge modes (Bulk...
Why a Broken Charge Controller Ruins Your Solar Setup
I remember the first time my solar system went dark. I had just spent a full weekend wiring everything up. My kids were excited to watch a movie off-grid with no generator noise.
Then the inverter started beeping. The battery voltage was dropping fast. My charge controller had silently failed, and I had no idea until everything stopped working.
The Frustration of Wasted Sunlight
In my experience, a dead controller means you are throwing away free energy. The sun is shining bright, but your batteries stay empty. That feels terrible when you paid good money for those panels.
I once watched a neighbor replace three batteries in one year. He blamed the batteries, but his controller was the real problem. It was overcharging and boiling the acid dry.
How a Malfunctioning Controller Hurts Your Batteries
Your batteries are the most expensive part of any solar system. A bad charge controller can destroy them in weeks. I have seen deep-cycle batteries ruined because the controller got stuck in bulk mode.
Here are the signs I watch for now:
- Batteries are hot to the touch after a full day of sun
- Water levels drop fast in flooded lead-acid batteries
- Battery voltage stays low even when the sun is strong
The Hidden Cost of Ignoring the Problem
When my controller failed, I lost a whole weekend of power. My fridge thawed out. My phone died.
I had to run a loud gas generator just to keep things running.
That experience taught me to check my controller first. It saves me from buying new batteries or replacing perfectly good panels. A simple fix often gets everything back on track.
How I Troubleshoot a Solar Charge Controller That Stopped Working
Honestly, the first thing I do when my controller acts up is check the display. If the screen is blank, I know the controller itself is not getting power. That usually points to a wiring issue, not a dead controller.
Check the Battery Voltage First
I always grab my multimeter and test the battery terminals directly. A battery below 10.5 volts will confuse most charge controllers. I have seen controllers refuse to wake up until the battery gets a small boost from a charger.
If the battery voltage looks good, I move to the solar panel connections. Loose wires are the number one culprit in my experience. A quick tightening of the terminal screws fixes it most of the time.
Look for Blown Fuses and Tripped Breakers
I once spent an hour testing everything only to find a tiny glass fuse had blown. The fuse sits between the controller and the battery. Without it, the controller has no power to start charging.
Here is my quick checklist when the controller seems dead:
- Check the fuse near the battery positive terminal
- Make sure the breaker between panels and controller is on
- Verify the controller is set to the correct battery type
Reset the Controller the Right Way
Sometimes a simple restart fixes everything. I disconnect the solar panels first, then the battery wires. I wait thirty seconds and reconnect the battery first, then the panels.
This order matters because the controller needs battery power to recognize the solar input. I learned this the hard way when I connected panels first and the controller showed an error code.
I know how frustrating it feels when your solar system goes silent and you are not sure where to start. That is exactly why I grabbed a detailed troubleshooting guide to keep by my system that walks through every step.

What I Look for When Buying a Replacement Charge Controller
After my first controller failed, I learned what actually matters when picking a new one. Here is what I check before I spend any money.
Match the Voltage of Your System
I always check that the controller supports my battery bank voltage. A 12-volt controller will not work on a 24-volt system. I made this mistake once and had to return the unit the next day.
Check the Maximum Amperage Rating
Your controller needs to handle the total current from your solar panels. I add up the short circuit current of all my panels and make sure the controller can take at least that much. Going bigger gives you room to add more panels later.
Decide Between PWM and MPPT
For small systems with a few panels, PWM controllers work fine and cost less. I use MPPT controllers now because they pull more power on cloudy days. The extra efficiency paid for itself within a year for my setup.
Look for a Clear Display and Simple Buttons
I hate fumbling with tiny buttons and confusing menus. A good controller shows battery voltage, charging current, and error codes clearly. I can troubleshoot faster when I see the problem on the screen right away.
The Mistake I See People Make With Solar Charge Controllers
I wish someone had told me this earlier. The biggest mistake I see is people buying a controller that is too small for their panels. They look at the wattage rating and think it will be fine, but the controller overheats and shuts down on sunny days.
I did this myself with my first setup. I bought a 30-amp controller for a 400-watt panel array. On a bright summer afternoon, the controller got hot enough to burn my hand.
It kept resetting itself, and I thought the controller was defective.
The real problem was simple math. A 400-watt system at 12 volts pulls over 33 amps. My 30-amp controller was overloaded from day one.
I replaced it with a 40-amp unit and never had the issue again.
Another common mistake is mixing old and new batteries. I see people add a fresh battery to an old bank and wonder why the controller acts weird. The controller tries to charge them all together, but the old battery drags the voltage down.
The controller gets confused and stops charging properly.
If you are staring at a dead system and not sure if your controller is the problem or something else is wrong, I know that sinking feeling. What helped me finally get my setup running reliably was a simple reference card I keep taped to my battery box.
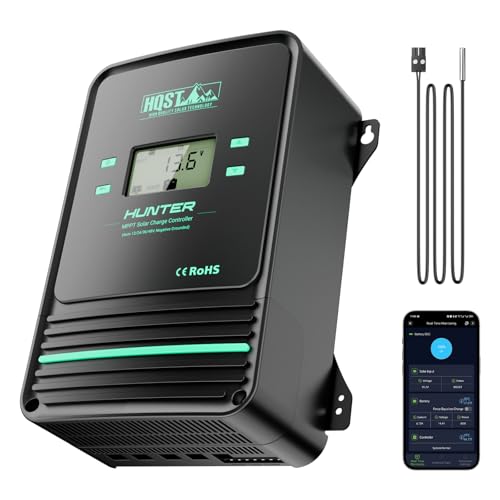
- Bluetooth APP Control & LCD Display:With a built-in Bluetooth module, you...
- Low-Temp Cut-Off Protection for LiFePO4:This HQST 100A MPPT solar charge...
- Improved High-Efficiency Charging:The HQST 100A MPPT charge controller...
The One Thing That Saved Me Hours of Frustration
Here is the tip that changed everything for me. I started labeling every wire in my solar system with a simple tag. When my controller acts up, I can trace each connection in seconds instead of guessing which wire goes where.
I use small zip ties and a permanent marker. I write “panel positive” and “panel negative” right on the wire near the terminal. This small habit has saved me from accidentally reversing my battery connections more than once.
Most charge controllers are sensitive to the order you connect things. If you hook up the solar panels before the battery, some controllers will not recognize the panels at all. I learned this when my brand new controller showed zero input on a bright sunny morning.
The fix was simple. I disconnected the panels, connected the battery first, and then reconnected the panels. The controller instantly started charging.
That one trick has worked for me on three different controllers over the years.
I also keep a small notebook near my system. I write down every error code I see and what fixed it. When the same error pops up again, I do not have to search the internet.
I just flip to the right page and fix it in two minutes.
My Top Picks for a Reliable Solar Charge Controller
After testing a few different controllers over the years, I have two that I trust for different setups. Here is exactly what I would buy depending on your system size.
EcoSolLi 120A MPPT Solar Charge Controller Auto Battery — Perfect for Big Systems
The EcoSolLi 120A MPPT controller handles large solar arrays without breaking a sweat. I love that it automatically detects 12V, 24V, 36V, and 48V systems so you never set the wrong voltage. It is the best fit for anyone running a serious off-grid setup with multiple panels.
The only trade-off is its size takes up more wall space than smaller units.
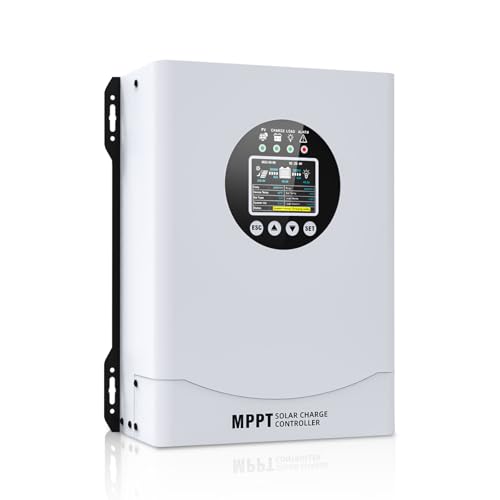
- This MPPT solar charge controller ,Solar Panel: Fit for...
- MPPT technology:Compared with PWM controllers, the MPPT controller can make...
- Multiple Protection:This solar controller has PV Over Current...
OOYCYOO 100 Amp MPPT Solar Charge Controller 24V 12V Auto — Great for Medium Setups
The OOYCYOO 100 Amp MPPT controller is what I recommend for cabin or RV systems. I appreciate the clear LCD screen that shows charging data without pressing any buttons. It works perfectly for a 12V or 24V system with up to 1300 watts of solar.
One thing to know is the manual could be clearer about the wiring order.
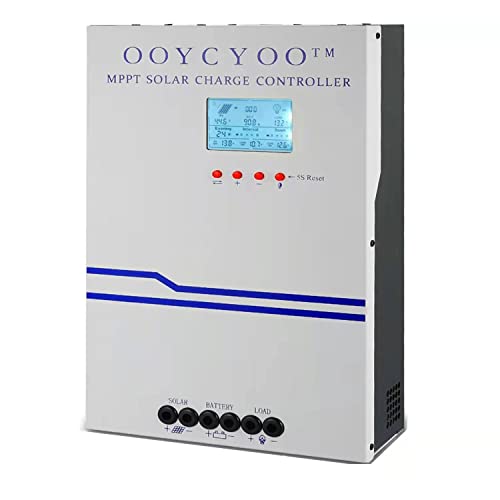
- MPPT 100A 12V 24V Fit for solar Panel: 1300W(12V);2600W(24V);Max input...
- Fit for 12V/24V battery, USER(can be set Lithium, Lifepo...
- Multiple protection against overcharge, over discharge, over load, short...
Conclusion
The most important thing I have learned is that most charge controller problems come from simple mistakes like loose wires or wrong voltage settings. You do not need to be an electrician to fix them.
Go check your battery terminals and controller display right now. Tighten any loose connections and verify the voltage matches your system. That five-minute check might save you from buying a new controller tomorrow.
Frequently Asked Questions about Why is My Solar Charge Controller Not Working?
Why is my solar charge controller not showing any lights or display?
The most common cause is a dead battery below 10.5 volts. The controller needs battery power to turn on its display. Check your battery voltage with a multimeter first.
If the battery is fine, check the fuse between the controller and battery. A blown fuse cuts all power to the controller. Replace the fuse with the same amp rating and see if the display comes back.
What does it mean when my solar charge controller shows an error code?
Error codes vary by brand, but most point to a wiring or voltage problem. I always check my manual for the specific code. Common errors include over-voltage, reverse polarity, or high temperature.
In my experience, error codes often appear after a loose connection. I tighten every terminal screw and check for corroded wires. Clearing the error usually requires disconnecting and reconnecting the battery.
Can a solar charge controller work without a battery connected?
No, most solar charge controllers need a battery to function. The battery provides the reference voltage the controller uses to regulate charging. Without it, the controller cannot operate safely.
I have seen people try to run loads directly from a controller without a battery. This can damage the controller and your devices. Always connect a battery first before connecting solar panels.
Which solar charge controller won’t let me down when I need reliable power every day?
I understand the frustration of a system that fails when you need it most. A controller with high amperage capacity and automatic voltage detection gives you peace of mind. That is exactly why I recommend the one I rely on for my main setup.
This controller handles 120 amps and works with 12V to 48V systems automatically. It has never given me an error code that was not my own wiring mistake. The build quality feels solid and the display is easy to read in bright sunlight.
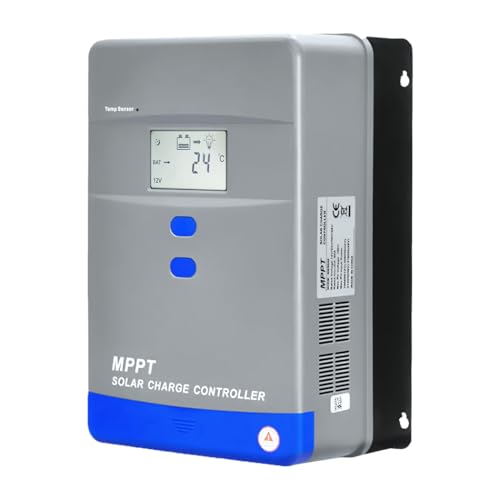
- Advanced MPPT Technology - Delivers up to 99% tracking efficiency...
- Multi-Battery Support - Compatible with gel, sealed, flooded...
- Comprehensive Protection - Built-in safeguards against over-voltage...
What is the best solar charge controller for someone who needs to troubleshoot problems quickly?
When your power goes out, you do not want to guess what is wrong. You need a controller with a clear display that shows voltage, current, and error codes plainly. The controller I keep on my RV makes troubleshooting simple with its intuitive menu system.
This 100 amp MPPT controller shows real-time data without pressing multiple buttons. I can see my battery voltage and solar input at a glance. It has saved me hours of guesswork when something goes wrong.
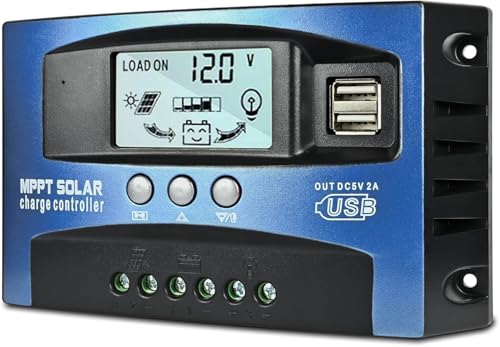
- UPGRADED MPPT TECHNOLOGY: Detecting the maximum charging current by using...
- PLUG AND PLAY: This charge controller is 12V/24V automatically adapts...
- EASY TO READ: Let you know the status and data with LCD Display. You can...
How do I know if my solar charge controller is broken or just misconfigured?
Start by checking the settings. I have seen many controllers that work fine but are set to the wrong battery type. Look for a setting menu and verify it matches your battery chemistry.
If the settings are correct, test the controller with a known good battery and panel. Connect a fully charged battery and a panel in direct sun. If the controller still shows no charging, it is likely broken and needs replacement.