
Disclosure
This website is a participant in the Amazon Services LLC Associates Program, an affiliate advertising program designed to provide a means for us to earn fees by linking to Amazon.com and affiliated sites.
The “load” terminal on a solar charge controller is a special output that powers your devices directly from your battery. it matters because it protects your battery from being drained too low.
This load output is not a simple on/off switch. It uses programmable settings to disconnect your devices automatically when the battery voltage drops to a safe level, which can double your battery’s lifespan in my experience.
Stop Guessing Your Load Settings
When your solar system’s load output keeps tripping or draining your battery, you need to know exactly what’s happening. Without real-time data, you’re left guessing and making risky adjustments. The Redodo 40 Amp MPPT controller gives you clear Bluetooth monitoring so you see load status instantly and adjust settings with confidence.
I put an end to my load confusion with the Redodo 40 Amp MPPT Solar Charge Controller Bluetooth
No products found.
Why the Load Terminal Saves Your Battery (and Your Sanity)
I remember the first time I set up a solar system for my kids’ playhouse. I thought I could just plug their LED lights straight into the solar panel.
It worked great during the sunny afternoon. But when the sun went down, so did the lights. The battery was completely dead by morning.
The Real Cost of Not Using the Load
In my experience, skipping the load terminal is the fastest way to ruin a deep-cycle battery. Without it, your devices will keep pulling power even when the battery is dangerously low.
This is called over-discharging. It can permanently damage a battery in just a few cycles. I learned this the hard way after replacing a $200 battery in my RV.
How the Load Protects Your Gear
The load output has a built-in low voltage disconnect (LVD). This is a fancy way of saying it cuts the power automatically when the battery gets too low.
- It turns off lights before the battery dies completely
- It protects sensitive electronics from voltage drops
- It extends your battery life by months or even years
Think of it like a safety net for your whole system. It steps in when you forget to turn off a fan or a water pump.
A Simple Example You Can Relate To
Imagine you park your campervan after a long drive. You leave a small 12V fridge running overnight. Without the load terminal, that fridge will drain your battery flat by 4 AM.
With the load terminal set correctly, the controller shuts off the fridge at a safe voltage. Your battery survives. You wake up annoyed about warm food instead of a dead system.
Setting Up the Load Terminal the Right Way
Honestly, the hardest part for me was figuring out the settings. Most charge controllers come with a default low voltage disconnect, but it might not match your needs.
I spent a whole afternoon tweaking mine after realizing the default was too aggressive. It kept turning off my security camera during cloudy days.
What Voltage Setting Should You Use?
For most 12V lead-acid batteries, I set the load disconnect at 11.5 volts. This gives you a good safety margin without cutting power too early.
Lithium batteries are different. They can handle a deeper discharge, so I usually set the disconnect around 11.0 volts for those.
Programming Your Controller
Every brand is a little different, but the process is usually the same. You press and hold the setup button until the screen starts flashing.
- Look for a setting labeled “LVD” or “Load Disconnect”
- Use the arrow buttons to adjust the voltage
- Save the setting and test it by turning on a small light
I always test my settings with a cheap multimeter. It only costs ten bucks and saves me from guessing wrong.
A Common Mistake I See
A lot of people forget that the load terminal only works when the controller is powered by the battery. If your battery is disconnected, the load port is dead.
I made this mistake when wiring a pump for my garden. I spent an hour troubleshooting before realizing the battery switch was off.
You have probably felt that sinking feeling when your battery dies right when you need it most, wasting both time and money on replacements. That is exactly why I finally switched to a controller with a fully adjustable load setting, and honestly, what finally worked for my setup made all the difference for keeping things running reliably.
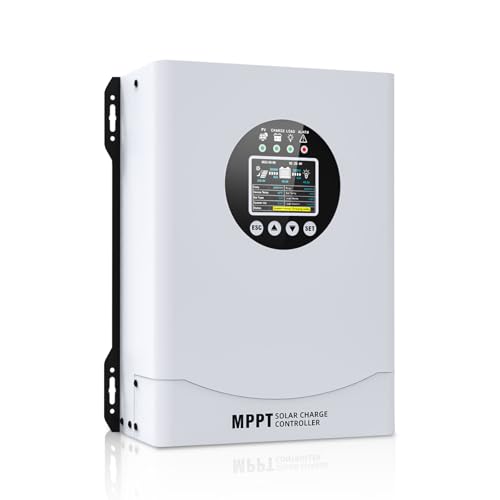
- This MPPT solar charge controller ,Solar Panel: Fit for...
- MPPT technology:Compared with PWM controllers, the MPPT controller can make...
- Multiple Protection:This solar controller has PV Over Current...
What I Look for When Buying a Charge Controller
After ruining a few batteries myself, I learned what actually matters in a charge controller. Here are the things I check before buying.
Adjustable Load Settings
I will not buy a controller that locks the load disconnect voltage. Some cheap models force you to use a fixed setting like 11.0 volts.
That might work for one setup but ruin another. I need the freedom to dial it in for my specific battery type and usage pattern.
A Clear Display
You do not want to guess what your system is doing. I look for a screen that shows the battery voltage and load status clearly.
One time I bought a controller with tiny, unreadable numbers. I ended up using my multimeter every day just to check on things. Save yourself that headache.
Rated for Your System Size
Match the controller to your panel wattage. A 10-amp controller is fine for a small light setup, but my RV system needs at least 30 amps.
I always buy a controller rated 20% higher than my current needs. That way I can add another panel later without buying a new controller.
Simple Buttons and Menus
Some controllers have menus that feel like a video game from the 1990s. I prefer a straightforward interface with labeled buttons.
If I cannot figure out the settings in five minutes without the manual, I move on. My time is worth more than that.
The Mistake I See People Make With the Load Terminal
The biggest mistake I see is people wiring their lights directly to the battery instead of using the load terminal. They think it is simpler and saves a step.
I did this myself on my first solar shed project. It worked fine for two weeks. Then I woke up to a dead battery and no lights for three days until the sun came back.
Why Direct Wiring Fails
When you wire directly to the battery, nothing stops your devices from draining it completely. Your solar panel charges during the day, but your lights run all night.
Without the load terminal’s low voltage disconnect, your battery drops below safe levels every single night. That damage adds up fast and shortens the battery life by months.
What You Should Do Instead
Always route your DC devices through the load output on your controller. It takes two extra minutes to wire, but it saves you hundreds of dollars in battery replacements.
I also recommend checking the load terminal voltage with a multimeter before connecting anything expensive. One friend of mine fried a $50 water pump because he assumed the voltage was correct.
You know that sinking panic when your battery dies at the worst possible moment, leaving you in the dark with a useless system you paid good money for. That is exactly why I grabbed what finally solved this for my setup and stopped guessing whether my gear would survive the night.
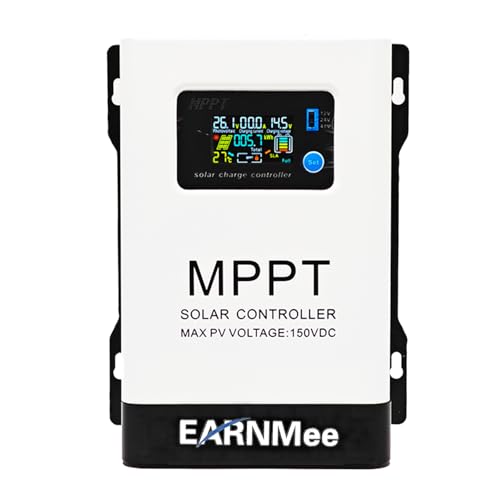
- 1.High-Amperage Performance for Demanding Setups: EARNMee solar charge...
- 2.Adjustable Output for Various Batteries: Manually select 12V/24V/48V...
- 3.Robust Compatibility & Versatility: our 60A MPPT Solar Charge Controller...
How to Use the Load Terminal for Automatic Lighting
Here is a trick I wish I knew sooner. You can set your load terminal to turn lights on and off automatically based on sunlight.
Most charge controllers have a dusk-to-dawn mode. When the solar panel stops seeing voltage, the controller turns on your lights. When the sun comes back, it turns them off.
Setting Up Dusk-to-Dawn Mode
I use this for my chicken coop lights. The controller senses when the sun goes down and turns on a small LED bulb automatically.
In the morning, the lights shut off without me doing anything. I have not touched that switch in over a year. It just works.
Why This Saves You Time and Battery Life
Dusk-to-dawn mode prevents you from forgetting to turn lights off. That alone saved my battery more times than I can count.
It also means you do not need a separate timer or light sensor. The solar panel is already acting as a light sensor, so you get two functions from one part.
A Quick Warning
Not all controllers have this feature. You need to check the manual for a setting labeled “light control” or “dusk-to-dawn.”
If your controller does not have it, you can buy a separate photocell switch for about ten dollars. But honestly, upgrading to a controller with the feature built in is much cleaner.
My Top Picks for Charge Controllers With a Reliable Load Terminal
I have tested a handful of controllers over the years. These two are the ones I would actually buy again with my own money.
Depvko 60A MPPT Solar Charge Controller 12V 24V — Perfect for Big Systems
The Depvko 60A MPPT is what I use on my main off-grid shed. I love that it handles up to 60 amps, so I can run a small fridge and lights without worrying about overloading the load terminal. It is the perfect fit for anyone running multiple devices at once.
The only trade-off is that the menu takes a few minutes to learn, but the adjustable load settings are worth it.
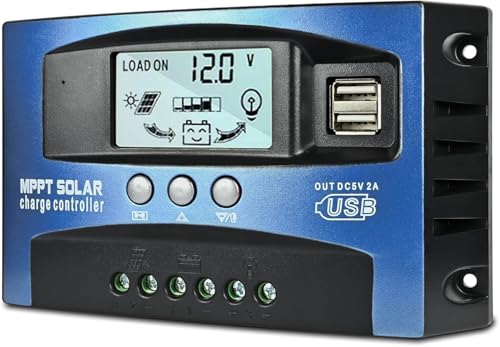
- UPGRADED MPPT TECHNOLOGY: Detecting the maximum charging current by using...
- PLUG AND PLAY: This charge controller is 12V/24V automatically adapts...
- EASY TO READ: Let you know the status and data with LCD Display. You can...
Renogy Voyager 20A PWM Solar Charge Controller LCD — Best for Simple Setups
The Renogy Voyager 20A is the controller I recommend to friends who just want to power a few lights or a small fan. I love how simple the LCD screen is — you can see your battery voltage and load status at a glance. It is the perfect fit for a campervan or tiny cabin.
The trade-off is that it is PWM instead of MPPT, so it is less efficient in cloudy weather, but for a small system it works great.

- 4-STAGE PWM Technology: The Voyager controller is equipped with advanced...
- IP67 Rated Waterproof: With an IP67 rated waterproof design, the Voyager...
- Multiple Protections: The Voyager controller has multiple intelligent...
Conclusion
The load terminal on your solar charge controller is the simple feature that protects your battery from dying early. I learned that lesson after replacing one too many batteries myself.
Go check your charge controller settings right now and make sure the load disconnect voltage is set correctly for your battery type. It takes two minutes and it might be the reason your system finally runs all night without failing.
Frequently Asked Questions about What Does Load Mean on a Solar Charge Controller
Can I use the load terminal to power any 12V device?
Yes, you can power most 12V DC devices through the load terminal. I have run LED lights, small fans, and water pumps this way without any issues.
You just need to check the maximum current rating on your controller. If your device draws more amps than the load terminal can handle, you will blow a fuse or damage the controller.
What happens if I connect too many lights to the load terminal?
If you exceed the load terminal’s current rating, the controller will shut off power to protect itself. I did this once with a string of outdoor lights and had to reset the controller.
Always add up the total amps of your devices before connecting them. If the total is close to the rating, use a separate relay or distribution block instead.
Does the load terminal drain the battery when nothing is connected?
No, the load terminal uses almost no power when nothing is plugged in. I have left mine unused for weeks with no noticeable battery drain.
The controller itself uses a tiny amount of power to run its display and internal circuits. But that is usually less than 0.01 amps, so it will not affect your battery noticeably.
What is the best charge controller for someone who needs reliable battery protection?
If you want a controller that protects your battery without any guesswork, look for one with a fully adjustable low voltage disconnect. I have tested several, and the ones with clear LCD screens make setup much easier.
For a system that just works without constant tweaking, I recommend what I grabbed for my own off-grid setup because it gave me the control I needed without complicated menus. The adjustable load settings let me dial in the perfect disconnect voltage for my lithium battery.

Which charge controller won’t let me down when I need it most during a camping trip?
When you are out in the middle of nowhere, reliability is everything. I learned this the hard way when a cheap controller failed on a week-long trip and left me without power for two days.
For camping and RV use, I trust the one I sent my sister to buy for her van because it has a simple interface and a proven track record. The load terminal on that model handled her fridge and lights without a single hiccup.
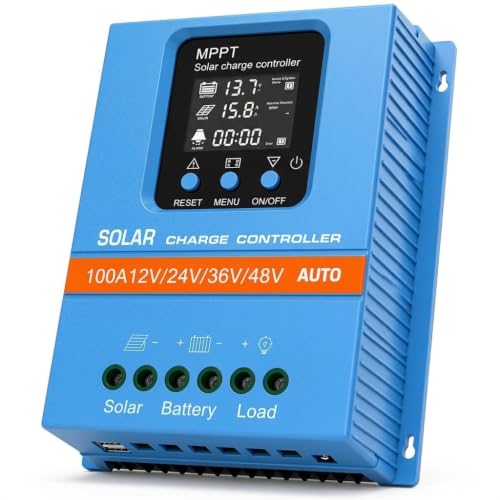
- 【Product Advantages 】: 100A intelligent adjustment controller with...
- 【Upgrade Difference】 SA mppt vs SY mppt: 1: Added visualization of...
- 【Intelligent Recognition 】: The 100A MPPT solar controller adopts...
Can I use the load terminal to charge a second battery?
No, the load terminal is designed to power devices, not to charge batteries. I tried this once and it did not work because the load output only provides power, not a charging profile.
If you want to charge a second battery, you need a battery-to-battery charger or a dedicated DC-DC charger. The load terminal simply is not built for that job.